Creative Woodworks & crafts 2004-09, страница 23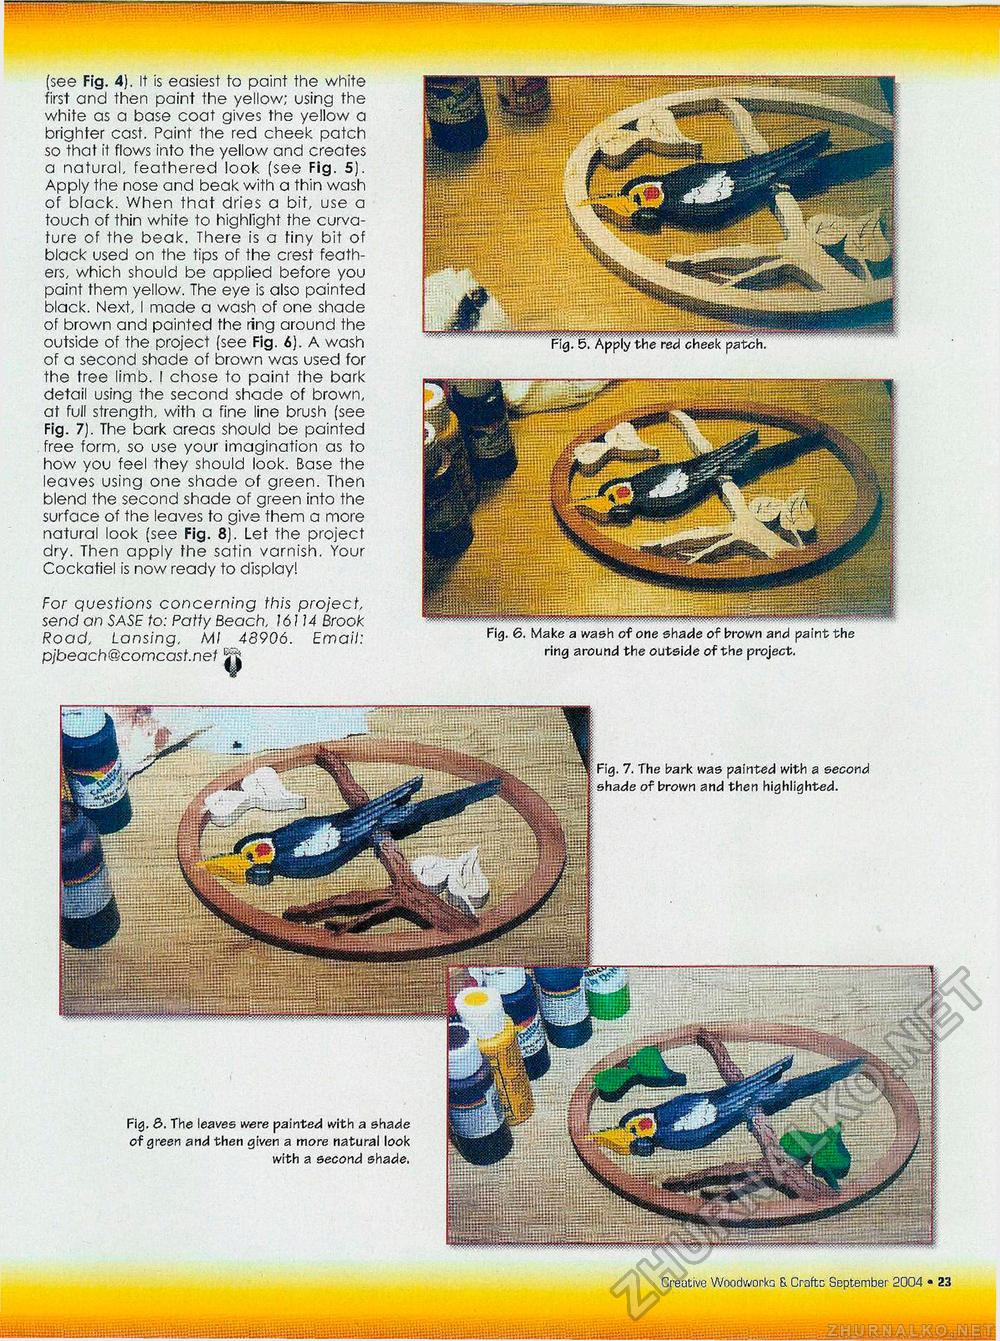
(see Fig. 4). It is easiest to paint the white first and then paint the yellow; using the white as a base coat gives the yellow a brighter cast. Paint the red cheek patch so that it flows into the yellow and creates a natural, feathered look (see Fig. 5). Apply the nose and beak with a thin wash of black. When that dries a bit, use a touch of thin white to highlight the curvature of the beak. There is a tiny bit of black used on the tips of the crest feathers, which should be applied before you paint them yellow. The eye is also painted black. Next, I made a wash of one shade of brown and painted the ring around the outside of the project (see Fig. 6). A wash of a second shade of brown was used for the tree limb. I chose to paint the bark detail using the second shade of brown, at full strength, with a fine line brush (see Fig. 7). The bark areas should be painted free form, so use your imagination as to how you feel they should look. Base the leaves using one shade of green. Then blend the second shade of green into the surface of the leaves to give them a more natural look (see Fig. 8). Let the project dry. Then apply the satin varnish. Your Cockatiel is now ready to display! For questions concerning this project, send on SASE to: Patty Beach, 16114 Brook Road, Lansing, Ml 48906. Email: pjbeach@comcast.net jjp Fig. 6. Make a wash of one shade of brown and paint the ring around the outside of the project. 7. The bark was painted with a second of brown and then highlighted. Fig. 0. The leaves were painted with a shade of green and then given a more natural look with a second shade. fit • Creative Woodworks S. Crafts September 2004 |


