Creative Woodworks & crafts 2004-11, страница 45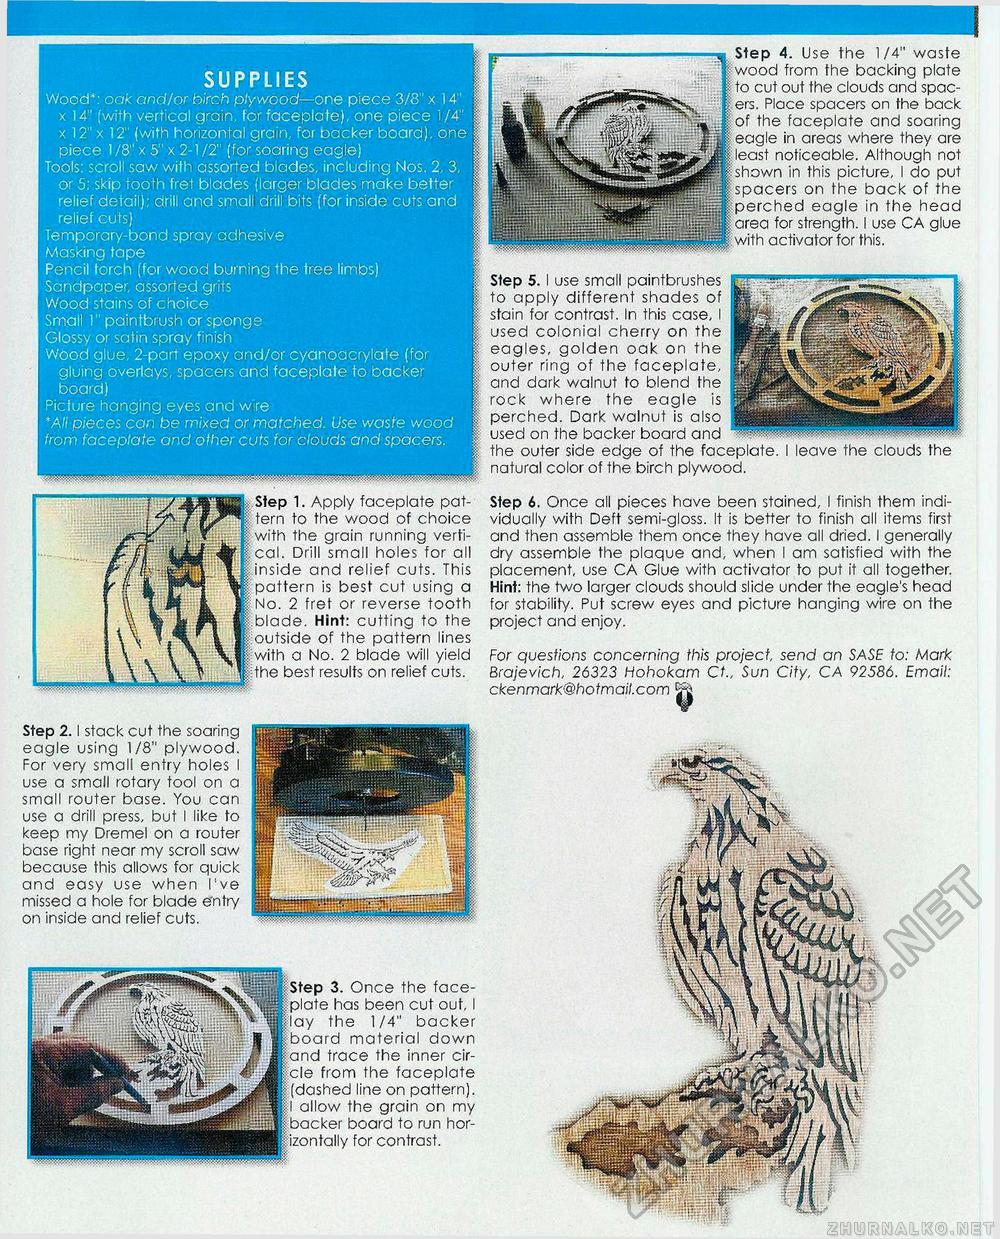
SUPPLIES Wood*: oak and/or birch plywood—one piece 3/8" x 14" x 14" [with vertical grain, for faceplate), one piece 1/4" x 12" x 12" (with horizontal grain, for backer board), one piece l/8"x5"x2-l/2" (for soaring eagle) Tools: scroll saw with assorted blades, including Nos. 2, 3, or 5: skip tooth fret blades (larger blades make better relief detail); drill and small drill bits (for inside cuts and relief cuts) Temporary-bond spray adhesive Masking tape Pencil torch [for wood burning the tree limbs) Sandpaper, assorted grits Wood stains of choice Small 1" paintbrush or sponge Glossy or satin spray finish Wood glue, 2-part epoxy and/or cyanoacrylate (for gluing overlays, spacers and faceplate to backer board) Picture hanging eyes and wire *AII pieces can be mixed or matched. Use waste wood from faceplate and other cuts for clouds and spacers. Step 4. Use the 1/4" waste from the backing plate cut out the clouds and spacers. Place spacers on the back the faceplate and soaring in areas where they are noticeable. Although not in this picture, I do put on the back of the eagle in the head for strength. I use CA glue activator for this. Step 5. I use small paintbrushes to apply different shades of stain for contrast. In this case, I used colonial cherry on the eagles, golden oak on the outer ring of the faceplate, and dark walnut to blend the rock where the eagle is perched. Dark walnut is also used on the backer board and the outer side edge of the faceplate. I leave the clouds the natural color of the birch plywood. 1. Apply faceplate pattern to the wood of choice the grain running vertical. Drill small holes for all inside and relief cuts. This n is best cut using a No. 2 fret or reverse tooth blade. Hint: cutting to the tside of the pattern lines a No. 2 blade will yield best results on relief cuts. Step 6. Once all pieces have been stained, I finish them individually with Deft semi-gloss. It is better to finish all items first and then assemble them once they have all dried. I generally dry assemble the plaque and, when I am satisfied with the placement, use CA Glue with activator to put it all together. Hint: the two larger clouds should slide under the eagle's head for stability. Put screw eyes and picture hanging wire on the project and enjoy. For questions concerning this project send an SASE to: Mark Brajevich, 26323 Hohokam Ct„ Sun City, CA 92586. Email: ckenmark@hotmail.com 5f& Step 2.1 stack cut the soaring eagle using 1/8" plywood. For very small entry holes I use a small rotary tool on a small router base. You can use a drill press, but I like to keep my Dremel on a router base right near my scroll saw because this allows for quick and easy use when I've missed a hole for blade e'ntry on inside and relief cuts. 3. Once the face-has been cut out, I the 1/4" backer 'd material down trace the inner cir-from the faceplate line on pattern), allow the grain on my board to run hor-for contrast. |


