Creative Woodworks & crafts 2004-11, страница 47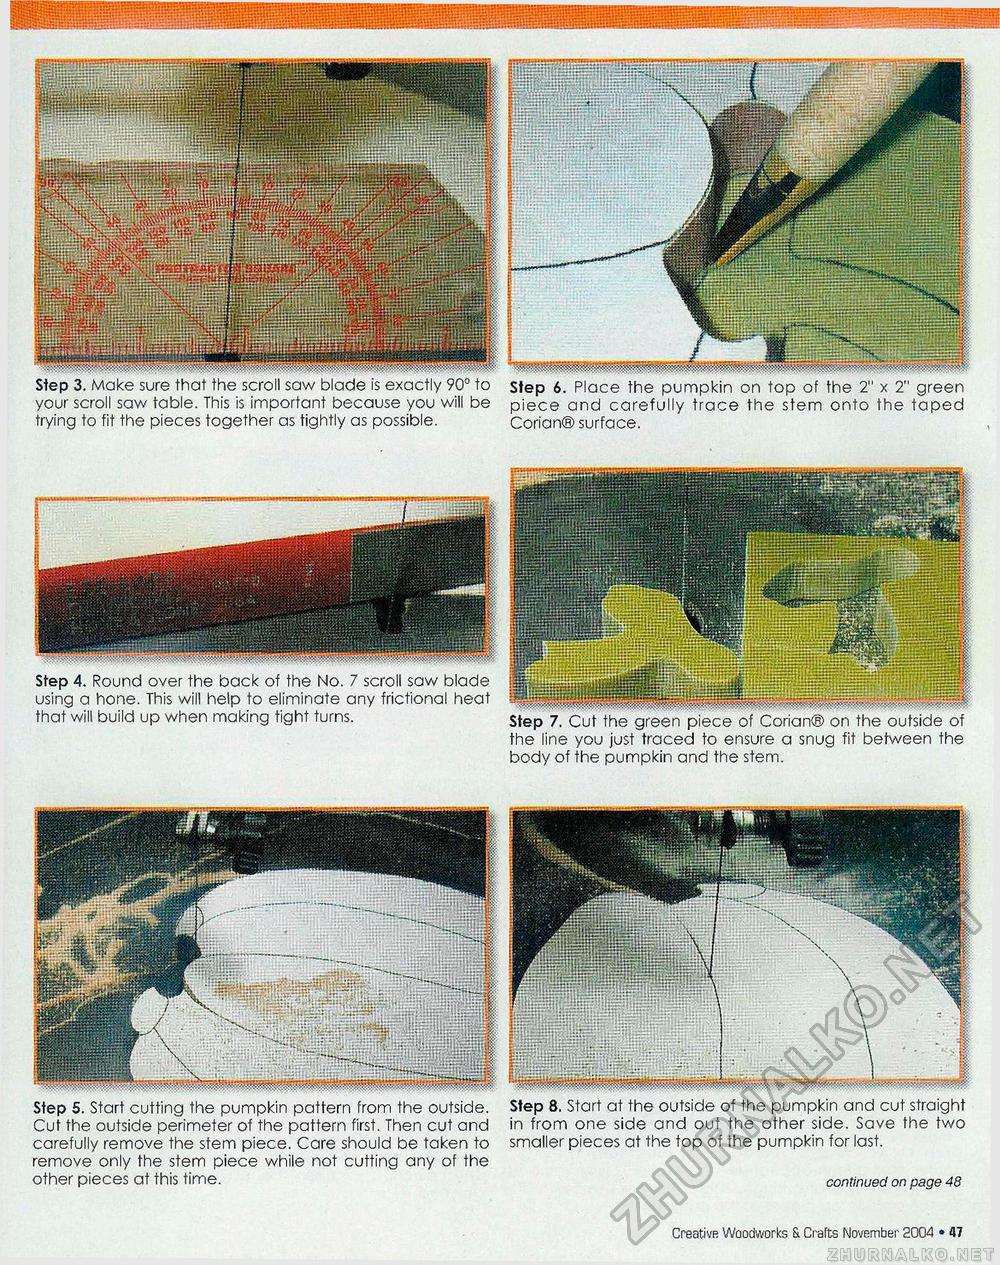
your scroll saw table. This is important because you will be trying to fit the pieces together as tightly as possible. Step 6. Place the pumpkin on top of the 2" x 2" green piece and carefully trace the stem onto the taped Corian® surface. Step 4. Round over the back of the No. 7 scroll saw blade using a hone. This will help to eliminate any frictional heat that will build up when making tight turns. the line you just traced to ensure a snug fit between the body of the pumpkin and the stem. Step 5. Start cutting the pumpkin pattern from the outside. Cut the outside perimeter of the pattern first. Then cut and carefully remove the stem piece. Care should be taken to remove only the stem piece while not cutting any of the other pieces at this time. Step 8, Start at the outside of the pumpkin and cut straight in from one side and out the other side. Save the two smaller pieces at the top of the pumpkin for last. continued on page 48 Creative Woodworks St Crafts November 2004 • 17 |


