Creative Woodworks & crafts 2004-11, страница 67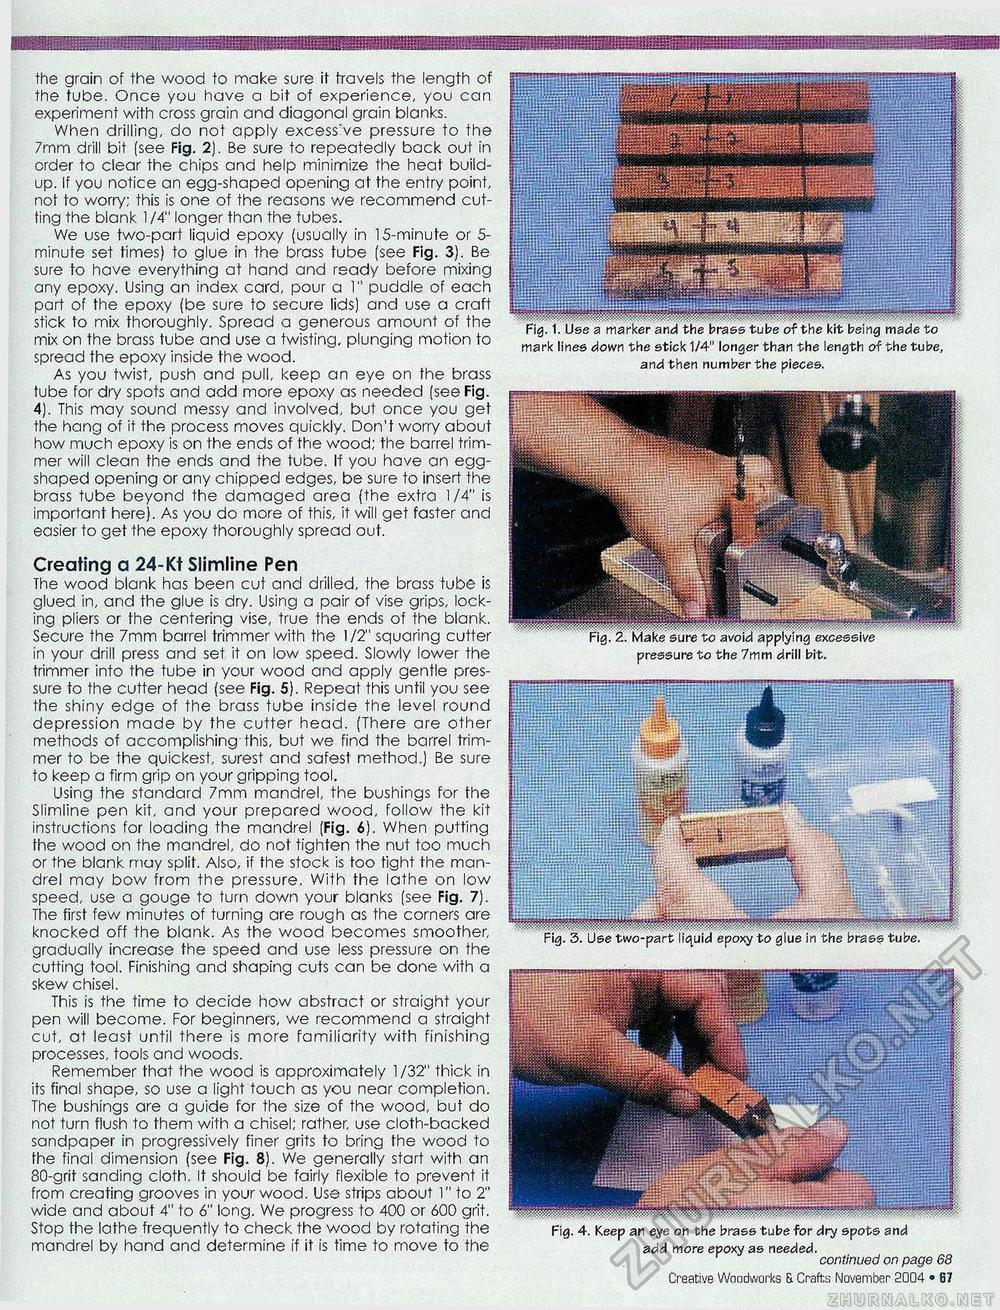
the grain of the wood to make sure it travels the length of the tube. Once you have a bit of experience, you can experiment with cross grain and diagonal grain blanks. When drilling, do not apply excess've pressure to the 7mm drill bit (see Fig. 2). Be sure to repeatedly back out in order to clear the chips and help minimize the heat buildup. If you notice an egg-shaped opening at the entry point, not to worry; this is one of the reasons we recommend cutting the blank 1 /4" longer than the tubes. We use two-part liquid epoxy (usually in 15-minute or 5-minute set times) to glue in the brass tube (see Fig. 3). Be sure to have everything at hand and ready before mixing any epoxy. Using an index card, pour a 1" puddle of each part of the epoxy (be sure to secure lids) and use a craft stick to mix thoroughly. Spread a generous amount of the mix on the brass tube and use a twisting, plunging motion to spread the epoxy inside the wood. As you twist, push and pull, keep an eye on the brass tube for dry spots and add more epoxy as needed (see Fig. 4). This may sound messy and involved, but once you get the hang of it the process moves quickly. Don't worry about how much epoxy is on the ends of the wood; the barrel trimmer will clean the ends and the tube. If you have an egg-shaped opening or any chipped edges, be sure to insert the brass tube beyond the damaged area (the extra 1/4" is important here). As you do more of this, it will get faster and easier to get the epoxy thoroughly spread out. Creating a 24-Kt Slimline Pen The wood blank has been cut and drilled, the brass tube is glued in, and the glue is dry. Using a pair of vise grips, locking pliers or the centering vise, true the ends of the blank. Secure the 7mm barrel trimmer with the 1/2" squaring cutter in your drill press and set it on low speed. Slowly lower the trimmer into the tube in your wood and apply gentle pressure to the cutter head (see Fig. 5). Repeat this until you see the shiny edge of the brass tube inside the level round depression made by the cutter head. (There are other methods of accomplishing-this, but we find the barrel trimmer to be the quickest, surest and safest method.) Be sure to keep a firm grip on your gripping tool. Using the standard 7mm mandrel, the bushings for the Slimline pen kit, and your prepared wood, follow the kit instructions for loading the mandrel (Fig. 6). When putting the wood on the mandrel, do not tighten the nut too much or the blank may split. Also, if the stock is too tight the mandrel may bow from the pressure. With the lathe on low speed, use a gouge to turn down your blanks (see Fig. 7). The first few minutes of turning are rough as the corners are knocked off the blank. As the wood becomes smoother, gradually increase the speed and use less pressure on the cutting tool. Finishing and shaping cuts can be done with a skew chisel. This is the time to decide how abstract or straight your pen will become. For beginners, we recommend a straight cut, at least until there is more familiarity with finishing processes, tools and woods. Remember that the wood is approximately 1/32" thick in its final shape, so use a light touch as you near completion. The bushings are a guide for the size of the wood, but do not turn flush to them with a chisel; rather, use cloth-backed sandpaper in progressively finer grits to bring the wood to the final dimension (see Fig. 8). We generally start with an 80-grit sanding cloth. It should be fairly flexible to prevent it from creating grooves in your wood. Use strips about 1" to 2" wide and about 4" to 6" long. We progress to 400 or 600 grit. Stop the lathe frequently to check the wood by rotating the mandrel by hand and determine if it is time to move to the mark lines down the stick 1/4" longer than the length of the tube, and then number the pieces. pressure to the 7mm drill bit. Fig. 4. Keep an eye on the brass tube for dry spots and add more epoxy as needed. continued on page 68 Creative Woodworks & Cr afts November 2004 • 67 |


