Creative Woodworks & crafts 2005-01, страница 75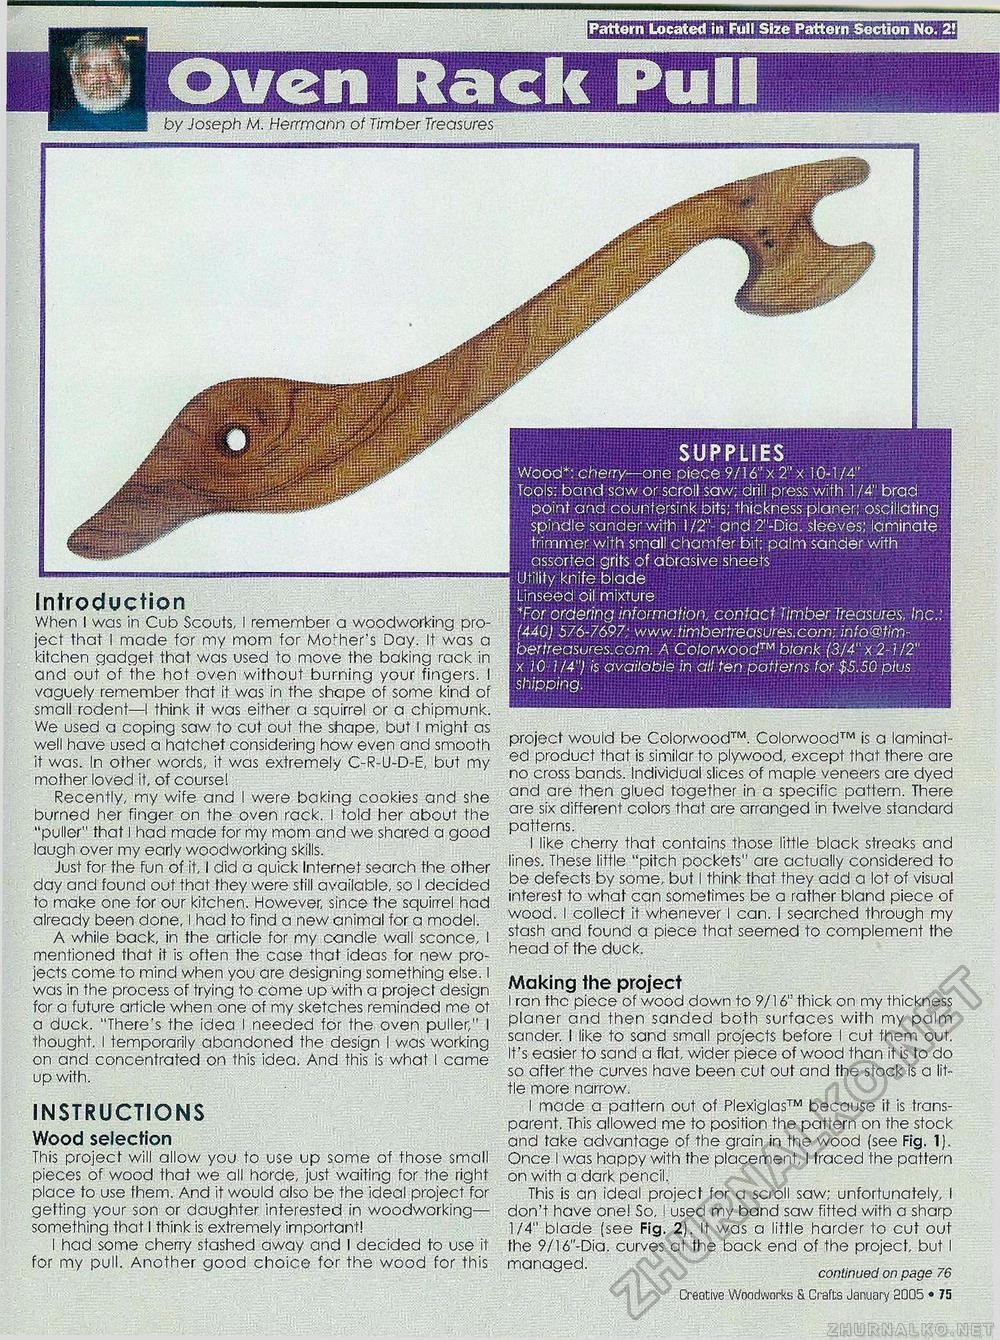
by Joseph M. Herrmann of Timber Treasures Pattern Located in Full Size Pattern Section No. 2! Introduction When I was in Cub Scouts, I remember a woodworking project that I made for my mom for Mother's Day. It was a kitchen gadget that was used to move the baking rack in and out of the hot oven without burning your fingers. I vaguely remember that it was in the shape of some kind of small rodent—I think it was either a squirrel or a chipmunk. We used a coping saw to cut out the shape, but I might as well have used a hatchet considering how even and smooth it was. In other words, it was extremely C-R-U-D-E, but my mother loved it, of course! Recently, my wife and I were baking cookies and she burned her finger on the oven rack. I told her about the "puller" that I had made for my mom and we shared a good laugh over my early woodworking skills. Just for the fun of it, I did a quick Internet search the other day and found out that they were still available, so I decided to make one for our kitchen. However, since the squirrel had already been done, I had to find a new animal for a model. A while back, in the article for my candle wall sconce, I mentioned that it is often the case that ideas for new projects come to mind when you are designing something else. I was in the process of trying to come up with a project design for a future article when one of my sketches reminded me ot a duck. "There's the idea I needed for the oven puller," I thought. I temporarily abandoned the design I was working on and concentrated on this idea. And this is what I came up with. INSTRUCTIONS Wood selection This project will allow you to use up some of those small pieces of wood that we all horde, just waiting for the right place to use them. And it would also be the ideal project for getting your son or daughter interested in woodworking— something that I think is extremely important! I had some cherry stashed away and I decided to use it for my pull. Another good choice for the wood for this SUPPLIES Wood*: cherry—one piece 9/!6"x2"x 10-1/4" Tools: band saw or scroll saw; drill press with 1 /4" brad point and countersink bits; thickness planer; oscillating spindle sander with 1/2"- and 2"-Dia. sleeves; laminate trimmer with small chamfer bit; palm sander with assorted grits of abrasive sheets Utility knife blade Linseed oil mixture Tor ordering information, contact Timber Treasures, Inc.: (440) 576-7697; www.timbertreasures.com; info@tim-bertreasures.com. A Colorwood™ blank (3/4" x 2-1/2" x 10 1/4") is available in all ten patterns for $5.50 plus shipping. project would be Colorwood™. Colorwood™ is a laminated product that is similar to plywood, except that there are no cross bands. Individual slices of maple veneers are dyed and are then glued together in a specific pattern. There are six different colors that are arranged in twelve standard patterns. I like cherry that contains those little black streaks and lines. These little "pitch pockets" are actually considered to be defects by some, but I think that they add a lot of visual interest to what can sometimes be a rather bland piece of wood. I collect it whenever I can. I searched through my stash and found a piece that seemed to complement the head of fhe duck. Making the project I ran the piece of wood down to 9/16" thick on my thickness planer and then sanded both surfaces with my palm sander. I like to sand small projects before I cut them out. It's easier to sand a flat, wider piece of wood than it is to do so after the curves have been cut out and the stock is a little more narrow. I made a pattern out of Plexiglas™ because it is transparent. This allowed me to position the pattern on the stock and take advantage of the grain in the wood (see Fig. 1). Once I was happy with the placement, I traced the pattern on with a dark pencil.. This is an ideal project for a scroll saw; unfortunately, I don't have one! So, I used my band saw fitted with a sharp 1/4" blade (see Fig. 2], It was a little harder to cut out Ihe 9/16"-Dia. curves at the back end of the project, but I managed. continued on page 76 Creative Woodworks & Crafts January 2005 • 75 |


