Creative Woodworks & crafts 2005-03, страница 49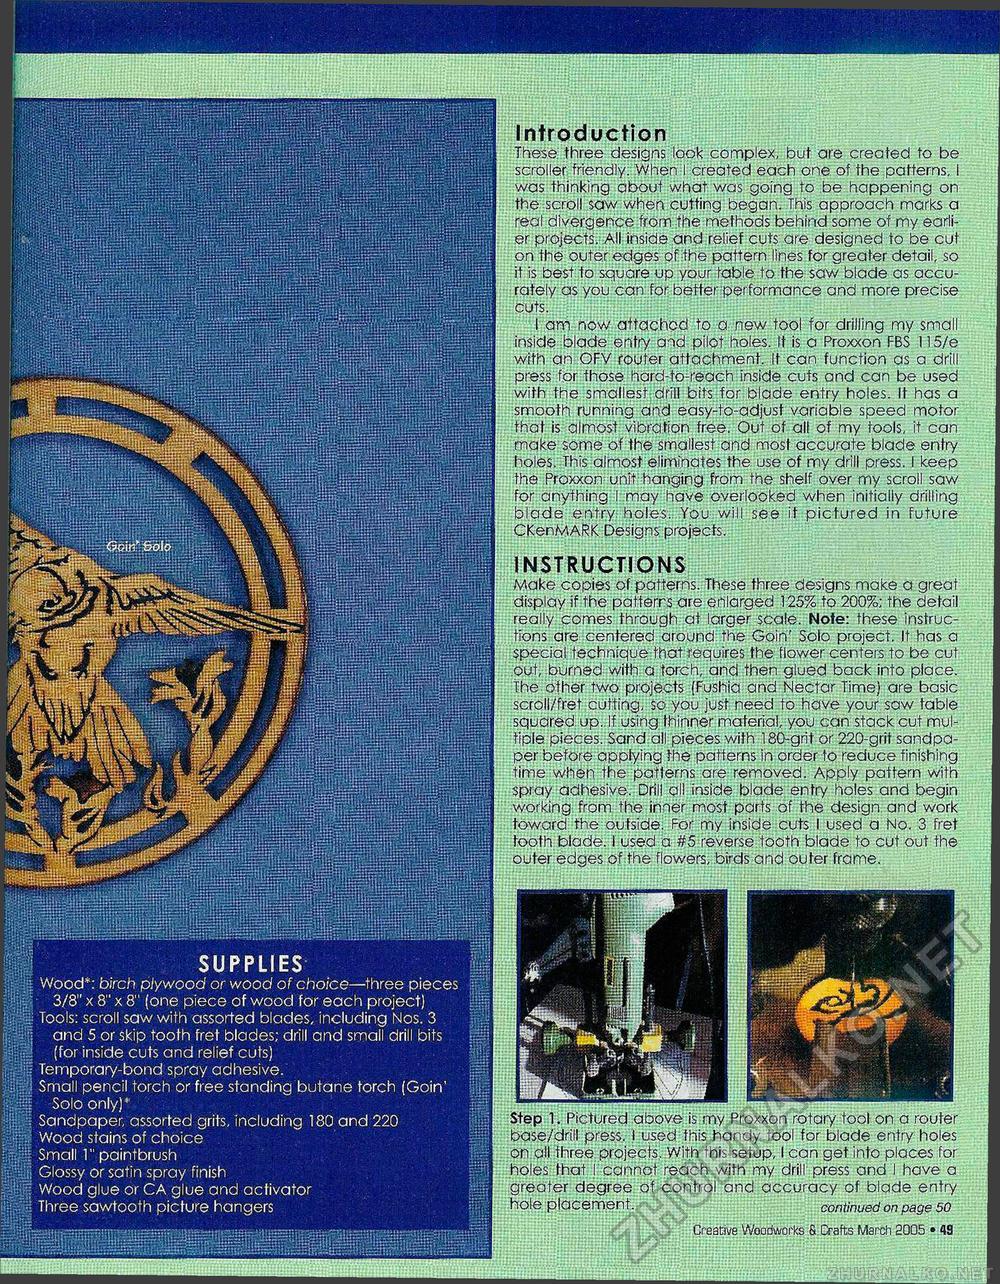
ISiil SBl SUPPLIES Wood*: birch plywood or wood of choice—three pieces 3/8" x 8" x 8" (one piece of wood for each project) Tools: scroll saw with assorted blades, including Nos. 3 and 5 or skip tooth fret blades; drill and small drill bits (for inside cuts and relief cuts) Temporary-bond spray adhesive. Small pencil torch or free standing butane torch (Goin' Solo only)* Sandpaper, assorted grits, including 180 and 220 Wood stains of choice Small 1" paintbrush Glossy or satin spray finish Wood glue or CA glue and activator Three sawtooth picture hangers Introduction These, three designs look complex, but are created to be scroller friendly; When I created each one of the patterns, I was thinking about what was going to be happening on the scroll saw when cutting began. This approach marks a real divergence from the methods behind some of my earlier projects. All inside and relief cuts are designed to be cut on the outer edges of the pattern lines for greater detail, so it is best to square up your table to the saw blade as accurately as you can for better performance and more precise cuts. I am now attached to a new tool for drilling my small inside blade entry and pilot holes. It is a Proxxon FBS 115/e with an OFV router attachment. It can function as a drill press for those hard-to-reach inside cuts and can be used with the smallest drill bits for blade entry holes. It has a smooth running and easy-to-adjust variable speed motor that is almost vibration free. Out of all of my tools, it can make some of the smallest and most accurate blade entry holes. This almost eliminates the use of my drill press. I keep the Proxxon unit hanging from the shelf over my scroll saw for anything I may have overlooked when initially drilling blade entry holes. You will see if pictured in future CKenMARK Designs projects. INSTRUCTIONS Make copies of patterns. These three designs make a great display if the patterns are enlarged 125% to 200%; the detail really comes through at larger scale. Note: these instructions are centered around the Goin' Solo project. It has a special technique that requires the flower centers to be cut out, burned with a torch, and then glued back into place. The other two projects (Fushia and Nectar Time) are basic scroll/fret cutting, so you just need to have your saw table squared, up.. If using thinner material, you can stack cut multiple pieces. Sand all pieces with 180-grit or 220-grit sandpaper before applying the patterns in order to reduce finishing time when, the patterns are removed. Apply pattern with spray adhesive, Drill all inside blade entry holes and begin working from the inner most parts of the design and work toward the outside. For my inside cuts I used a No. 3 fret tooth blade. I used a #5 reverse tooth blade to cut out the outer edges of the flowers, birds and outer frame. Step 1. Pictured above is my Proxxon rotary tool on a router base/drill press. I used this handy tool for blade entry holes on ail three projects. With this setup, I can get into places for holes that I cannot reach with my drill press and I have a greater degree of control and accuracy of blade entry hole placement. continued on page 50 Creative Woodworks S Crafts March 2005 • 48 |


