Creative Woodworks & crafts 2005-03, страница 8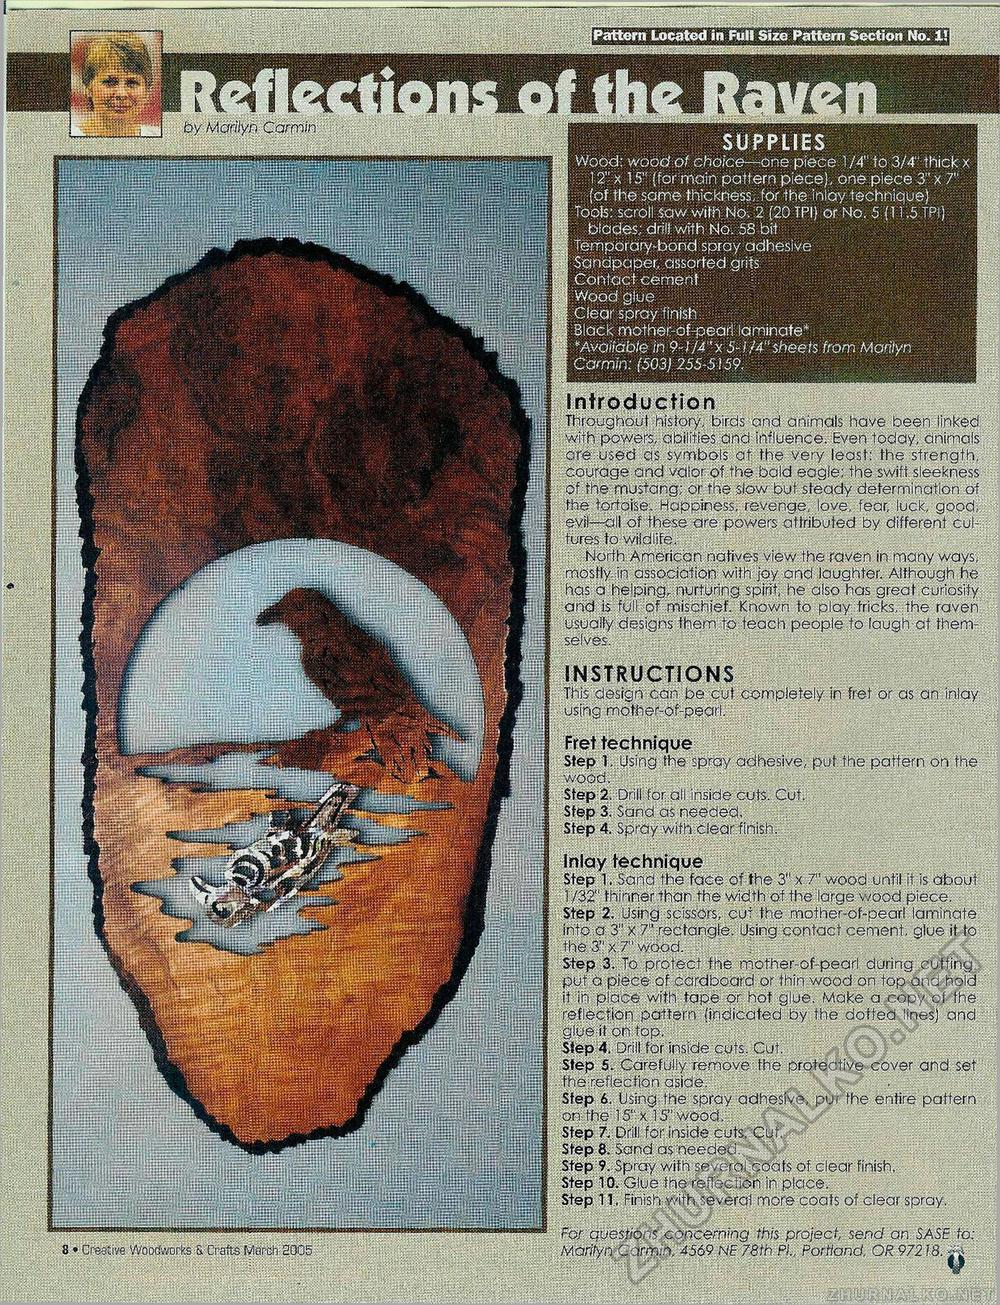
pattern Located in Full Size Pattern Section No. 1!| SUPPLIES Wood: wood of choice—one piece 1/4" to 3/4" thick x •:. 12" x 15" (for main pattern piece), one piece 3" x 7" (of the same thickness, for the inlay technique) Tools: scroll saw with No. 2 (20 TPI) or No. 5 (11.5 TPl) blades; drill with No. 58 bit Temporary'bond spray adhesive Sandpaper/ assorted grits Contact cement:! Wood glue Clear spray finish . Black mother of peari laminate* *Available in 9-Wx 5-1/4"sheets from Marilyn Carmin: (503) 255-5159, by Marilyn Carmin Introduction Throughout history, birds and animals have been linked with powers, abilities and influence. Even today, animals are used as symbols at the very least: the strength, courage and valor of the bald eagle: the swift sleekness of the mustang; or the slow but steady determination of the tortoise. Happiness, revenge, love, fear, luck, good., evil—all of these are powers attributed by different cultures to wildlife. . North American natives view the raven in many ways, mostly, in association with joy and laughter. Although he has a helping, nurturing spirit, he also has great curiosity and is full of mischief. Known to play tricks, the raven usually designs them to teach people to laugh at themselves. INSTRUCTIONS This design can be cut completely in fret or as an inlay using 'mother-of-pearl. Fret technique Step 1. Using the spray adhesive, put the pattern on the wood. Step 2. Drill for all inside cuts. Cut. Step 3. Sand as needed. Step 4. Spray with clear.finish. inlay technique Step 1. Sand the face of the 3" x 7" wood until it is about 1/32" thinner than the width of the large wood piece. Step 2. Using scissors, cut the mother-of-pearl laminate into a 3" x 7" rectangle. Using contact cement, glue it to the 3" x;7" wdod. ."■ Step 3. To protect the mother-of-pearl during cutting, put a piece of cardboard or thin wood on top and hold it in place with tape or hot glue. Make a copy of the .reflection pattern (indicated by the dotted lines) and glue it on fop. Step 4. Drill for inside cuts. Cut. Step 5. Carefully remove the protective cover and set the;reflecfion aside. Step 6. Using the spray adhesive, put the entire pattern on the 15"x 15" wood. Step -7. Drill for inside cuts. Cut. Step 8. Sand as needed. Step 9. Spray with several.coats of clear Finish. Step 10. Glue the reflection in place. Step 11, Finish with several more coats of clear spray. For questions concerning this project, send an SAS£ to: Marityn Carmin, 4569 NE 78th PL, Portland, OR 97218. fjt 8 • Creative Woodworks S. Crafts Moreh 2005 |


