Creative Woodworks & crafts 2005-04, страница 30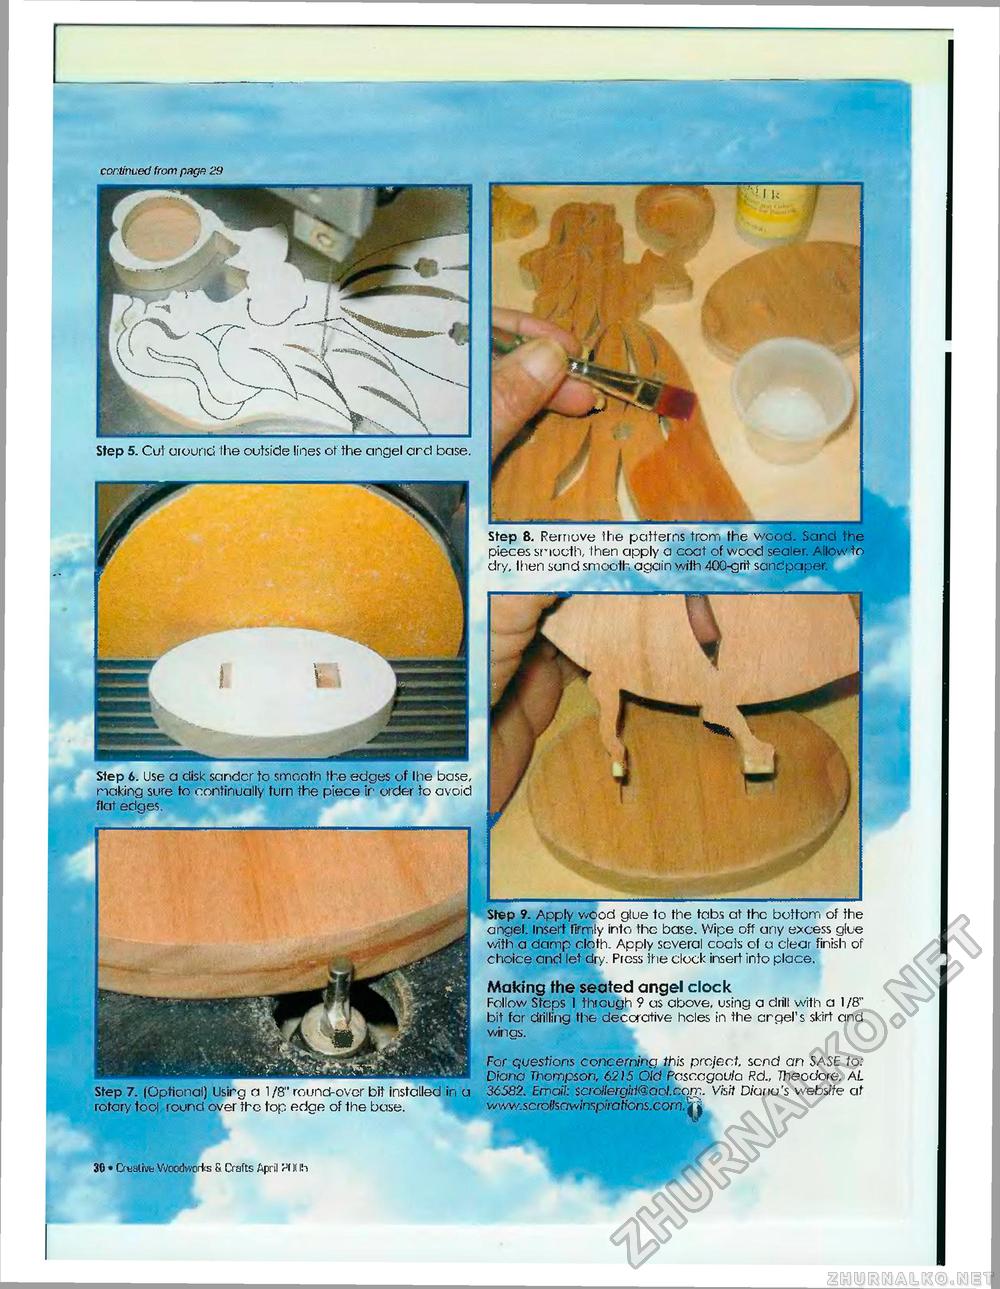
continued from page; 29 Step 7. [Optional) Usirg a 1 /8" round-over bit installed in a rotary tool round over the lop edge of the buse. Step 9. Apply wood glue to the tabs at the bottom of the angel. Insert firmly into the base. Wipe off any excess glue with a damp cloth. Apply several cools ot a clear finish of choice and let dry. Press the clock insert into place, Making the seated angel clock Follow Steps 1 through 9 as above, using a drill with a 1/8" bit for drilling the decorative holes in the crgel's skirt and wings. For questions concerning this project, send an SASE to: Diana Thompson, 62)5 Old Posc.ogou/a Rd„ Theodore, AL 36582. Email: saollergii1@aol.com. Visit Diana's website at www.scroflsawjn.sp/rahons.eom. ji Step 5. Cut around Ihe outside lines of the angei ard base. Step 6. Use a disk sander to smooth the edges of Ihe base, making sure to continually turn the piece ir order to avoid flat edges. Step 8. Remove the patterns from the wood. Sand the pieces smooth, then apply a coot of wood sealer. Allow to dry, ihen sund smooth again with 400-grit sandpaper. 30 • Cfualivfc Woodworks 5 Crafts fipril "X It Ih |


