Creative Woodworks & crafts 2005-04, страница 29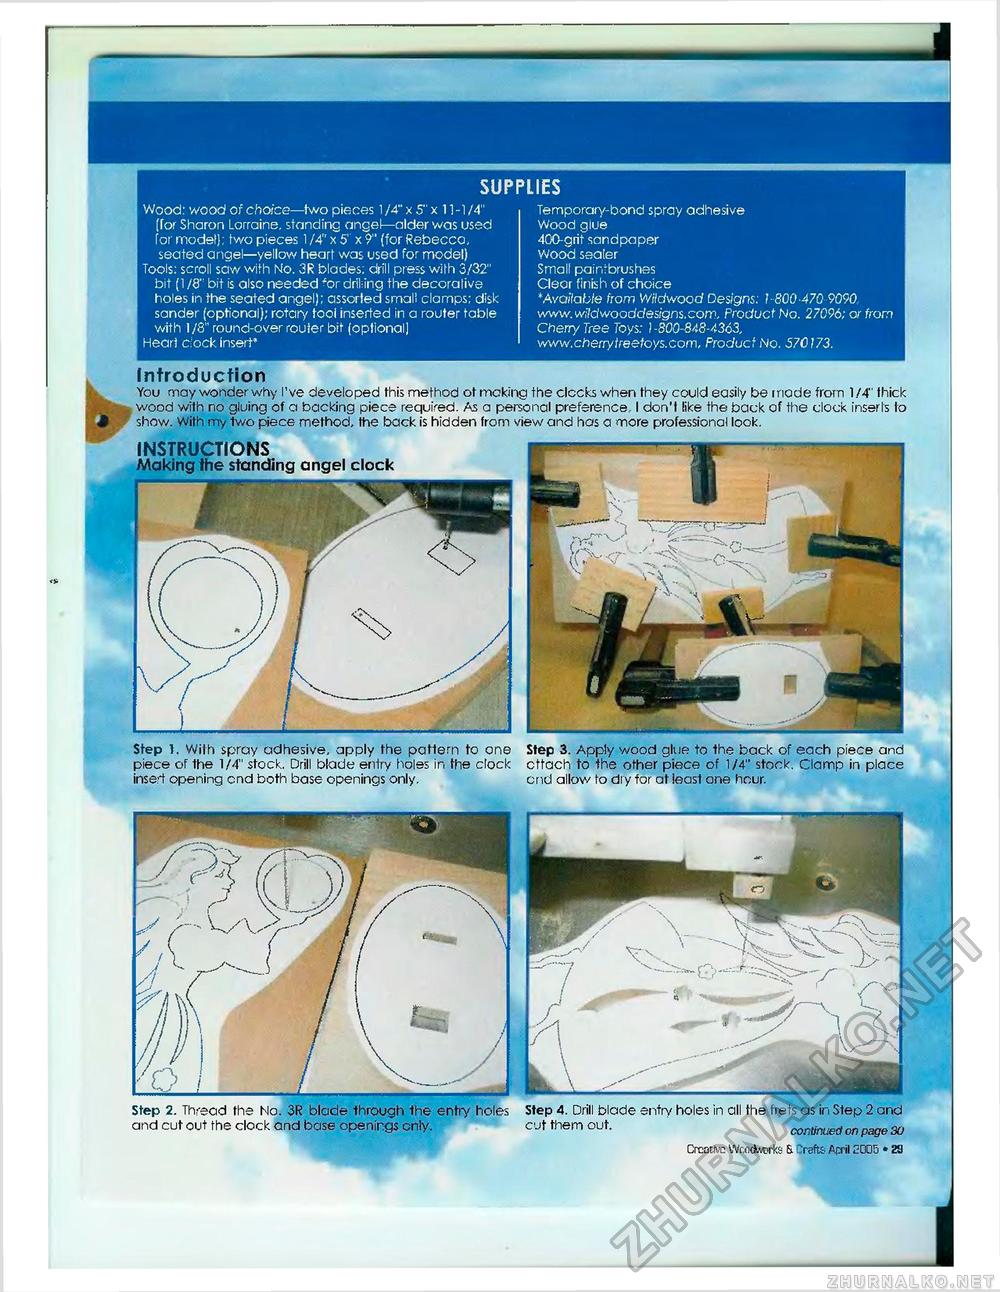
SUPPLIES Wood: wood of choice—two pieces 1 /4" x 5" x 11 -1 /4" (for Sharon Lorraine, standing angel—alder was used for model): two pieces 1 /4" x 5' x 9" (for Rebecca, seated angel—yellow heart was used for model) Tools: scroll saw with No. 3R blades: drill press with 3/32" bit (1 /8" bit is olso needed - or drying the decorative holes in the seated angel): assorted small clamps: disk sander (optional); rotary tooi inserted in a router table with 1/8" round-over router bit (optional) Heart dock insert* Temporary-bond spray adhesive Wood giue 400-grit sandpaper Wood sealer Small paintbrushes Cleor finish of choice 'Available from Wildwood Designs: 1800-470 9090 www.wildwooddesigns.com. Product No. 27096; or from Cherry Tree Toys: 1-300-848-4363, www.cherrytreetoys.com. Product No. 570173. Introduction You may wonder why I've developed this method ot making the clocks when they could easily be mode from 1/4" thick wood with no gluing of a backing piece required. As a personal preference I don't like the back of the clock inserts to show. With my two piece method, the back is hidden from view and has a more professional look. INSTRUCTIONS Making ihe standing angel clock Step h With spray adhesive, apply the pattern to one piece of the 1/4" stock. Drill blade entry holes in the clock insert opening end both base openings only. Step 3. Apply wood glue to the back of each piece and cttach to the other piece of 1/4" stock. Clamp in place end allow to dry for at least one hour. Step 2. Thread the Mo. 3R blade through the entry holes Step 4. Drill blade entry holes in all the frets as in Step 2 and and cut out the clock and base openings only. cut them out. continued on page 30 Creative Woodworks & Crefts April 2005 • 29 |


