Creative Woodworks & crafts 2005-04, страница 26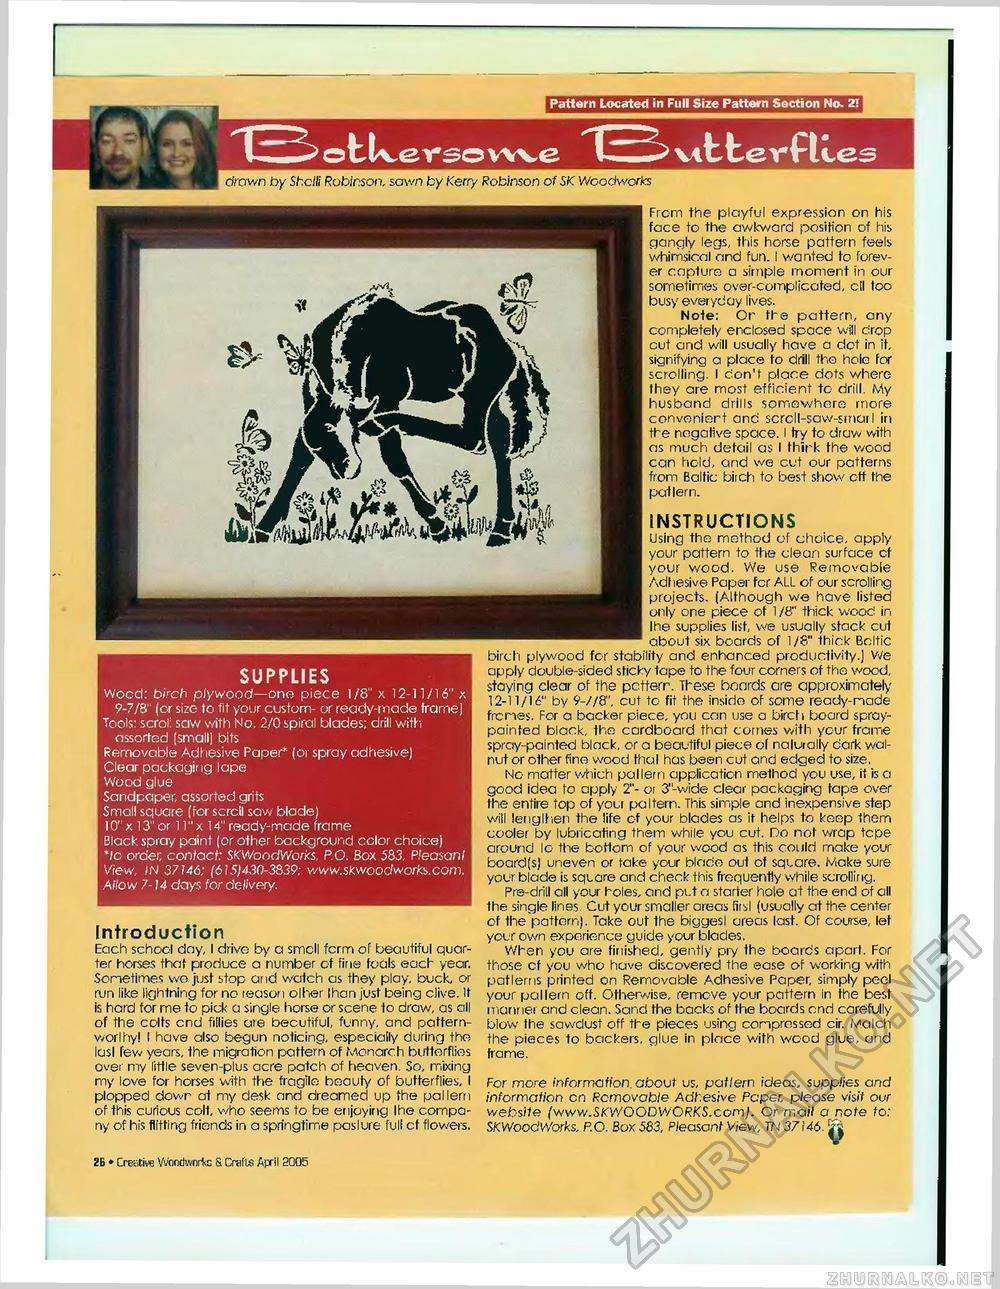
Pattern Located in Full Size Pattern Section No. 21 drawn by Shclli Robinson, sown by Kerry Robinson of SK Woodworks SUPPLIES Wood: birch ply wood—one piece 1/8" x 12-11/16" x 9-7/8" (or size to fit your custom- or ready-made frame) Tools: scroll saw with No. 2/0 spiral blades; drill with assorted (small] bits Removable Adhesive Paper* (or spray adhesive) Clear packaging lape Wood glue Sandpaper, assorted grits Small square (for scrcil saw blade) 10" x 13" or 11" x 14" ready-made frame Black spray paint (or other background color choice) *lc order, contact: SKWoodWorks, P.O. Box 583, Pleasant View, IN 37146: (6i5)4:50-3839; vww.skwoodworks.com. Allow 7-14 days for delivery. Introduction Each school day, I drive by a smell fcrm of beautiful quarter horses that produce a number cf fine foals each year, Sometimes wo just stop and walch as they play, buck, or run like lightning for no reason olher lhan just being olive. It is hard for me lo pick a single horse or scene lo draw, as all of the colts end fillies ate becufiful, funny, and pattern-worlhy! I have also begun noticing, especially during the lasl few years, the migration pattern of Monarch butterflies over my little seven-plus acre patch of heaven. So, mixing my love for horses with the fragile beauty of butterflies, I plopped dowr at my desk and dreamed up the pallem of this curious colt, who seems to be enjoying Ihe company of his flitting friends in a springtime paslure full cf flowers, From the playful expression on his face to the awkward position of his gangly legs, this horse pattern feels whimsical and fun. I wanted to forever capture a simple moment in our sometimes over-complicated, ell too busy everyday lives. Note: Or the pattern, any completely enclosed space will drop cut and will usually have a dot in it. signifying a place fo drill the hole for scrolling. I don't place dots where they are most efficient to drill. My husband drills somewhere more conveniert and scrcll-saw-srnail in the negative space. I try to draw with as much detail as I thirk the wood can field, and we cut our patterns from Baltic biich to best show off the patlern. INSTRUCTIONS Using the method of choice, apply your pattern to the clean surface cf your wood. We use Removable Adl iesive Paper for ALL of our scrolling projects. (Although we have listed only one piece of 1 /8" thick wood in Ihe supplies list, we usually stack cut about six boards of 1/8" thick Baltic birch plywood for stability and enhanced productivity.) We apply double-sided sticky tape to the four corners of the wood, staying clear of the pctterr. These boards are approximately 12-11/16" by 9-//8", cut to fit the inside of some ready-made frcries. For a backer piece, you can use a birch board spray-painted black, the cardboard that comes with your frame spray-painted black, or a beautiful piece ol nalurally dark walnut or other fine wood thai has been cut and edged to size. No matter which pa 11 em application method you use, it is a good idea fo apply 2"- oi 3"-wide clear packaging tape over the entire top of your paltern. This simple and inexpensive step will lenglhen the life cf your blades as it helps to keep them cooler by lubricating them while you cut. Do not wrap tcpe around lo the bottom of your wood as this could make your board(s) uneven or take your blade out of square. Make sure your blade is square and check this frequently while scrolling. Pre-drill all your holes, and put a starter hole at the end of all the single lines. Cut your smaller areas firsl (usually at the center of 1he pattern). Take out the biggesl areas last. Of course, let your own experience guide your blades. When you are finished, gently pry the boards apart. For those cf you who have discovered the ease of working with patlerris printed on Removable Adhesive Paper, simply peel your pallern off. Otherwise, remove your pattern in the best manner and clean. Sand the backs of the boards ond carefully blow the sawdust off the pieces using compressed cir. M.alch the pieces to backers, glue in place with wood glue, and frame. For more information, about us, pat/ern ideas, supplies and information on Removable Adhesive Paper, please visit our website (www.SKWOODWORKS.com}. Or maif a note to: SKWoodWorks. P.O. Box 583, Pleasant View, TN 37146. V ZB • Creative Wnndwnrta 8 Crafts April 2005 |


