Creative Woodworks & crafts 2005-06, страница 22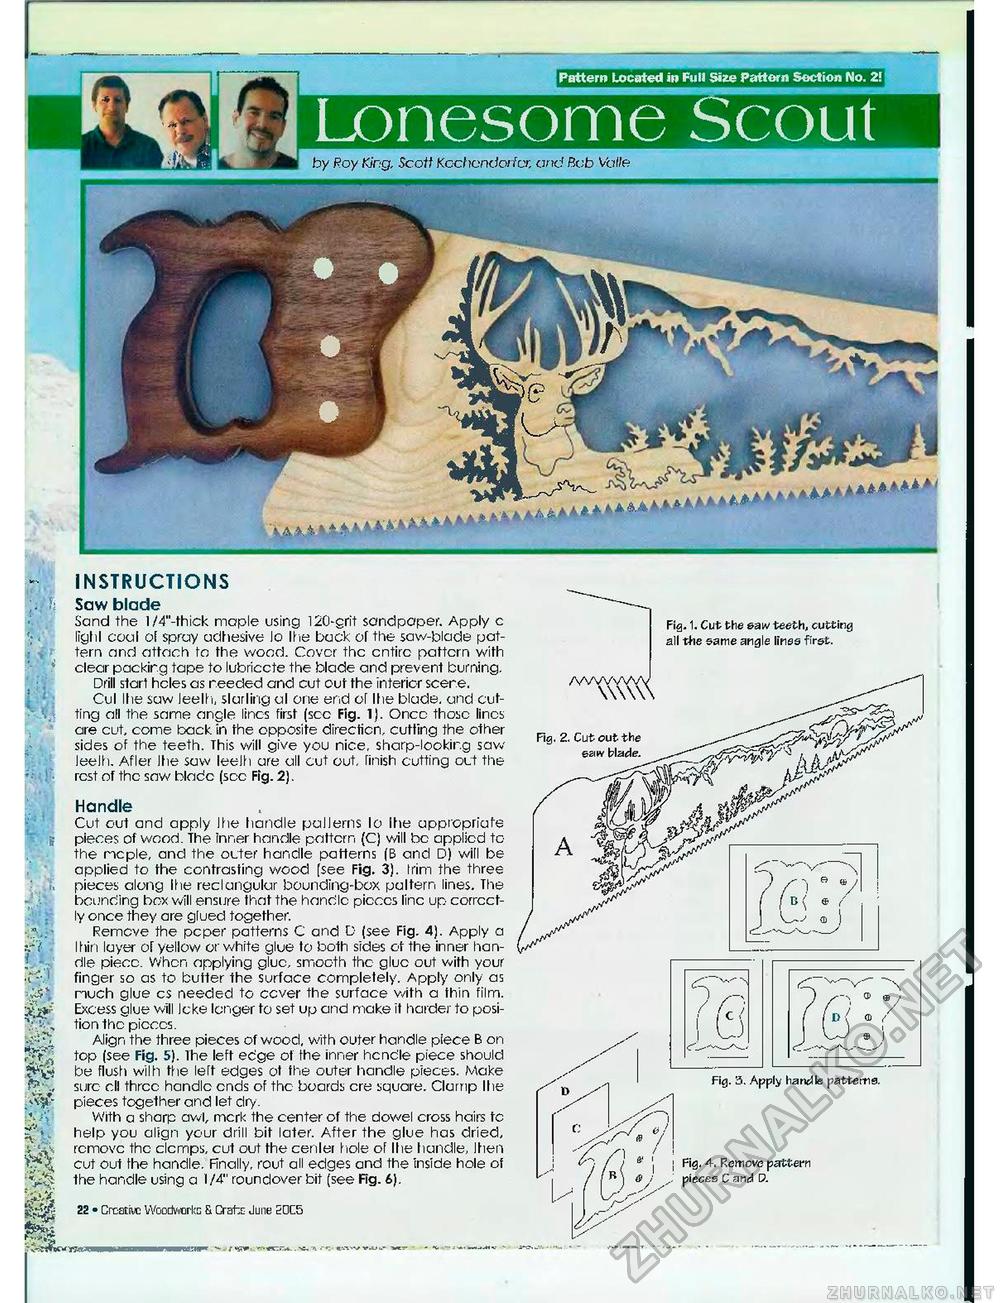
i Pattern Located in Full Size Pattern Section No. 2! I Lonesome Scout) r\e v X&j INSTRUCTIONS Saw blade Sand the l/4"-thick rnaple using 120-grit sandpaper. Apply c liglil coal oE spray adhesive lo ihe back of the saw-blade pattern and attach tc the wood. Cover the entire pattern with clear packing tape to lubriccte the blade and prevent burning. Drill start holes as needed and cut out the interior scene. Cul Ihe saw leelh, slarling al one end al Ihe blade, and cutting all the same angle lines first (see Fig. 1). Once those lines are cut. come back in the opposite direction, cutting the other sides of the teeth. This will give you nice, sharp-lookir.g saw leelh. After Ihe saw leelh are all cut out, finish cutting out the rest of the saw blade (see Fig. 2). Handle Cut out and apply Ihe handle pallerns lo Ihe appropriate pieces of wood. The inner handle pattern (Cj will be applied to the ncple, and the outer handle patterns (B and D) will be applied to the contrasting wood [see Fig. 3). Irim the three pieces along Ihe reel angular bounding-box paltern lines. The bounding box will ensure that the handle pieces line up correctly once they are glued together. Remove the peper patterns C and D (see Fig. 4). Apply a Itiin layer of yellow or white glue to both sides ot the inner handle piece. When applying glue, smooth the glue out with your finger so as to butter the surface completely. Apply only as much glue cs needed to cover the surface with a thin film. Excess glue will lake longer to set up and make it harder to position the pieces. Align the three pieces of wood, with outer handle piece B on top (see Fig. 5). The left edge of the inner hcndle piece should be flush wilh the left edges ot the outer handle pieces. Make sure ell three handle ends of the boards ere square. Clamp Ihe pieces together and let dry . With a sharp awl, mcrk the center of the dowel cross hairs tc help you align your drill bit later. After the glue has dried, remove the clomps, cut out the cenler hole of Ihe handle, Ihen cut out the handle. Finally, rout all edges and the inside hole ot the handle using a 1/4" roundover bit (see Fig. 6). 22 • Creative Woodworks & Crate June 50C5 iil) ! S 1 -r-. CVs Fig. 3. Apply handle patterns. Fig, 4. Remove pattern pieces C and D. Fig. 1. Cut the saw teeth, cutting all the same angle lines first. AWMM^ ' ft > Fig. 2, Cut cut the saw blade. |


