Creative Woodworks & crafts 2005-06, страница 23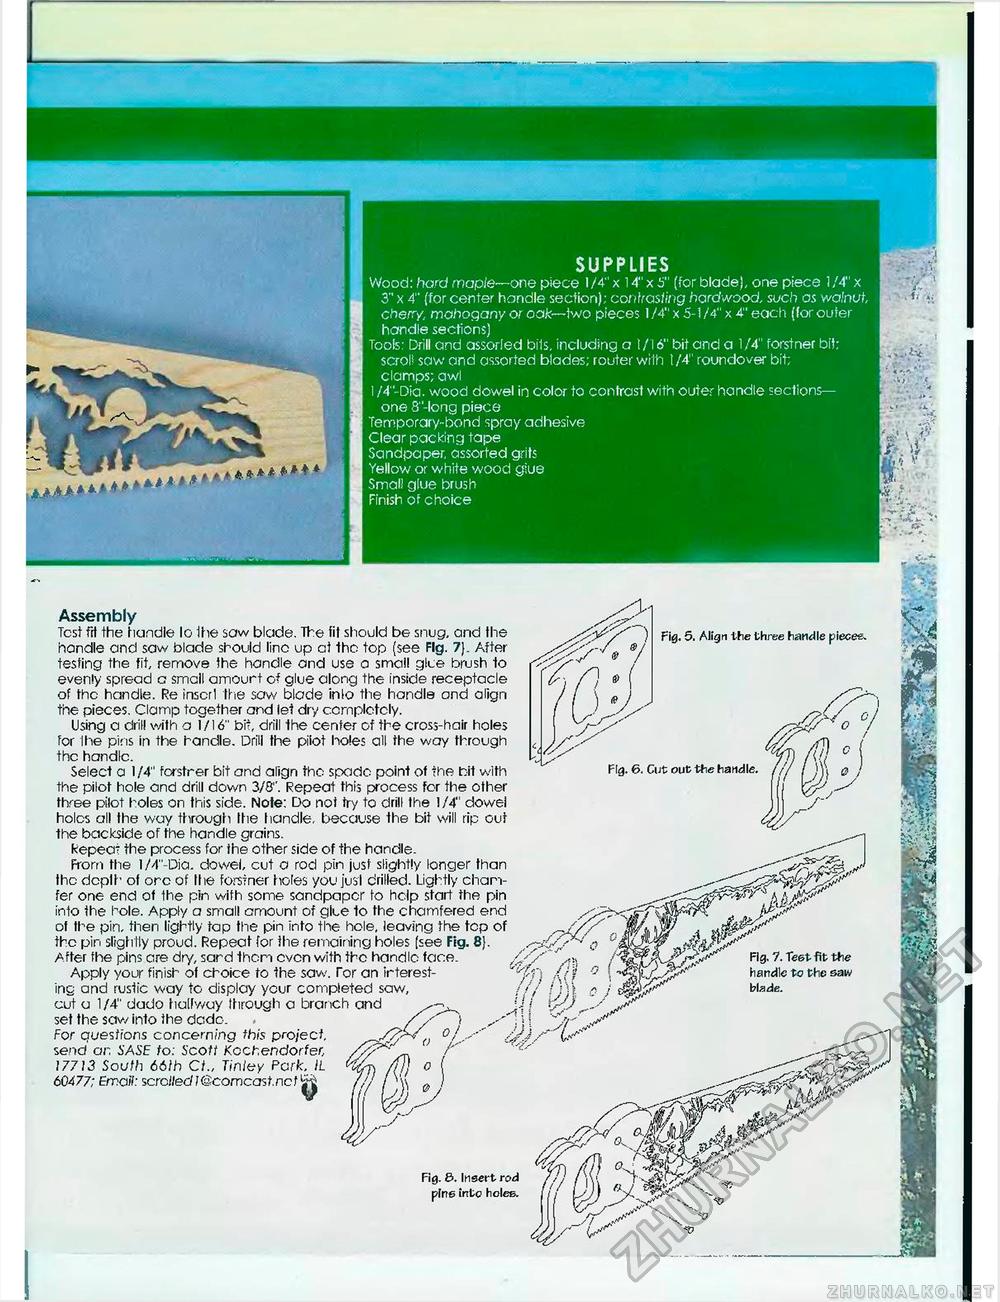
1 SUPPLIES Wood: hard maple—one piece 1/4" x 14" x 5" (for blade), one piece 1 /4" x 3" x 4" (for center handle section); contrasting hardwood, such as Y/afoUt, cherry, mahogany or oak— two pieces 1/4" x 5-1/4" x 4" each (tor outer handle sections) Tools: Drill and assorled bits, including a 1/16" bit and a 1/4" forstner bit; scroll saw and assorted blades; router with 1/4" roundover bit; clamps; awl I /4 -Dia. wood dowel in color to contrast with outer handle sections- one 8"-long piece Temporary-bond spray adhesive Clear packing tape Sandpaper, assorted grits Yellow or white wood giue Small glue brush Finish of choice i • m i until14* Assembly Test frt the handle lo Ihe saw blade. The tit should be snug, and Ihe handle and saw blade should lino up at the top (see Fig. 7). After testing the fit, remove ihe handle and use a small glue brush to evenly spread a small amourt of glue along the inside receptacle of the handle. Re inscrl Ihe saw blade inlo the handle and align the pieces. Clamp together and let dry completely. Using a drill with a 1/16" bit, drill the center of the cross-hair holes for ihe pins in the handle. Drill the pilot holes all the way through the handle. Select a 1/4" forstrer bit and align the spade point at the bit with the pilot hole and drill down 3/8". Repeat this process for the other three pilot holes on this side. Note: Do not try to drill the 1/4" dowel holes all the way through Ihe handle, because the bit will rip out the backside of the handle grains. kepea- the process for ihe other side of the handle. From the 1 /4"-Dia. dowel, cut a rod pin just slightly longer than the deplh of ore of Ihe forstner holes you just drilled. Lightly chamfer one end of the pin with some sandpaper to help start the pin into the hole. Apply a small amount of glue to the chamfered end of the pin, then lightly tap the pin into the hole, leaving the top of the pin slightly proud. Repeat for ihe remaining holes [see Fig. 8}. After the pins are dry, sard then even with the handle face. Apply your finish of choice to the saw. Tor an interesting and rustic way to display your completed saw, cut a 1 /4" dado halfway through a branch and set the saw into the dadc. For questions concerning this project, send an SASE to: Scott Kcchendorfer, 1/713 South 66lh Ct., Tinley Park, IL 60477; Email: scrolledl@comcast.nct..... Fig. 8. Insert rod pins into holes. Fig. 5. Align the three handle pieces. Fig. 7. Test fit the handle to the saw blade. |


