Creative Woodworks & crafts 2005-06, страница 68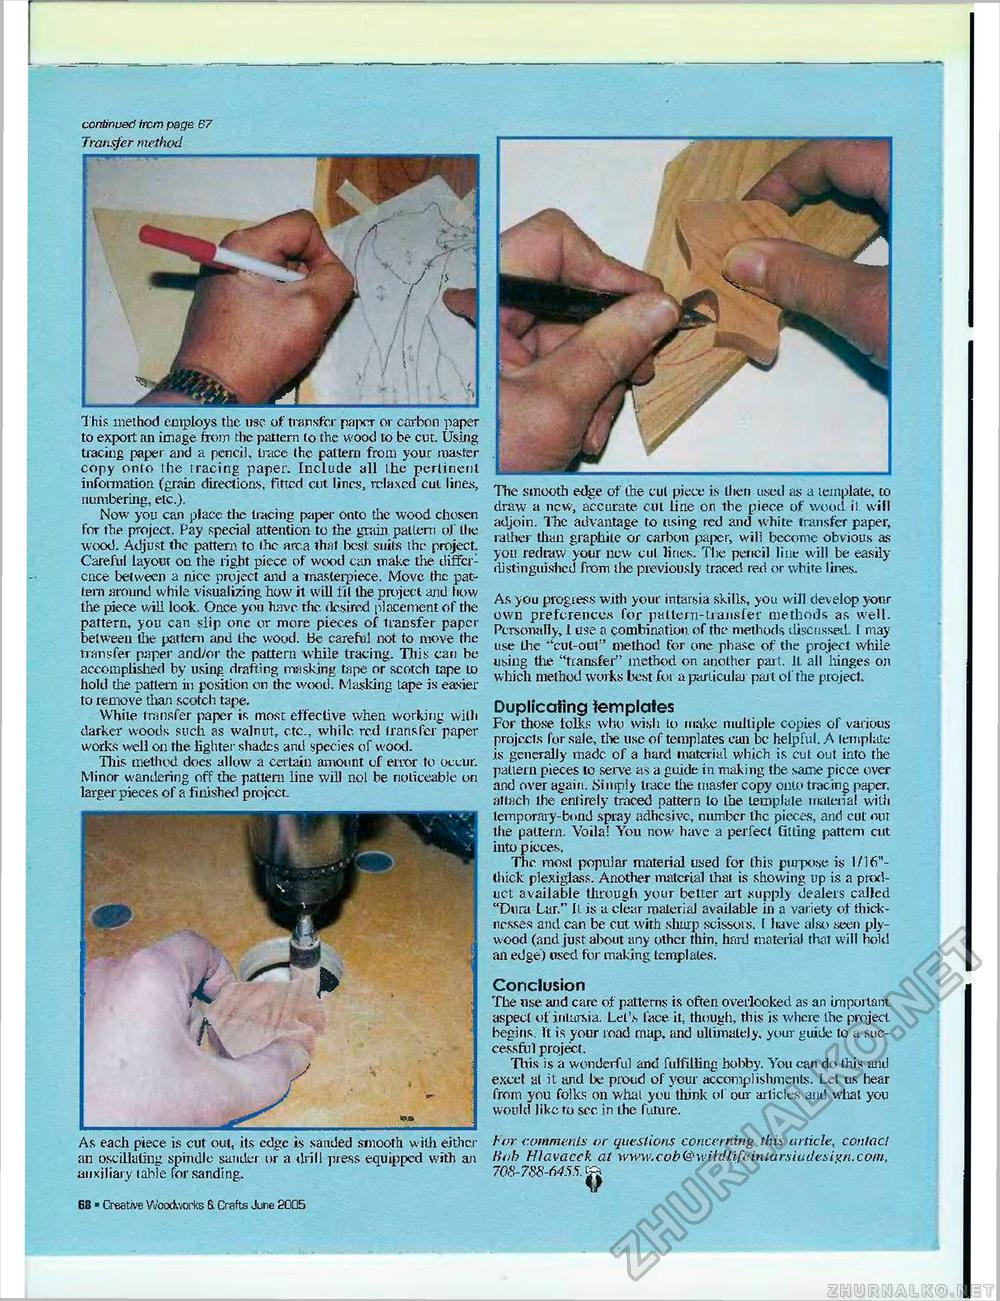
continued ircm page 67 Transfer method As each piece is cut oul, its edge is sanded smooth wilh either an oscillating spindle sander or a drill press equipped with an auxiliary (able for sanding. This method employs the use of transfer paper or carbon paper to export an image from the pattern to the wood lo be cut. Using tracing paper and a pencil, trace the pattern from your master copy onto the tracing paper. Include all the pertinent information (grain directions, fitted cut lines, relaxed cul lines, numbering, etc.). Now you can place the tracing paper onto the wood chosen for the project. Pay special attention to the gram palleni of the wood. Adjust the pattern to ihe area that best suits the project. Careful layout on the right piece of wood can make the differ: cnce between a nice project and a masterpiece. Move the patient around while visualizing how it will til the project and how the piece will look. Once you have the desired placement of the pattern, you can slip one or more pieces of transfer paper between the pattern and the wood, be careful not to move the transfer paper and/or the pattern while tracing. This can be accomplished by using drafting masking tape or scotch tape lo hold die pattern in position on the wood. Masking tape is easier to remove than scotch tape. While transfer paper is most effective when working with darker woods such as walnut., ctc., while red transfer paper works well oil the lighter shades and species of wood. This method does allow a certain amount of error to occur. Minor wandering oft the pattern line will nol be noticeable on larger pieces of a finished project. The smooth edge of the cul piece is then used as a template, to draw a new, accurate cut line on the piece of wood il. will adjoin. The advantage to using red and white transfer paper, rather than graphile or carbon paper, will become obvious as you redraw your new cut lines- The pencil line will be easily distinguished from the previously traced red or white tines. As you progress with your intarsia skills, you will develop your own preferences for pattern-transfer methods as well. Personally, 1 use. a combination of the methods discussed. I may use Lhe ''cut-out" method for one phase of the project while using the "transfer" method on another part. IL all hinges on which method works best for a particular part of the pro ject. Duplicating templates For those folks who wish to make multiple copies of various projects for sale, tire use of templates can be helpful. A template is generally made of a hard material which is cut out into the pattern pieces to serve as a guide in making the same picce over and over again. Simply trace the master copy onto tracing paper, attach the entirely traced pattern to the template material with temporary-bond spray adhesive, number the pieces, arid cut nut the pattern. Yoila! You now have a perfect fitting pattern cut into pieces. The most popular material used for this purpose is 1/16"-thick plexiglass. Another material that is showing up is a product available through your better art supply dealers called "Dura Lar." 11, is a clear material available in a variety of thicknesses ami can be cut with sharp scissors. I have also seen plywood (and just about any other thin, hard material that will hold an edge) used for making templates. Conclusion The use and care of patterns is often overlooked as an important aspect of intarsia. Let's face it, though, this is where the project begins. It is your road map. and ultimately, your guide to a successful project. This is a wonderful and fulfilling hobby. You can do this and excel al it and be proud of your accomplishments. Let us hear from you folks on whal you think of our articles and what you would like to see in the future. tor communis or questions concerning this article, contact Hob Hlavacek at www.cob@wilill.ifeiniursiciiJesixn.com, 708-788-6455. £ T> G8 ■ Creative Woodworks & Crafts Jure 2005 |


