Creative Woodworks & crafts 2005-08, страница 37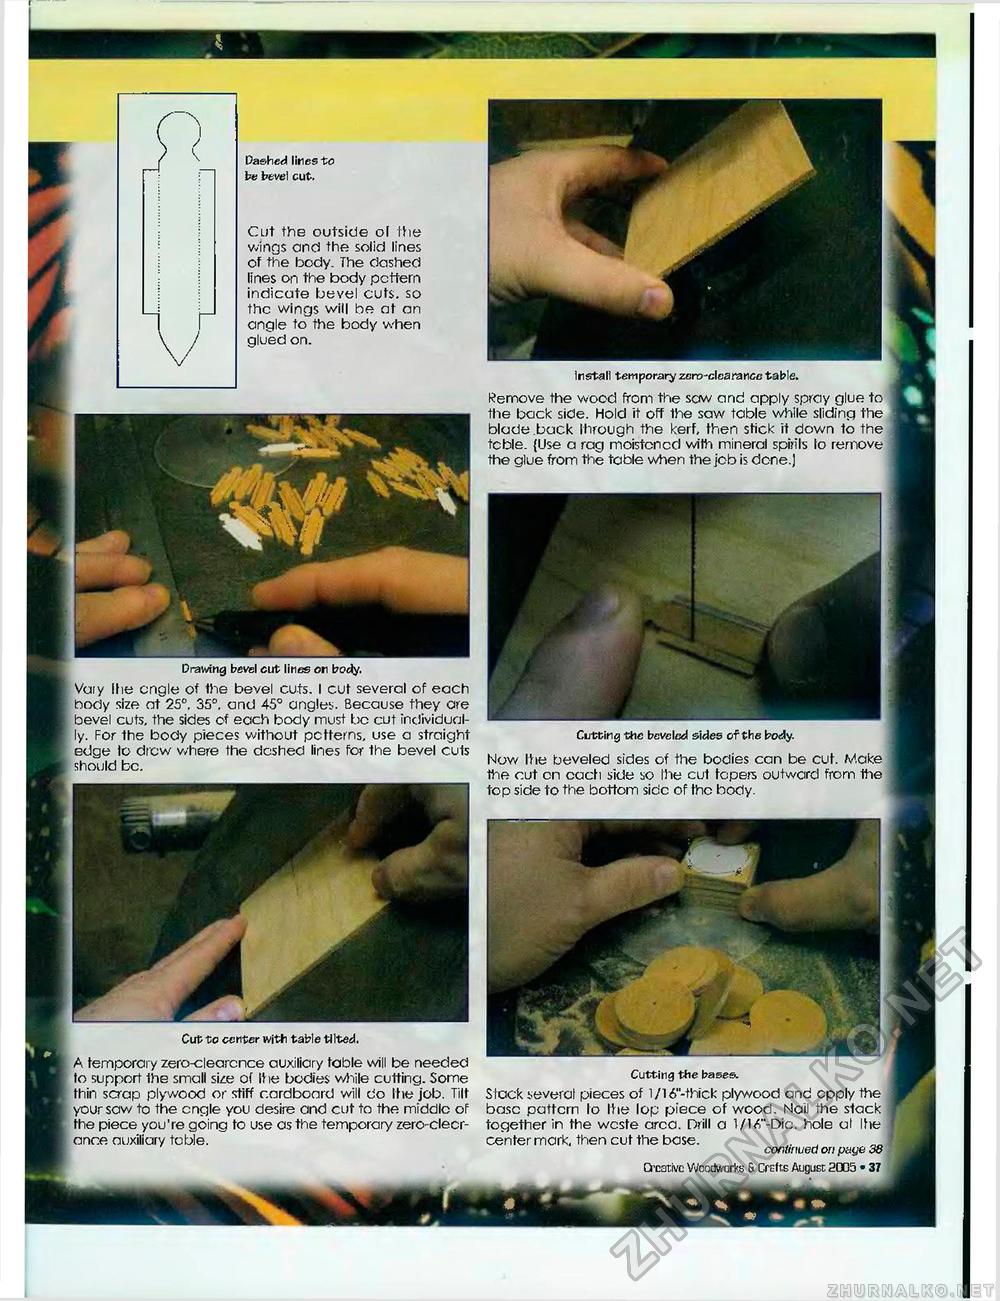
Dashed lines to be bevel cut. Cut the outside ol the wings ond the solid lines of the body. The dashed lines on the body pcttern indicate bevel cuts, so the wings will be at an ongle to the body when glued on. Install temporary zero-clearance table. Remove the wood from the sow and apply spray glue to the back side. Hold it off the saw table while sliding the blade back through the kerf, then stick if down to the tcble. {Use a rag moistened with mineral spirils lo remove the glue from the table when the job is done.] Drawing bevel cut lines on body. Vaiy Ihe angle of the bevel cuts. I cut several of each body size at 25°. 35°. and 45° angles. Because they are bevel cuts, the sides of each body must bo cut Individually. For the body pieces without pctterns, use a straight edge to drew where the deshed lines for the bevel cuts should be. Cutting the beveled sides of the body. Nov/ Ihe beveled sides of the bodies can be cut. Make the cut on cacti side so Ihe cut topers outward from the top side to the bottom side of the body. Cut to center with table tilted, A temporary zero-clearcnce auxiliary table will be needed to support the small siie of Ihe bodies while cutting. Some thin scrap plywood or stiff cardboard will do Ihe job. Tilt your saw to the engle you desire and cut to the middle oF the piece you're going to use as the temporary zero-clecr-ance auxiliary tcble. Cutting the bases. S lack several pieces of 1/16"-thick plywood and epply the base pattern lo Ihe lop piece of wood. Nail the stack < together in the weste area. Drill a l/l^'-Dio. hole at Ihe center mark, then cut the base. . continued on paye 38 Q'cativc Woodworks & Crsfts August 2005 • 37 |


