Creative Woodworks & crafts 2005-08, страница 67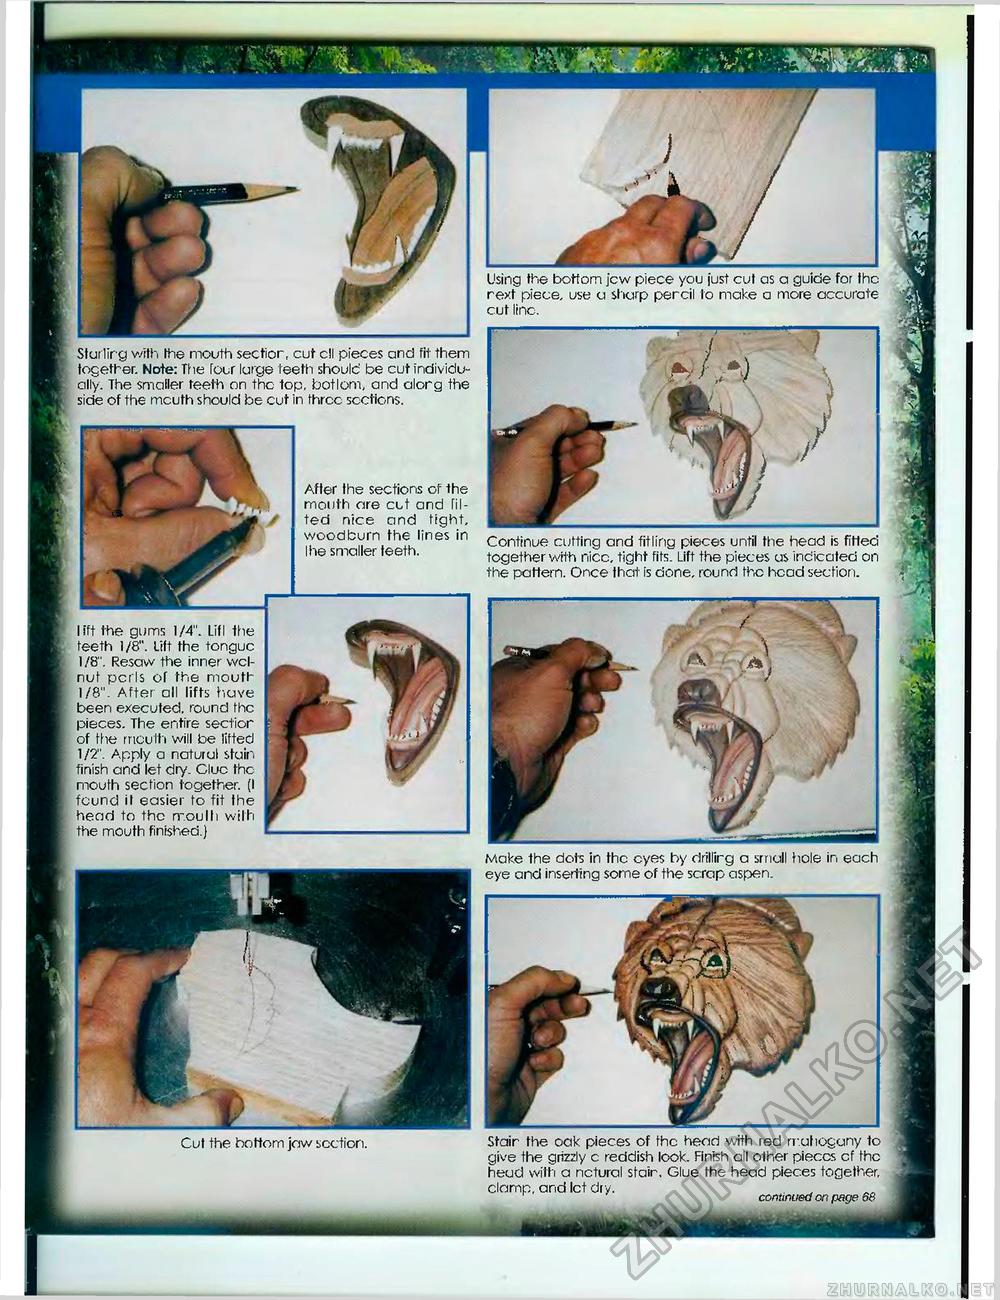
After fhe sections of the mouth ore cut ond fil-ted nice and tight, woodburn the lines in I lie smaller teeth. lift the gums 1/4". Lifl ihe teeth 1/8". Lift the tongue I /8". Resaw the inner wcl-nut perls of the mouth 1/8". After oil lifts have been executed, round the pieces. The entire sectior of the mouth will be lifted 1/2". Apply a natural stain finish and let dry. Clue the mouth section together. (I found il easier to fit the head to the n-oulli wilh the mouth finished.) Cut the bottom jaw scction. _ K Jl i Using the bottom jew piece you just cut as a guide for the rext piece, use a sharp percil to make a more accurate cut line. Starling with Ihe mouth sectior, cut ell pieces and fit them together. Note: The four lurge teeth should be cut individually. The smaller teeth on the top. botlom, and alorg the side of the mcuth should be cut in three sections. Continue cutting and titling pieces until the head is fitted together with nice, tight fits. Lift the pieces us indicated on the pattern. Once that is done, round the head section. Make the dots in the eyes by drillirg a small hole in each eye and inserting some of the scrap aspen. Stair the oak pieces of the head with red rruhogany to give the grizzly c reddish look. Finish all other pieccs cf the heud witli a nctural stair. Glue the head pieces together, clamp, and let diy. continued on page 66 |


