Creative Woodworks & crafts 2005-09, страница 11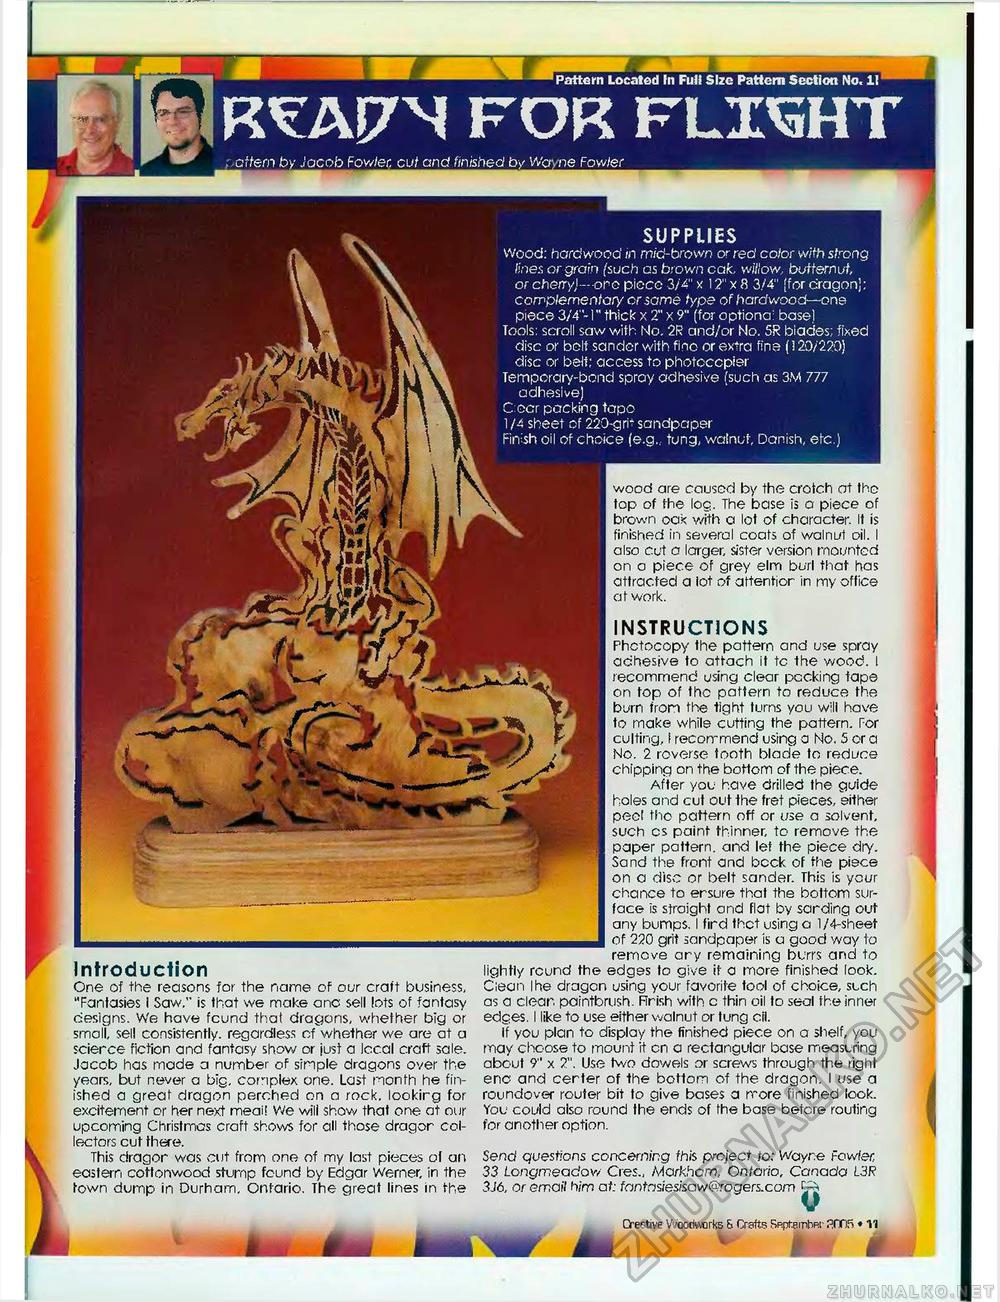
Pattern Located In Full Size Pattern Section No. II FTCAJ7N FOR FLX^HT 'tern by Jacob Fovsler, cut and finished by Wayne Fowler Introduction One of the reasons for the name of our craft business, "Fantasies i Saw," is that we make one sell lots of fantasy designs. We have found that dragons, whether big or small, sell consistently, regardless of whether we are at a scierce fiction and fantasy show or just a Iccal craft sale. Jacob has made a number of simple dragons over the years, but never a big, complex one. Last month he finished a great dragon perched on a rock, lookirg for excitement or her next meai! We will show that one at our upcoming Christmas craft shows for all those dragor collectors cut there. This dragor was cut from one of my last pieces ol an eastern cottonwood stump found by Edgar Werner, in the town dump in Durham. Ontario, The great lines in the SUPPLIES wood: hardwood in mid-brown or red color with strong lines or grain (such as brown cafe, willow, butternut, orchen^-orepiece3/4"x 12"x8 3/4" (for dragon]; complementary or some type of hardwood—one piece 3/4"-1" thick x 2" x 9" (for optiona: base] Tools: scroll saw with No. 2R and/or No. 5R biades; fixed disc or bolt sandor with fino or extra fins (3 20/220) disc or belt; access to photocopier Temporary-bond spray adhesive (such as 3M 777 adhesive) Cocr packing tapo 1 /4 sheet of 220-grit sandpaper Finish oil of choice (e.g.,. tung, walnut, Danish, etc.) wood are causcd by the crotch at the top of the log. The base is o piece of brown oak with a lot of character. It is finished in several coats of walnut oil. I also cut a larger, sister version mounted on a piece of grey elm burl that has attracted a lot of attentior in my office at work. INSTRUCTIONS Photocopy the pattern and use spray adhesive to attach it tc the wood. 1 recommend using clear peeking tape on top of the pattern to reduce the burn from the tight turns you will have to make while cutting the pattern. For culting, I recommend using a No. 5 or a No. 2 reverse tooth blade to reduce chipping on the bottom of the piece. After you have drilled the guide holes and cut out the fret pieces, either peel tho pattern off or use a solvent, such cs paint thinner, to remove the paper pattern, and lef the piece dry. Sand the front and bcck of the piece on a disc or belt sander. This is your chance to ersure that the bottom surface is straight and flat by sarding out any bumps. I fird thct using o 1/4-sheet of 220 grit sandpaper is a good way to remove ary remaining burrs and to lightly round the edges to give it a more finished look. Clean Ihe drogen using your favorite tool of choice, such as a clear, paintbrush. Firish with c thin oil to seal the inner edges. I like to use either walnut or tung oil. If you plan to display the finished piece on a shelf, you may choose to mount it cn a rectangular base measuring about 9" x 2". Use two dowels or screws through the right enc and certer of the bottom of the dragon. I use a roundover router bit to give bases a rrore finished look. You could also round the ends of the base before routing for another option. Send questions concerning this project to: Wayne fowfec 33 LongmeadoY/ Cies., Markham, Ontario, Canada L3R 3J6, or email him at: fantnsiesisaw@rogers.com ^ Creative Wcodworte & Crafts BRptembRr P.ITfi «11 |


