Creative Woodworks & crafts 2005-09, страница 8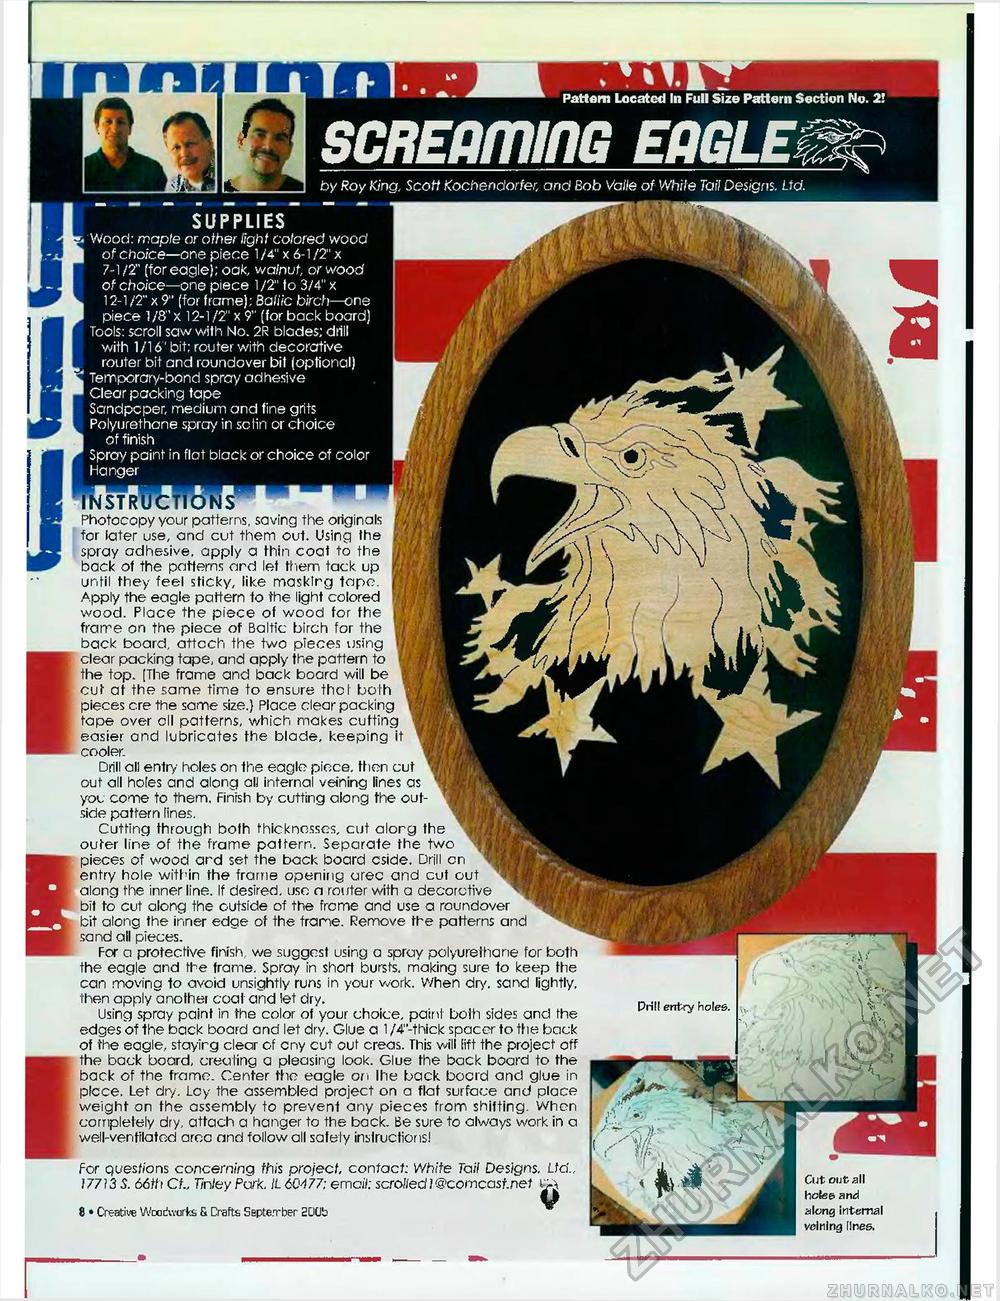
by Roy King, Scott Kochendorfer, and Bob Valle of While Tail Designs. Ltd. SUPPLIES Wood: maple or other light colored wood of choice—one piece 1/4" x 6-1/2" x 7-1/2" (for eagle); oak, walnut, or wood of choice—one piece 1/2" fo 3/4" x 12-1/2" x 9" (for frame); Baliic birch—one piece 1/8" x 12-1/2" x 9" (for back board) Tools: scroll saw with No. 2R blades; drill with 1 /161 bit; router with decorative router bit and roundover bit (optional) Temporary-bond spray adhesive Clear packing tape Sandpaper, medium and fine grits Polyurethane spray in sclin or choice of finish Spray paint in flat black or choice of color Photocopy your patterns, saving the originals for later use, and cut them out. Using the spray adhesive, apply a thin coat to the back of the patterns ard let them tack up until they feel sticky, like masklrg tape. Apply the eagle pattern fo the light colored wood. Place the piece of wood for the frame on the piece of Baltic birch for the back board, attcch the two pieces using clear packing tape, and apply the pattern to the top. (The frame and back board will be cut at the same time to ensure the I both pieces ere the same size.) Place clear packing tape over all patterns, which makes cutting easier and lubricates the blade, keeping it cooler. Drill all entry holes on the eagle piece, then cut out all holes and along all internal veining lines as you come to them. Finish by cutting along the outside pattern lines. Cutting through both thicknesses, cut alorg the outer line of the frame pattern. Separate the two pieces of wood ard set the back board cside. Drill cn entry hole within the frame opening arec and cut out along the inner line. If desired, use n router with a decorative bit to cut along the outside of the frcme and use a roundover bit along the inner edge of the frarie. Remove the patterns and sand all pieces. For a protective finish we suggest using a spray polyurethane for bath the eagle and the frame. Spray in short bursts, making sure to keep the can moving to avoid unsightly runs in your work. When dry, sand lightly, then apply another coal and let dry. Using spray paint in the color of your choice, paint both sides and the edges of the back board and let dry. Glue a 1 /4"-thick spacer to the back of the eagle, stayirg clear of cny cut out creas. This will lift the project off the back board, creating a pleasing look. Glue the back board to the back of the frame. Center the eagle on Ihe back bocrd and glue in plcce. Let dry. Ley the assembled project on a flat surface and place weight on the assembly to prevent any pieces from shifting. When completely dry, attach a hanger to the back. Be sure to always work in a well-ventilated arec and follow all safety inductions! for questions concerninq this project, contact: White Tail Designs. Ltd.. 17713 S. 66th CL Tinley Park. IL 60477; emdl; scrolledi@comcasf.net ^jx « • Creative Woodworks 5 Crafts September SDCb Pnll entry holes. Cut out all holee and along internal veining lines. |


