Creative Woodworks & crafts 2005-11, страница 6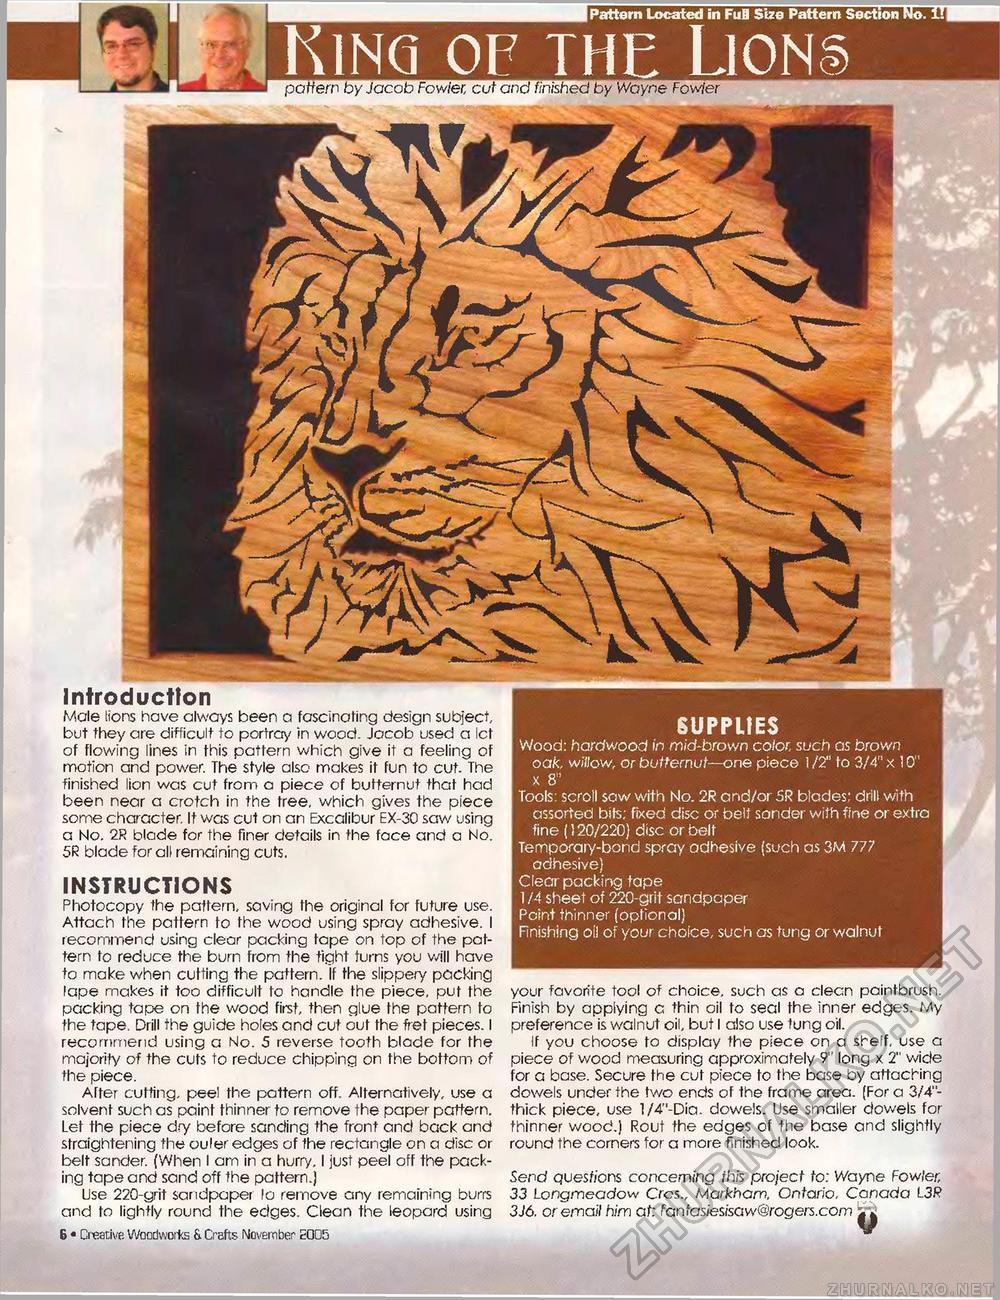
Pattern Located in Ful Size Pattern Section King of the Lionspattern by Jacob Fowler, cut and finished by Wayne Fowler 6UPPLIES Wood: hardwood in mid-brown color, such as brown oak, willow, or butternut—one piece 1 IT to 3/4" x 10" x 8" Tools: scroti sow with No. 2R and/or 5R blades; drill with assorted bits; fixed disc or belt sonder with fine or extra fine (! 20/220) disc or belt Temporary-borid spray adhesive (such as 3M 777 adhesive) Clear packing tape 11A sheet of 220-grit sandpaper Point thinner (optional) Finishing oii of your choice, such as tung or walnut your favorite tool of choice, such as a clean paintbrush. Finish by applying a thin oil to seal the inner edges. My preference is walnut oil, but I also use tung oil. If you choose to display the piece on a shelf, use a piece of wood measuring approximately 9" long x 2" wide for a base. Secure the cut piece to the base by attaching dowels under the two ends of the frame area. (For a 3/4"-thick piece, use l/4"-Dia. dowels. Use smaller dowels for thinner wood.) Rout the edges of the base and slightly round the corners for a more finished look. Send questions concerning fh;s project to: Wayne Fowler, 33 Longmeadow Crcs., Markham, Ontario, Canada L3R 3J6. or email him at: fantasiesisaw@rogers.com Introduction Male lions have always been a fascinating design subject, but they are difficult to portray in wood. Jacob used a let of flowing lines in this pattern which give it a feeling of motion and power. The style also makes if fun to cut. The finished lion was cut from a piece of butternut that had been near a crotch in the tree, which gives the piece some character. It was cut on an Excalibur EX-30 saw using a No. 2R blade for the finer details in the face and a No. 5R blade for all remaining cuts. INSTRUCTIONS Photocopy the pattern, saving the original for future use. Attach the pattern to the wood using spray adhesive. I recommend using clear packing tape on top of the pattern to reduce the burn from the tight turns you will have to make when cutting the pattern. If the slippery packing lape makes it too difficult to handle the piece, put the packing tape on the wood first, then glue the pattern to the tape. Drill the guide holes and cut out the fret pieces. I recommend using a No. 5 reverse tooth blade for the majority of the cuts to reduce chipping on the bottom of the piece. After cutting, peel the pattern off. Alternatively, use a solvent such as paint thinner to remove the paper pattern. Let the piece dry before sanding the front and back and straightening the ouler edges of the rectangle on a disc or belt sander. (When I am in a hurry. I just peel off the packing tape and sand off the pattern.) Use 220-grit sandpaper lo remove any remaining burrs and to lightly round the edges. Clean the leopard using 6 • Creative Woodworks fi Crafts November £005 |


