Creative Woodworks & crafts 2005-11, страница 8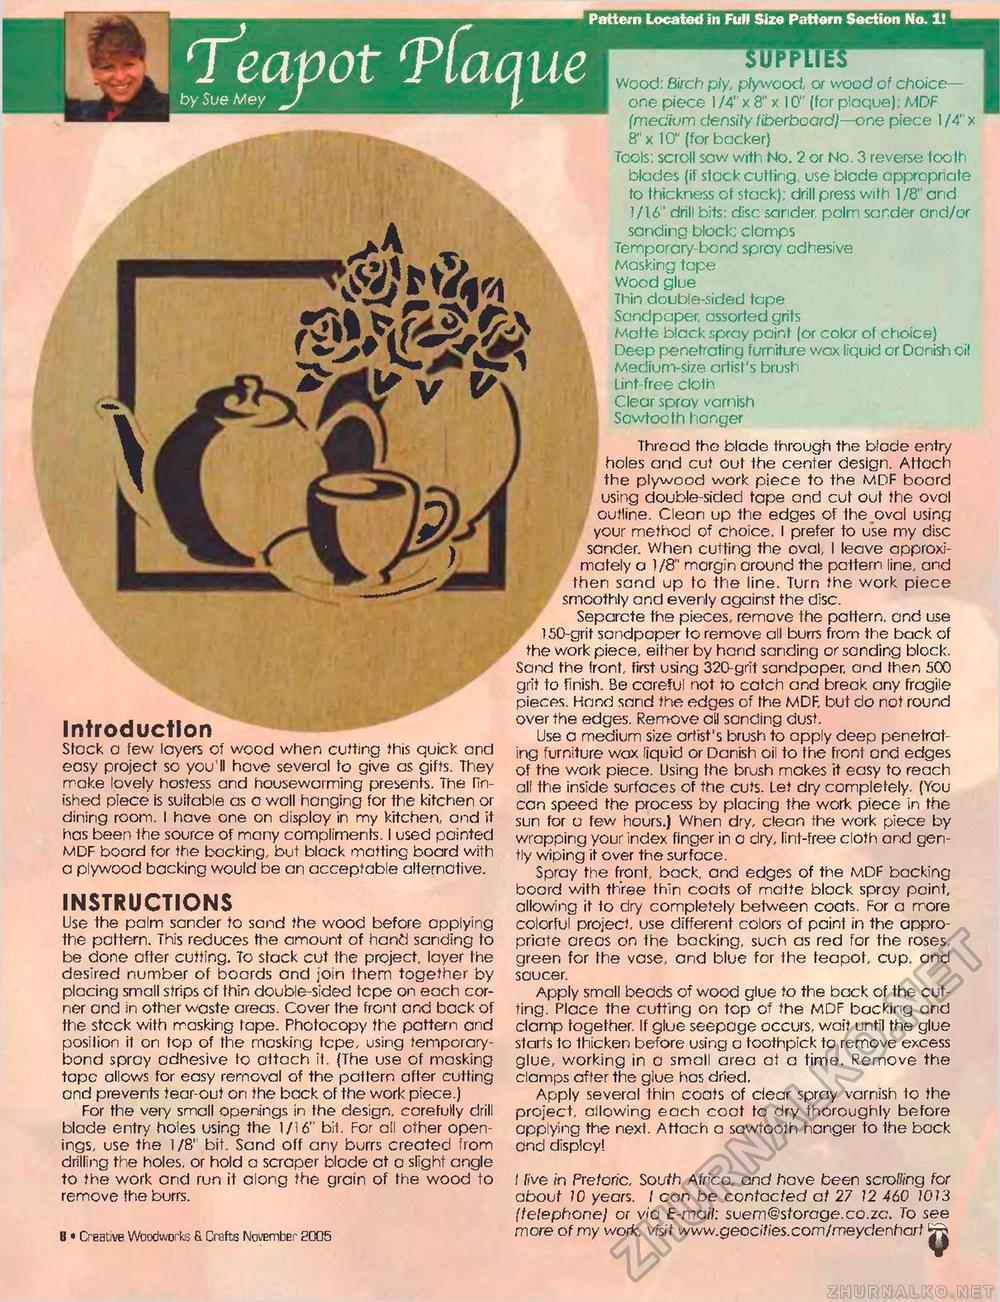
T*zapot T(ac v. by Sue Mey ^J Introduction Stack a few layers of wood when cutting this quick and easy project so you II have several to give as gifts. They make tovely hostess and housewarming presents. The finished piece is suitable as o wall hanging for the kitchen or dining room. I have one on display in my kitchen, and it has been the source of many compliments. I used painted MDF board for the backing, but black matting board with a plywood backing would be an acceptable alternative. INSTRUCTIONS Use the palm sander to sand the wood before applying the pattern. This reduces the amount of hand sanding to be done after cutting. To stack cut the project, layer the desired number of boards and join them together by placing small strips of thin double-sided tcpe on each corner and in other waste areas. Cover the front and back of the stcck with masking tape. Photocopy the pattern and posilion it on top of the masking tcpe, using temporary-bond spray adhesive to attach it. {The use of masking tape allows for easy removal of the pattern after cutting and prevents tear-out on the back of the work piece.) For the very small openings in the design, carefully drill blade entry holes using the 1/16" bif. For all other openings, use the 1 /8' bit. Sand off any burrs created from drilling the holes, or hold a scraper blade at a slight angle to the work and run it along the grain of the wood to remove the burrs. 8 • Creative Woodworks fi Crafts November £005 Pattern Located in Full Size Pattern Section No. 1! SUPPLIES Wood: Birch p/y, p/ywood, or wood of choice— one piece 1 /4" x 8" x 10" (for plaque); MDF (medium density fiberboard)—one piece 1 /4" x 8" x 10" (for backer) Tools: scroll saw with No. 2 or No. 3 reverse 1ooth blades (if slack cutting use blade appropnate to thickness of stack); drill press with 1/8" and 1/16" drill bits: disc sander, palm sarder and/or sanding block; clamps Temporary-bond spray adhesive Masking tape Wood glue Thin double-sided tape Sandpaper, assorted grits Matte black spray paint (or color of choice) Deep penetrating furniture wax liquid or Danish oil Medium-size artist's brush Lint-free clolh Clear spray varnish I Sawtooth hanger Thread the blade through the blade entry holes and cut out the center design. Attach the plywood work piece to the MDF board using double-sided tape and cut out the oval outline. Clean up the edges of the oval using your method of choice. I prefer to use my disc sander. When cutting the oval, I leave approximately a 1/8" margin around the pattern line, and then sand up to the line. Turn the work piece smoothly and evenly against the disc. Separate the pieces, remove the pattern, and use 150-grit sandpaper to remove all burrs from the back of the work piece, either by hand sanding or sanding block. Sand the front, first using 320-grit sandpaper, and then 500 grit to finish. Be careful not to catch and break any fragile pieces. Hand sand the edges of the MDF. but do not round over the edges. Remove all sanding dust. Use a medium size artist's brush to apply deep penetrating furniture wax liquid or Danish oil to the front and edges of the work piece. Using the brush makes it easy to reach all the inside surfaces of the cuts. Let dry completely. (You can speed the process by placing the work piece in the sun for a few hours.) When dry, clean the work piece by wrapping your index finger in a dry, lint-free cloth and gently wiping it over the surface. Spray the front, back, and edges of the MDF backing board with three thin coats of matte black spray paint, allowing it to dry completely between coats. For a more colorful project, use different colors of paint in the appropriate areas on the backing, such as red for the roses, green for the vase, and blue for the teapot, cup, and saucer. Apply small beads of wood glue to the back of the cutting. Place the cutting on top of the MDF backing and clamp together. If glue seepage occurs, wait until the glue starts to thicken before using a toothpick to remove excess glue, working in a small area at a time. Remove the clamps after the glue has dried. Apply several thin coats of clear spray varnish to the project, allowing each coat to dry thoroughly before applying the next. Attach a sawtooth hanger to the back and displcy! 1 five in Preforic, South Africa, and have been scrolling for about 10 years. I can be contacted at 27 12 460 1013 (telephone/ or via E-rnqil; suem©storage, co.zc. To see more of my work, visit www.geocities.com/meydenhart ^ |


