Creative Woodworks & crafts 2009-04, страница 17
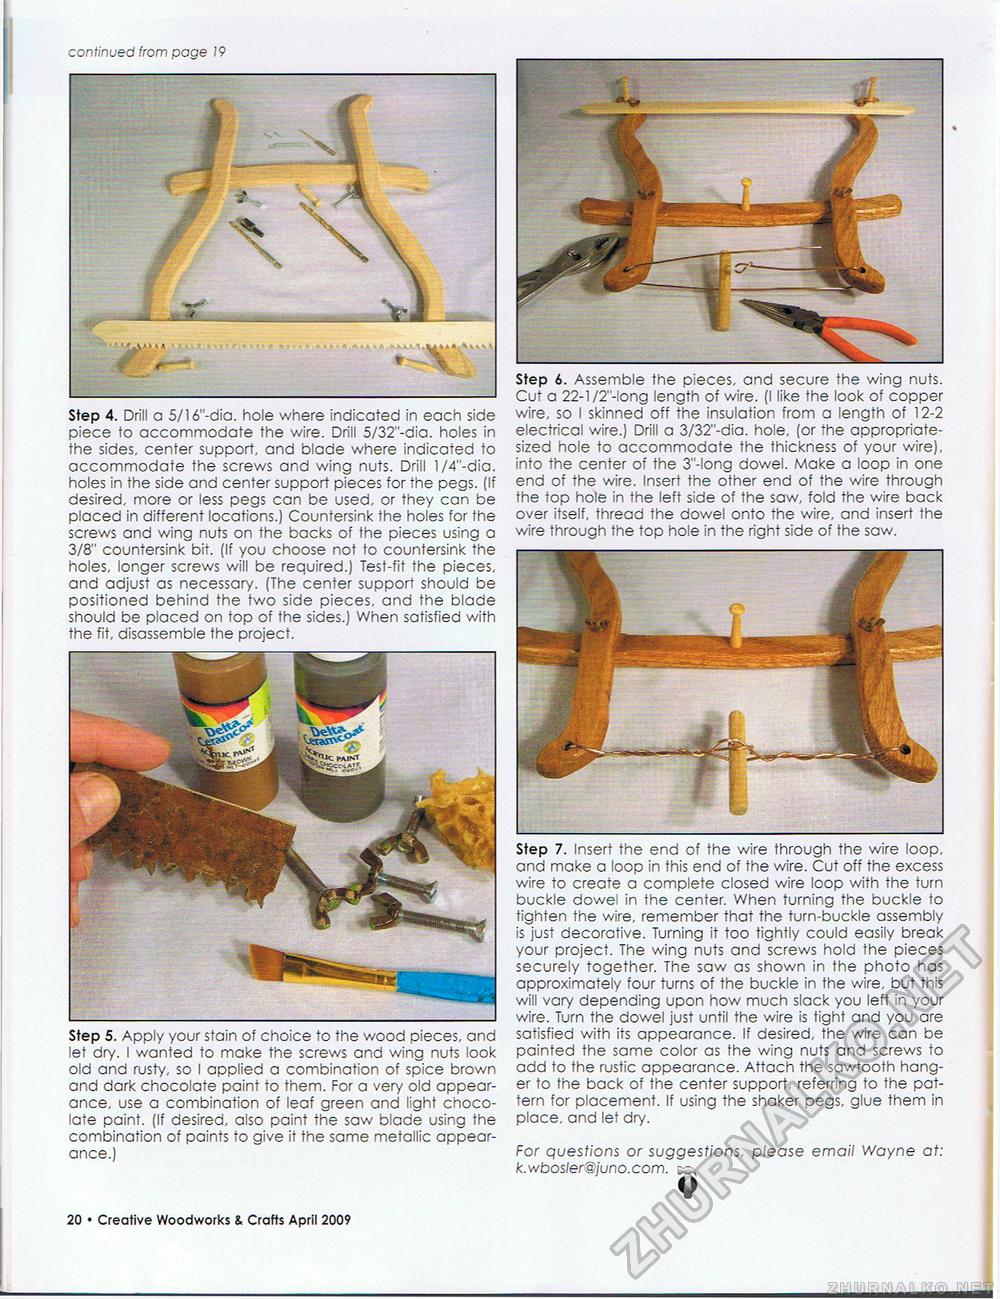
continued from page 17 r -X Step 4. Drill a 5/16"-dia. hole where indicated in each side piece to accommodate the wire. Drill 5/32"-dia. holes in the sides, center support, and blade where indicated to accommodate the screws and wing nuts. Drill l/4"-dia. holes in the side and center support pieces for the pegs. (If desired, more or less pegs can be used, or they can be placed in different locations.) Countersink the holes for the screws and wing nuts on the backs of the pieces using a 3/8" countersink bit. (If you choose not to countersink the holes, longer screws will be required.) Test-fit the pieces, and adjust as necessary. (The center support should be positioned behind the two side pieces, and the blade should be placed on top of the sides.) When satisfied with the fit, disassemble the project. Step 5. Apply your stain of choice to the wood pieces, and let dry. I wanted to make the screws and wing nuts look old and rusty, so I applied a combination of spice brown and dark chocolate paint to them. For a very old appearance, use a combination of leaf green and light chocolate paint. (If desired, also paint the saw blade using the combination of paints to give it the same metallic appearance.) Step 6. Assemble the pieces, and secure the wing nuts. Cut a 22-l/2"-long length of wire. (I like the look of copper wire, so I skinned off the insulation from a length of 12-2 electrical wire.) Drill a 3/32"-dia. hole, (or the appropriate-sized hole to accommodate the thickness of your wire), into the center of the 3"-long dowel. Make a loop in one end of the wire. Insert the other end of the wire through the top hole in the left side of the saw, fold the wire back over itself, thread the dowel onto the wire, and insert the wire through the top hole in the right side of the saw. Step 7. Insert the end of the wire through the wire loop, and make a loop in this end of the wire. Cut off the excess wire to create a complete closed wire loop with the turn buckle dowel in the center. When turning the buckle to tighten the wire, remember that the turn-buckle assembly is just decorative. Turning it too tightly could easily break your project. The wing nuts and screws hold the pieces securely together. The saw as shown in the photo has approximately four turns of the buckle in the wire, but this will vary depending upon how much slack you left in your wire. Turn the dowel just until the wire is tight and you are satisfied with its appearance. If desired, the wire can be painted the same color as the wing nuts and screws to add to the rustic appearance. Attach the sawtooth hanger to the back of the center support, referring to the pattern for placement. If using the shaker pegs, glue them in place, and let dry. For questions or suggestions, please email Wayne at: k.wbosler@juno.com. ^ 78 • Creative Woodworks & Crafts April 2009 |


