Creative Woodworks & crafts 2009-04, страница 18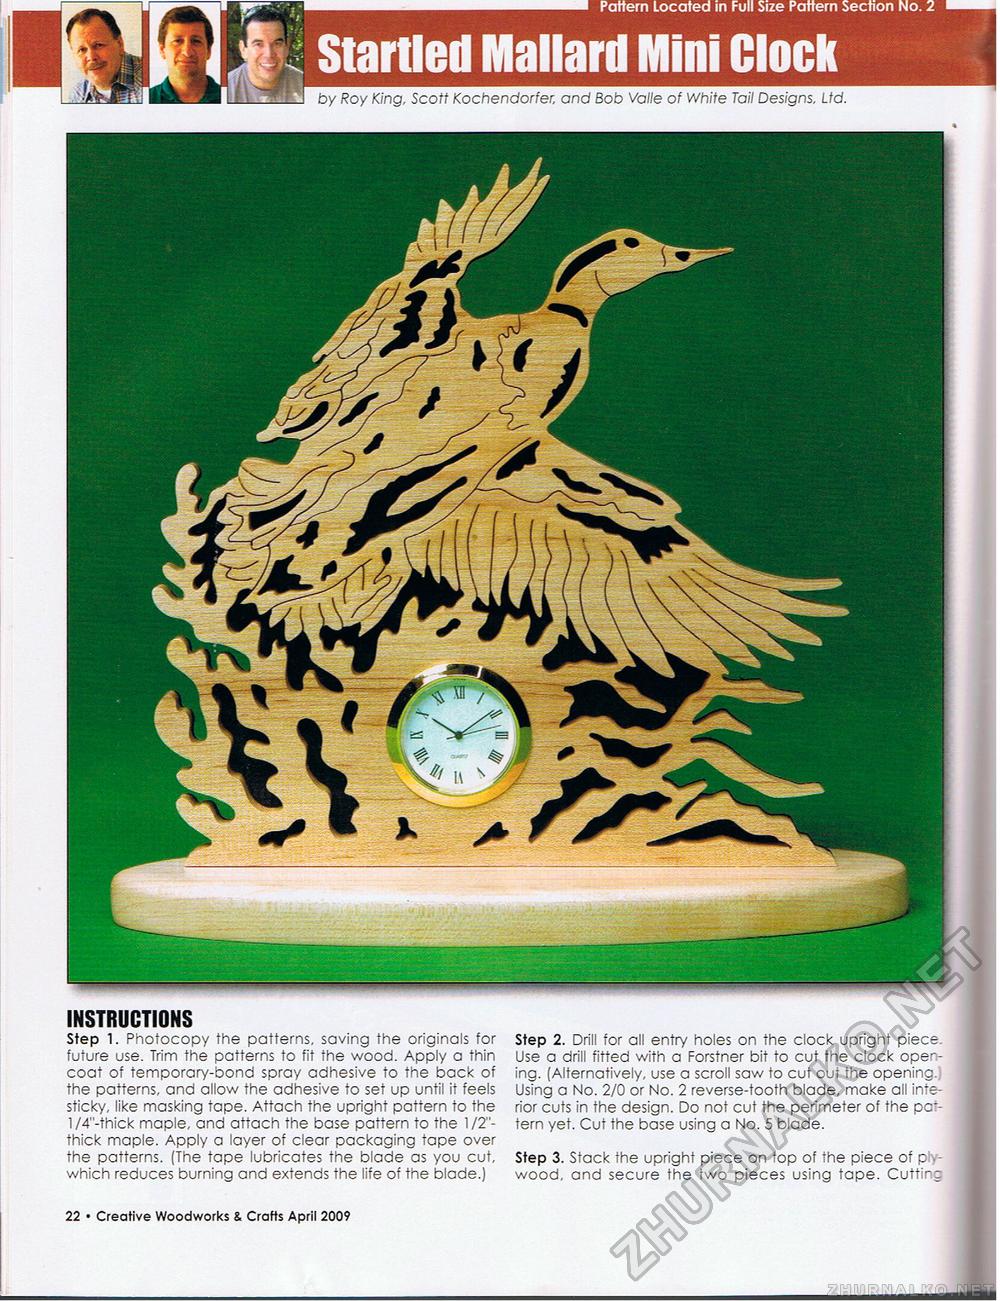
Pattern Located in Full Size Pattern Section No. 2 U Startled Mallard Mini Clock_ by Roy King, Scott Kochendorfer, and Bob Valle of White Tail Designs, Ltd. - INSTRUCTIONS Step 1. Photocopy the patterns, saving the originals for future use. Trim the patterns to fit the wood. Apply a thin coat of temporary-bond spray adhesive to the back of the patterns, and allow the adhesive to set up until it feels sticky, like masking tape. Attach the upright pattern to the l/4"-thick maple, and attach the base pattern to the 1/2"-thick maple. Apply a layer of clear packaging tape over the patterns. (The tape lubricates the blade as you cut, which reduces burning and extends the life of the blade.) Step 2. Drill for all entry holes on the clock upright piece Use a drill fitted with a Forstner bit to cut the clock opening. (Alternatively, use a scroll saw to cut out the opening. Using a No. 2/0 or No. 2 reverse-tooth blade, make all interior cuts in the design. Do not cut the perimeter of the pc-tern yet. Cut the base using a No. 5 blade. Step 3. Stack the upright piece on top of the piece of p ly-wood, and secure the two pieces using tape. Cutting Creative Woodworks & Crafts April 2009 • 11 |


