Creative Woodworks & crafts 2009-04, страница 21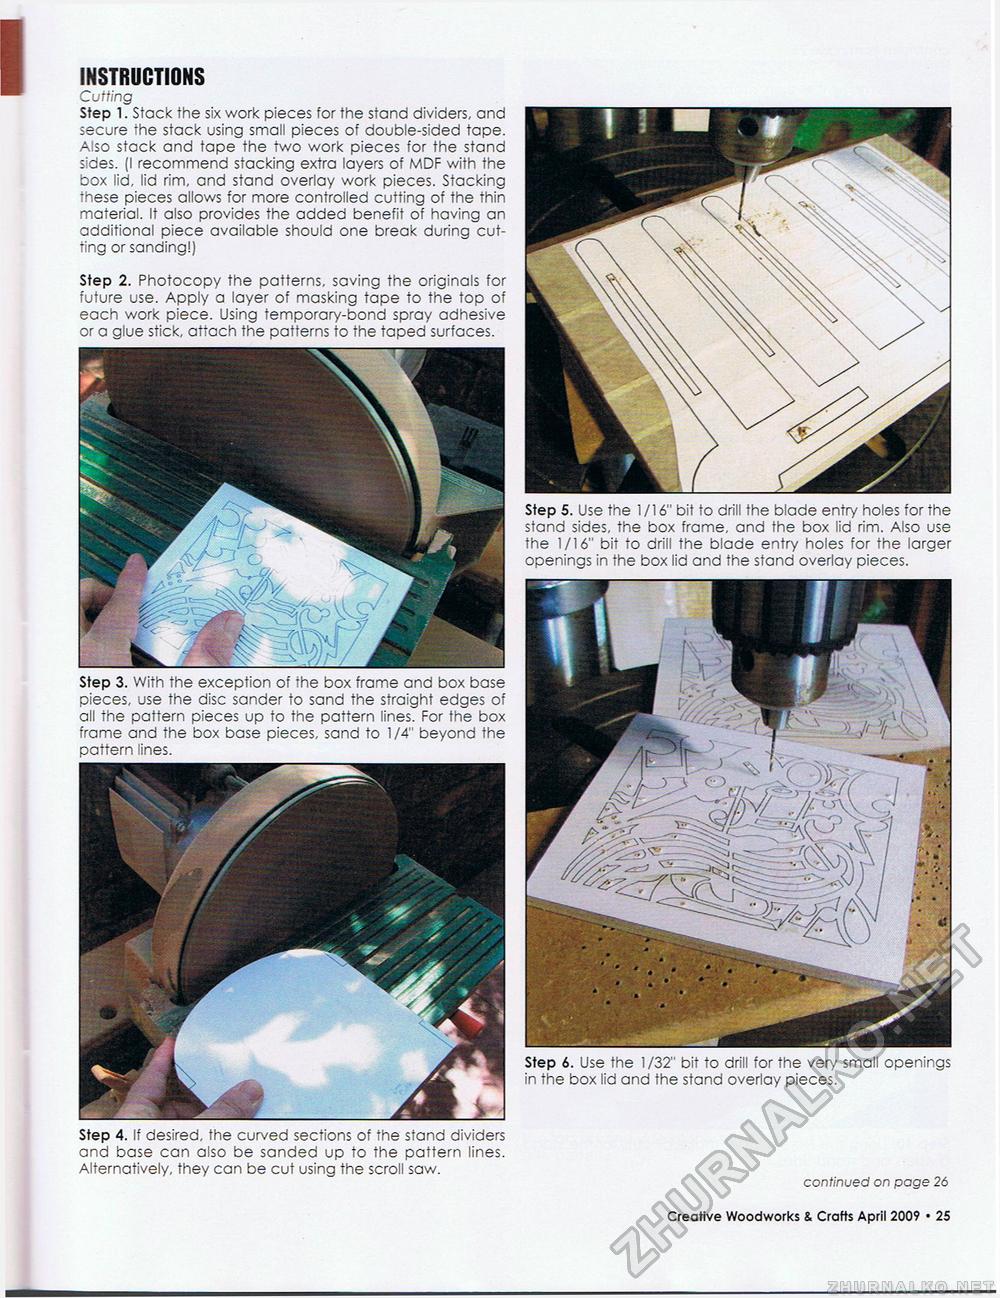
INSTRUCTIONS Cutting Step 1. Stack the six work pieces for the stand dividers, and secure the stack using small pieces of double-sided tape. Also stack and tape the two work pieces for the stand sides. (I recommend stacking extra layers of MDF with the box lid, lid rim, and stand overlay work pieces. Stacking these pieces allows for more controlled cutting of the thin material. It also provides the added benefit of having an additional piece available should one break during cutting or sanding!) Step 2. Photocopy the patterns, saving the originals for future use. Apply a layer of masking tape to the top of each work piece. Using temporary-bond spray adhesive or a glue stick, attach the patterns to the taped surfaces. Step 3. With the exception of the box frame and box base pieces, use the disc sander to sand the straight edges of all the pattern pieces up to the pattern lines. For the box frame and the box base pieces, sand to 1/4" beyond the pattern lines. Step 4. If desired, the curved sections of the stand dividers and base can also be sanded up to the pattern lines. Alternatively, they can be cut using the scroll saw. Step 5. Use the 1/16" bit to drill the blade entry holes for the stand sides, the box frame, and the box lid rim. Also use the 1/16" bit to drill the blade entry holes for the larger openings in the box lid and the stand overlay pieces. Step 6. Use the 1/32" bit to drill for the very small openings in the box lid and the stand overlay pieces. continued on page 25 Creative Woodworks & Crafts April 2009 • 19 |


