Creative Woodworks & Crafts-050-1998-winter, страница 13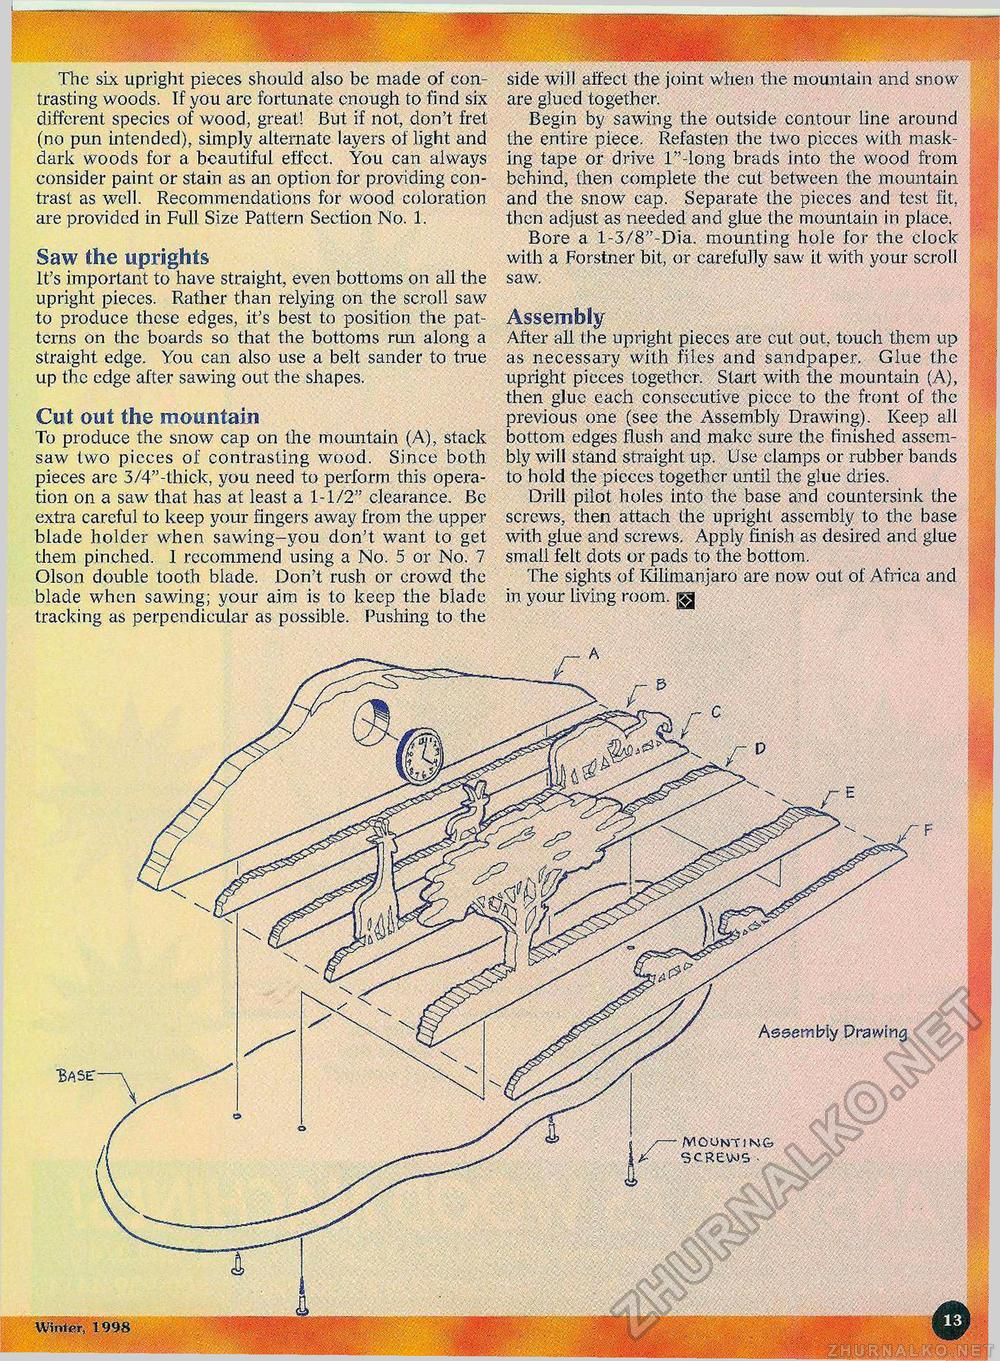
Assembly Prawing M0UNT1M& SCREWS■ The six upright pieces should also be made of contrasting woods. If you arc fortunate enough to find six different species of wood, great! But if not, don't fret (no pun intended), simply alternate layers of light and dark woods for a beautiful effect. You can always consider paint or stain as an option for providing contrast as well. Recommendations for wood coloration are provided in Full Size Pattern Section No. 1. Saw the uprights It's important to have straight, even bottoms on all the upright pieces. Rather than relying on the scroll saw to produce these edges, it's best to position the patterns on the boards so that the bottoms run along a straight edge. You can also use a belt sander to true up the edge after sawing out the shapes. Cut out the mountain To produce the snow cap on the mountain (A), stack saw two pieces of contrasting wood. Since both pieces arc 3/4"-thick, you need to perform this operation on a saw that has at least a 1-1/2'" clearance. Be extra careful to keep your fingers away from the upper blade holder when sawing-you don't want to get them pinched. 1 recommend using a No. 5 or No. 7 Olson double tooth blade. Don't rush or crowd the blade when sawing; your aim is to keep the blade tracking as perpendicular as possible. Pushing to the side will affect the joint when the mountain and snow are glued together. Begin by sawing the outside contour line around the entire piece. Refasten the two pieces with masking tape or drive l"-lo.ng brads into the wood from behind, then complete the cut between the mountain and the snow cap. Separate the pieces and test fit, then adjust as needed and glue the mountain in place. Bore a l-3/8"-Dia. mounting hole for the clock with a Forstner bit, or carefully saw it with your scroll saw. Assembly After all the upright pieces are cut out, touch them up as necessary with files and sandpaper. Glue the upright pieces together. Start with the mountain (A), then glue each consecutive piece to the front of the previous one (see the Assembly Drawing). Keep all bottom edges flush and make sure the finished assembly will stand straight up. Use clamps or rubber bands to hold the pieces together until the glue dries. Drill pilot holes into the base and countersink the screws, then attach the upright assembly to the base with glue and screws. Apply finish as desired and glue small felt dots or pads to the bottom. The sights of Kilimanjaro are now out of Africa and in your living room. §g |


