Creative Woodworks & Crafts-050-1998-winter, страница 16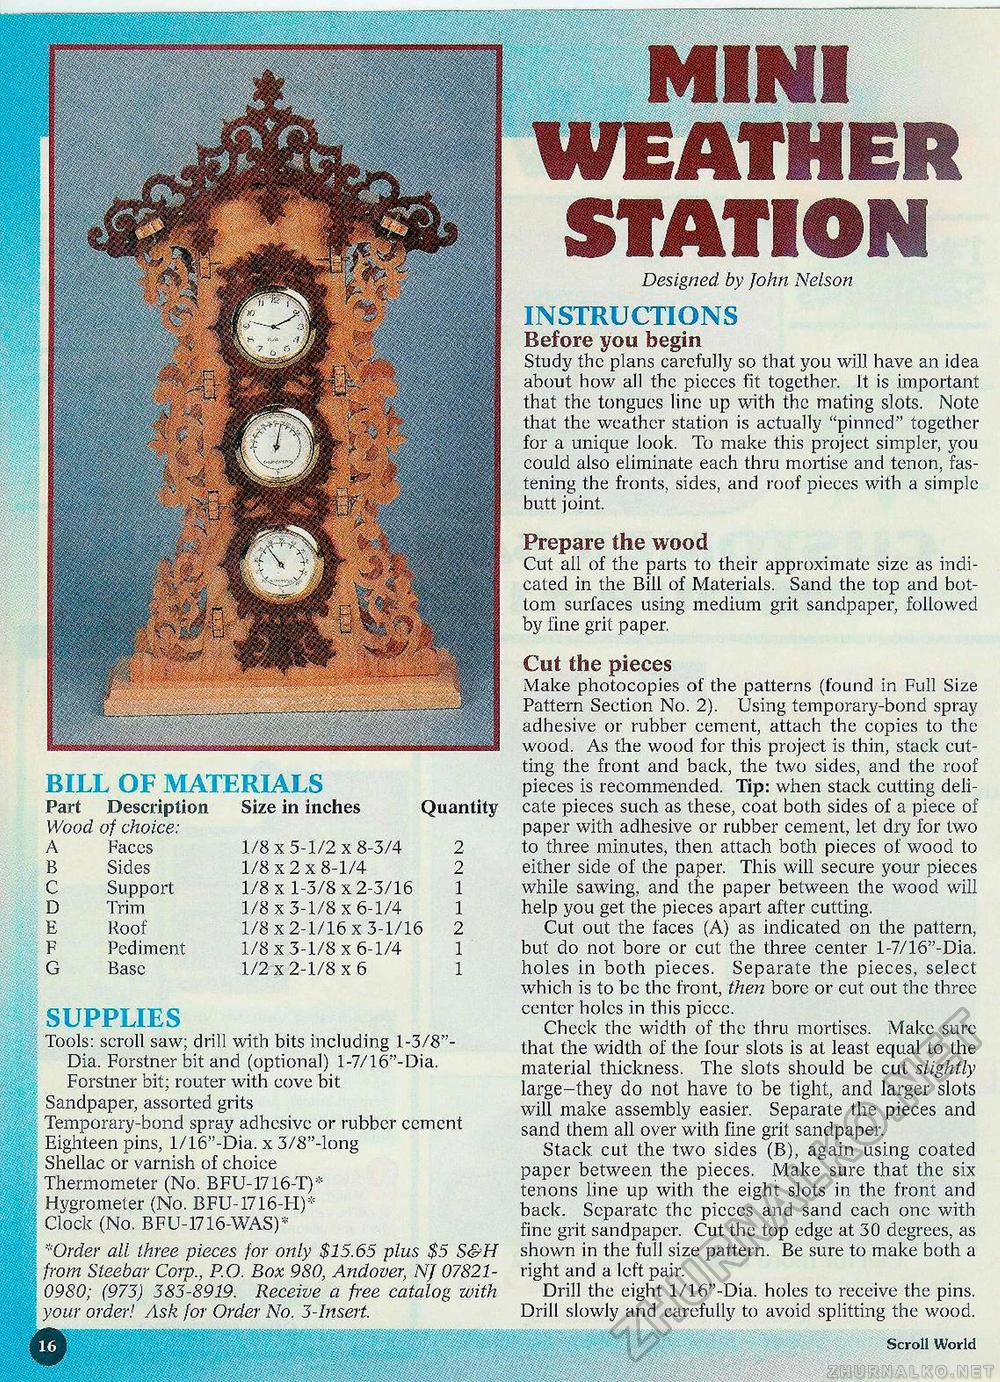
BILL OF MATERIALS Part Description Size in inches Quantity Wood of choice:
SUPPLIES Tools: scroll saw; drill with bits including 1-3/8"-Dia. Forstner bit and (optional) l-7/16"-Dia. Forstner bit; router with cove bit Sandpaper, assorted grits Temporary-bond spray adhesive or rubber cement ## ■ Eighteen pins, 1/16"-Dia. x 3/8"-long Shellac or varnish of choice <iV Thermometer (No. BFU-1716-T)* II Hygrometer (No. BFU-1716-H)* | Clock (No. BFU-1716-WAS)* | *Order all three pieces for only $15.65 plus $5 S&H I from Sleebar Corp., P.O. Box 980, Andover, NJ 07821-| 0980; (973) 383-8919. Receive a free catalog with 1 your order! Ask for Order No. 3-Insert. m w INSTRUCTIONS Before you begin Study the plans carefully so that you will have an idea about how all the pieces fit together. It is important that the tongues line up with the mating slots. Note tht it the weather station is actually "pinned" together for a unique look. To make this project simpler, you could also eliminate each thru mortise and tenon, fastening the fronts, sides, and roof pieces with a simple butt joint. Prepare the wood Cut all of the parts to their approximate size as indicated in the Bill of Materials. Sand the top and bottom surfaces using medium grit sandpaper, followed by fine grit paper. Cut the pieces Make photocopies of the patterns (found in Full Size Pattern Section No. 2). Using temporary-bond spray adhesive or rubber cement, attach the copies to the wood. As the wood for this project is thin, stack cutting the front and back, the two sides, and the roof pieces is recommended. Tip: when stack cutting delicate pieces such as these, coat both sides of a piece of paper with adhesive or rubber cement, let dry for two to three minutes, then attach both pieces of wood to either side of the paper. This will secure your pieces while sawing, and the paper between the wood will help you get the pieces apart after cutting. Cut out the faces (A) as indicated on the pattern, but do not bore or cut the three center l-7/16"-Dia. holes in both pieces. Separate the pieces, select which is to be the front, then bore or cut out the three center holes in this piccc. Check the width of the thru mortises. Make sure that the width of the four slots is at least equal to the material thickness. The slots should be cut slightly large-they do not have to be tight, and larger slots will make assembly easier. Separate the pieces and sand them all over with fine grit sandpaper. Stack cut the two sides (B), again using coated paper between the pieces. Make sure that the six tenons line up with the eight slots in the front and back. Separate the pieccs and sand each one with fine grit sandpaper. Cut the top edge at 30 degrees, as shown in the full size pattern. Be sure to make both a right and a left pair. Drill the eight 1/16"-Dia. holes to receive the pins. Drill slowly and carefully to avoid splitting the wood. Scroll World STATION Designed, by John Nelson |


