Creative Woodworks & Crafts-050-1998-winter, страница 18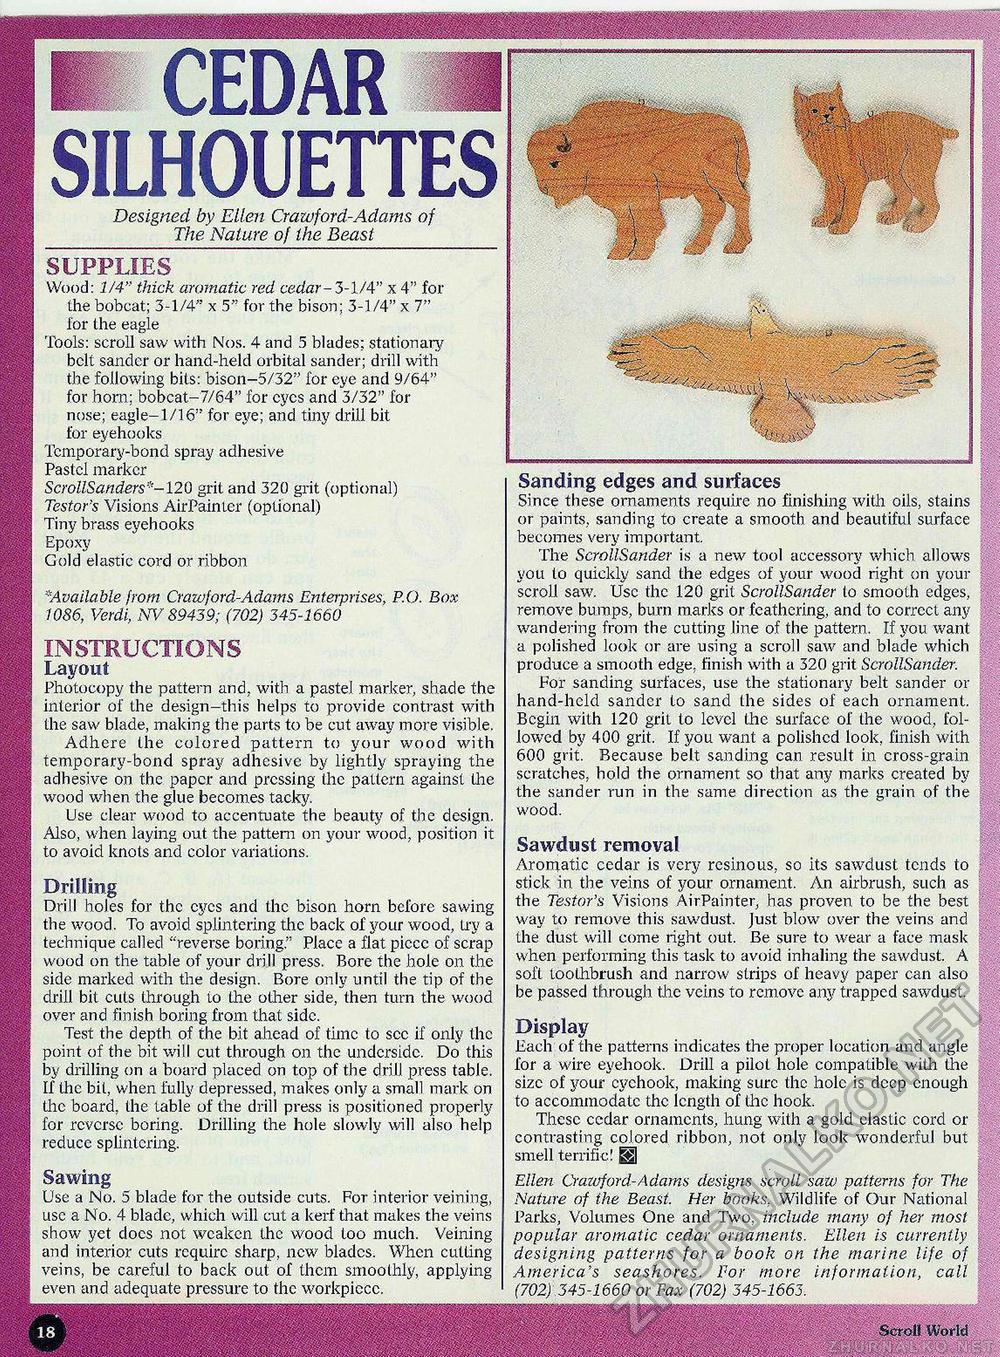
CEDAR SILHOUETTESDesigned by Ellen Crawford-Adams of The Nature of the Beast SUPPLIES Wood: 1/4" thick aromatic red cedar-3-1/4" x 4" for the bobcat; 3-1/4" x 5" for the bison; 3-1/4" x 7" lor the eagle Tools: scroll saw with Nos. 4 and 5 blades; stationary belt sandcr or hand-held orbital sander; drill with the following bits: bison-5/32" for eye and 9/64" for horn; bobcat-7/64" for eyes and 3/32" for nose; eagle-1/16" for eye; and tiny drill bit for eyehooks Temporary-bond spray adhesive Pastel marker ScrollSanders'*-120 grit and 320 grit (optional) Testor's Visions AirPainier (optional) Tiny brass eyehooks Epoxy Gold elastic cord or ribbon Sanding edges and surfaces Since these ornaments require no finishing with oils, stains or paints, sanding to create a smooth and beautiful surface becomes very important. The ScrollSander is a new tool accessory which allows you to quickly sand the edges of your wood right on your scroll saw. Use the 120 grit ScrollSander (o smooth edges, remove bumps, burn marks or feathering, and to correct any wandering from the cutting line of the pattern. If you want a polished look or are using a scroll saw and blade which produce a smooth edge, finish with a 320 grit ScrollSander. For sanding surfaces, use the stationary belt sander or hand-held sander to sand the sides of each ornament. Begin with 120 grit to level the surface of the wood, followed by 400 grit. If you want a polished look, finish with 600 grit. Because belt sanding can result in cross-grain scratches, hold the ornament so that any marks created by the sander run in the same direction as the grain of the wood. Sawdust removal Aromatic cedar is very resinous, so its sawdust tends to stick in the veins of your ornament. An airbrush, such as the Testor's Visions AirPainter, has proven to be the best way to remove this sawdust. Just blow over the veins and the dust will come right out. Be sure to wear a face mask when performing this task to avoid inhaling the sawdust. A soft toothbrush and narrow strips of heavy paper can also be passed through the veins to remove any trapped sawdust. Display Each of the patterns indicates the proper location and angle for a wire evehook. Drill a pilot hole compatible with the size of your cychook, making sure (he hole is deep enough to accommodatc the length of (lie hook. These ccdar ornaments, hung with a gold clastic cord or contrasting colored ribbon, not only look wonderful but smell terrific! Efil Ellen Crawford- A dams designs scroll saw patterns for The Nature of the Beast. Her books. Wildlife of Our National Parks, Volumes One and Two, include many of her most popular aromatic cedar ornaments. Ellen is currently designing patterns for a book on the marine life of America's seashores. For more information, call (702) 345-1660 or Fax (702) 345-1665. *Available from Crawford-Adams Enterprises, P.O. Box 1086, Verdi, NV 89439; (702) 345-1660 INSTRUCTIONS Layout Photocopy the pattern and, with a pastel marker, shade the interior of the design—this helps to provide contrast with the saw blade, making the parts to be cut away more visible. Adhere the colored pattern to your wood with temporary-bond spray adhesive by lightly spraying the adhesive on the paper and pressing (he pattern against the wood when the glue becomes tacky. Use clear wood to accentuate the beauty of the design. Also, when laying out the pattern on your wood, position it to avoid knots and color variations. Drilling Drill holes for the eyes and the bison horn before sawing the wood. To avoid splintering the back of your wood, try a technique called "reverse boring." Place a flat piece of scrap wood on the table of your drill press. Bore the hole on the side marked with the design. Bore only until the tip of the drill bit cuts through to the other side, then turn the wood over and finish boring from that side. Test the depth of the bit ahead of time to see if only the point of the bit will cut through on the underside. Do this by drilling on a board placed on top of the drill press table. If the bit, when fully depressed, makes only a small mark on (lie board, the table of the drill press is positioned properly for reverse boring. Drilling the hole slowly will also help reducc splintering. Sawing Use a No. 5 blade for the outside cuts. For interior veining, use a No. 4 blade, which will cut a kerf that makes the veins show yet docs not weaken the wood too much. Veining and interior cuts require sharp, new blades. When cutting veins, be careful to back out of them smoothly, applying even and adequate pressure to the workpiccc. Scroll World |


