Creative Woodworks & Crafts-050-1998-winter, страница 21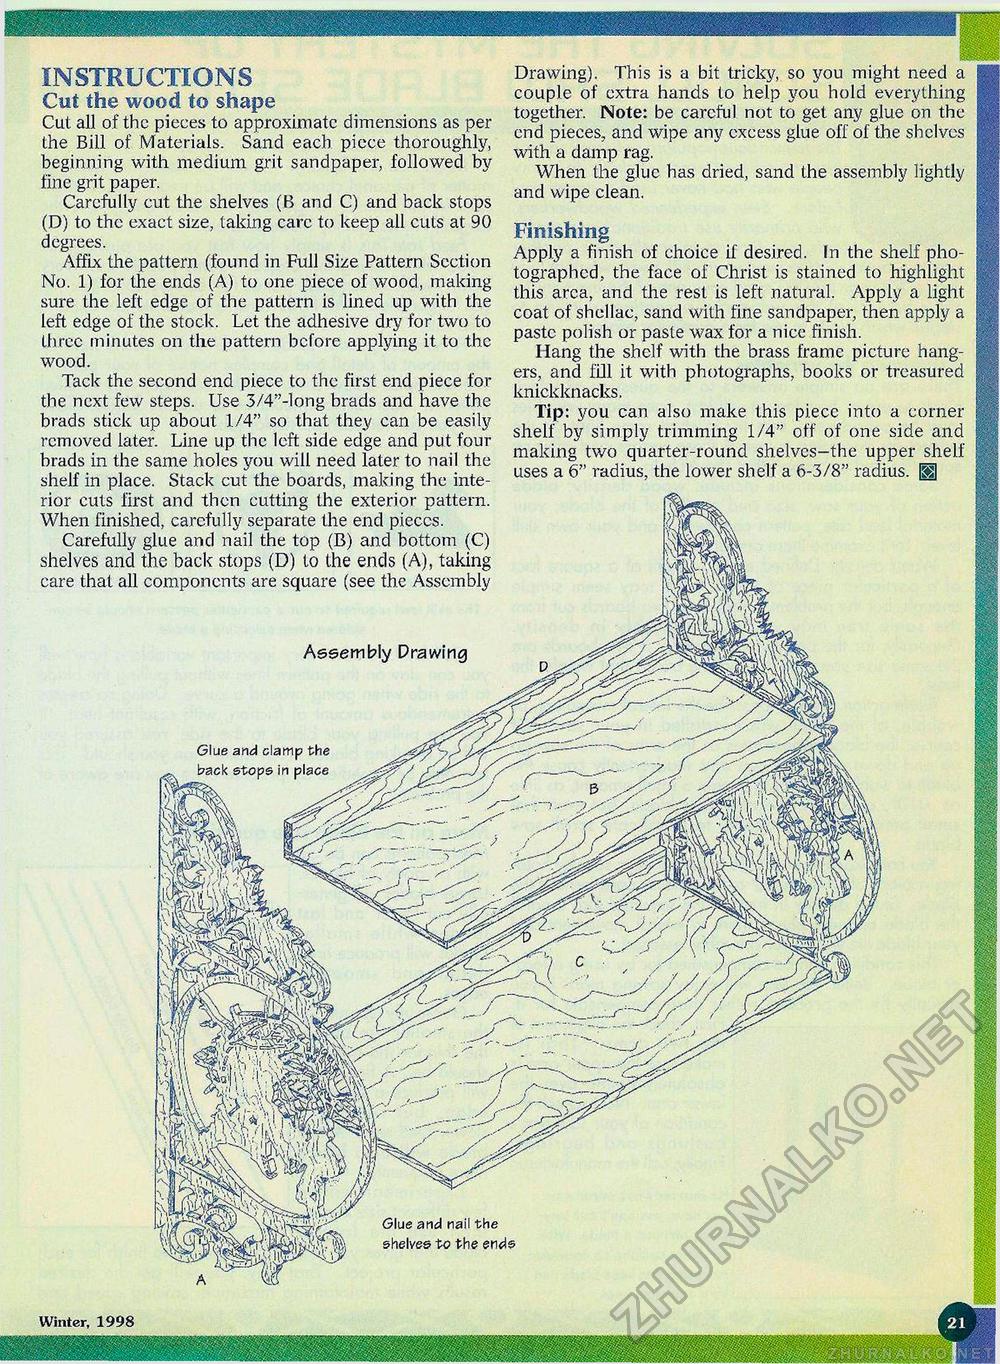
Assembly Drawing Glue and clamp the Glue and nail the shelves to the ends INSTRUCTIONS Cut the wood to shape Cut all of the pieces to approximate dimensions as per the Bill of Materials. Sand each piece thoroughly, beginning with medium grit sandpaper, followed by fine grit paper. Carefully cut the shelves (B and C) and back stops (D) to the exact size, taking care to keep all cuts at 90 degrees. Affix the pattern (found in Full Size Pattern Section No. 1) for the ends (A) to one piece of wood, making sure the left edge of the pattern is lined up with the left edge of the stock. Let the adhesive dry for two to three minutes on the pattern before applying it to the wood. Tack the second end piece to the first end piece for the next few steps. Use 3/4"-long brads and have the brads stick up about 1/4" so that they can be easily removed later. Line up the left side edge and put four brads in the same holes you will need later to nail the shelf in place. Stack cut the boards, making the interior cuts first and then cutting the exterior pattern. When finished, carefully separate the end pieccs. Carefully glue and nail the top (B) and bottom (C) shelves and the back stops (D) to the ends (A), taking care that all components are square (see the Assembly Drawing). This is a bit tricky, so you might need a couple of extra hands to help you hold everything together. Note: be careful not to get any glue on the end pieces, and wipe any excess glue off of the shelves with a damp rag. When the glue has dried, sand the assembly lightly and wipe clean. Finishing Apply a finish of choice if desired. In the shelf photographed, the face of Christ is stained to highlight this area, and the rest is left natural. Apply a light coat of shellac, sand with fine sandpaper, then apply a paste polish or paste wax for a nice finish. Hang the shelf with the brass frame picture hangers, and fill it with photographs, books or treasured knickknacks. Tip: you can also make this piece into a corner shelf by simply trimming 1/4" off of one side and making two quarter-round shelves-the upper shelf uses a 6" radius, the lower shelf a 6-3/8" radius. H Winter, 1998 |


