Creative Woodworks & Crafts-050-1998-winter, страница 17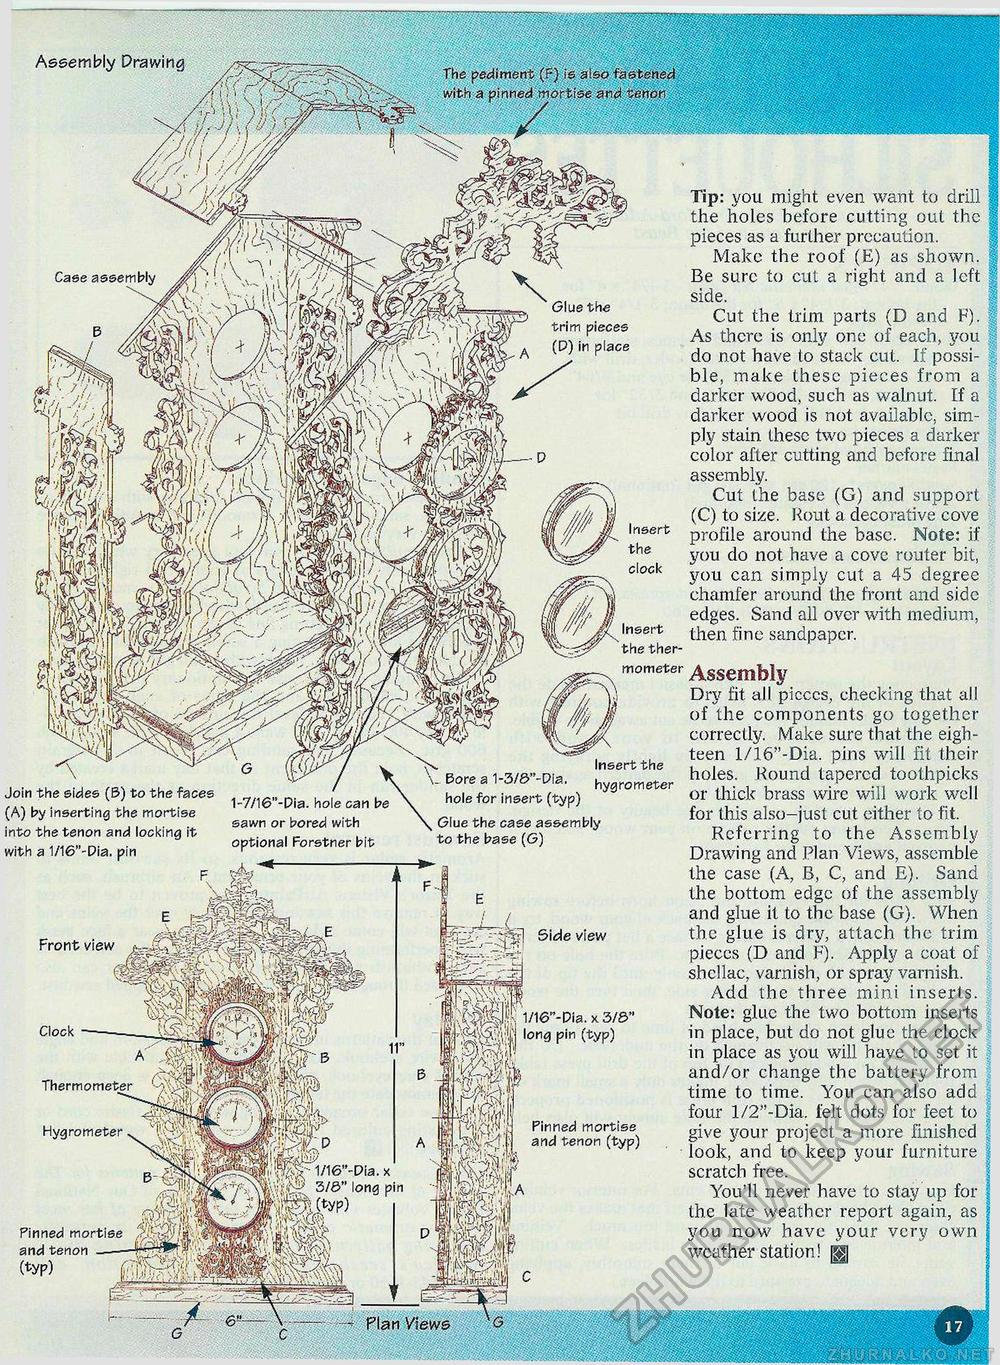
mMMpmgs llilli ■ JfMi The pediment (F) is al with a pinned mortise / Assembly Drawing Tip: you might even want to drill the holes before cutting out the pieces as a further precaution. Make the roof (E) as shown. Be sure to cut a right and a left side. Cut the trim parts (D and F). As there is only one of each, you do not have to stack cut. If possible, make these pieces from a darker wood, such as walnut. If a darker wood is not available, simply stain these two pieces a darker color after cutting and before final assembly. Cut the base (G) ancl support (C) to size. Rout a decorative cove profile around the base. Note: if you do not have a cove router bit, you can simply cut a 45 degree chamfer around the front and side edges. Sand all over with medium, then fine sandpaper. Assembly Dry fit all picccs, checking that all of the components go together correctly. Make sure that the eighteen 1/16"-Dia. pins will fit their holes. Round tapered toothpicks or thick brass wire will work well for this also-just cut either to fit. Referring to the Assembly Drawing and Plan Views, assemble the case (A, B, C, and E). Sand the bottom edge of the assembly and glue it to the base (G). When the glue is dry, attach the trim pieces (D and F). Apply a coat of shellac, varnish, or spray varnish. Add the three mini inserts. Note: glue the two bottom inserts in place, but do not glue the clock in place as you will have to set it and/or change the battery from time to time. You can also acid four l/2"-Dia. felt dots for feet to give your project a more finished look, and to keep your furniture scratch free. You'll never have to stay up for the late weather report again, as you now have your very own weatherstation! gg Case assembly Glue the trim pieces (D) in place Insert the clock Insert the -thermometer Insert the _ Borea1-3/0"-Dla. hygmmeter hole for insert (typ) Glue the case assembly to the base (<3) Join the sides (B) to the faces (A) by inserting the mortise into the tenon and locking it with a 1/16"-Dia. pin 1-7/16"-Pia. hole can be sawn or bored with optional Forstner bit 5itie view Front view Clock Thermometer Pinned mortise and tenon (typ) Hygrometer Pinned mortise ^ and tenon--- (typ) ife- Plan Views |


