Creative Woodworks & Crafts-059-1998-Fall, страница 24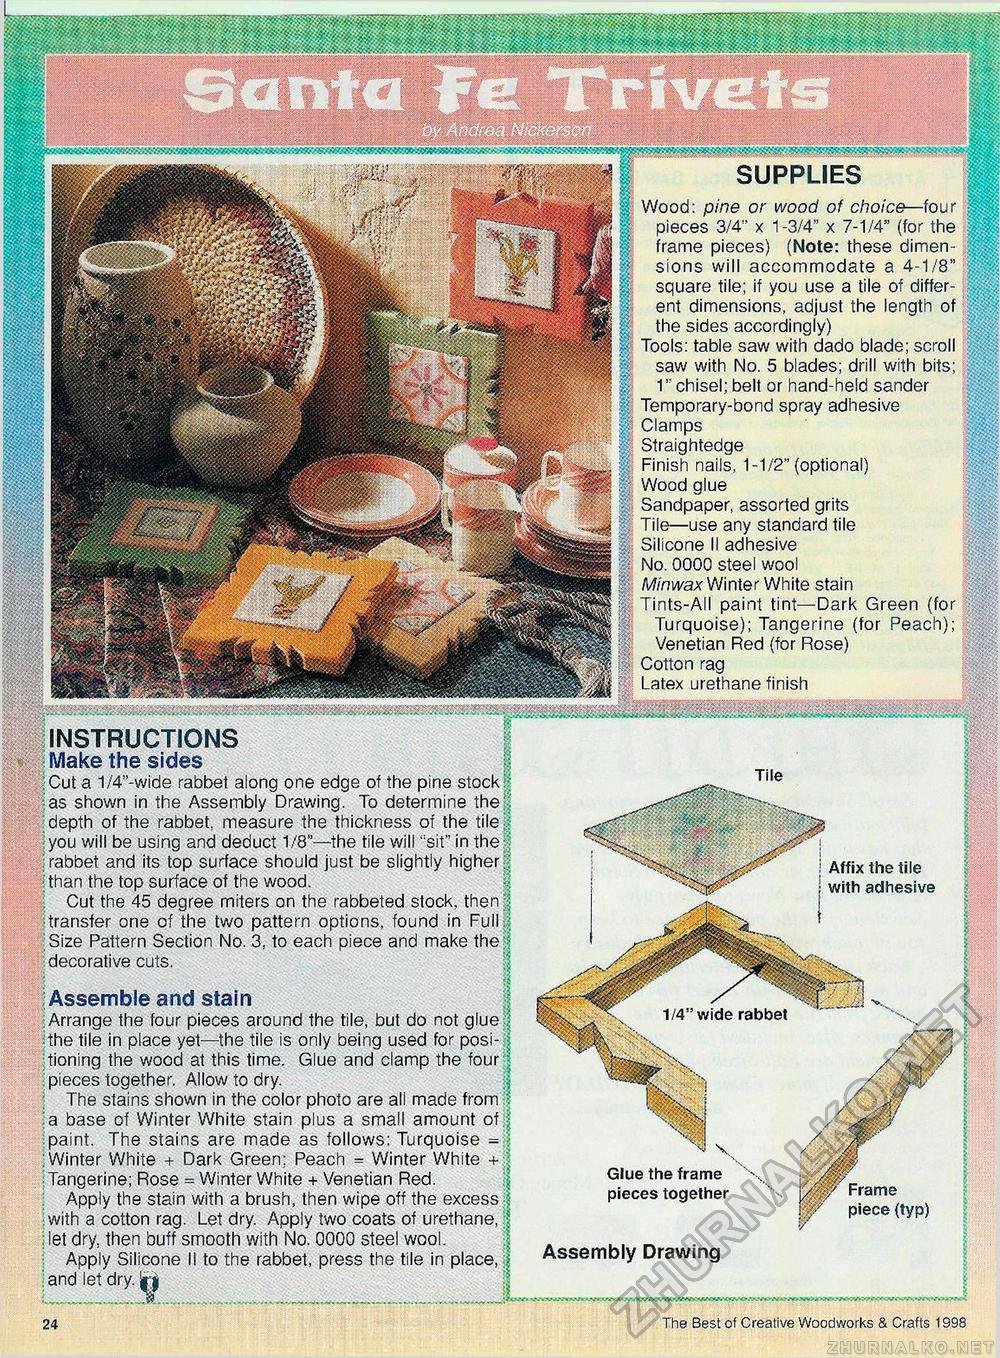
SUPPLIES Wood: pine or wood of choice—four pieces 3/4" x 1-3/4" x 7-1/4" (for the frame pieces) (Note: these dimensions will accommodate a 4-1/8" square tile; if you use a tile of different dimensions, adjust the length of the sides accordingly) Tools: table saw with dado blade; scroll saw with No. 5 blades; drill with bits; 1" chisel; belt or hand-held sander Temporary-bond spray adhesive Clamps Straightedge Finish nails, 1-1/2" (optional) Wood glue Sandpaper, assorted grits Tile—use any standard tile Silicone II adhesive No. 0000 steel wool Minwax Winter White stain Tints-All paint tint—Dark Green (for Turquoise); Tangerine (for Peach); Venetian Red (for Rose) Cotton rag Latex urethane finish INSTRUCTIONS Make the sides Cut a 1/4"-wide rabbet along one edge of the pine stock as shown in the Assembly Drawing. To determine the depth of the rabbet, measure the thickness of the tile you will be using and deduct 1/8"—the tile will "sit" in the rabbet and its top surface should just be slightly higher than the top surface of the wood. Cut the 45 degree miters on the rabbeted stock, then transfer one of the two pattern options, found in Full Size Pattern Section No. 3, to each piece and make the decorative cuts. Affix the tile with adhesive Assemble and stain Arrange the four pieces around the tile, but do not glue the tile in place yet—the tile is only being used for positioning the wood at this time. Glue and clamp the four pieces together. Allow to dry. The stains shown in the color photo are all made from a base of Winter White stain plus a small amount of paint. The stains are made as follows: Turquoise = Winter White + Dark Green; Peach = Winter White + Tangerine; Rose = Winter White + Venetian Red. Apply the stain with a brush, then wipe off the excess with a cotton rag. Let dry. Apply two coats of urethane, let dry, then buff smooth with No. 0000 steel wool. Apply Silicone II to the rabbet, press the tile in place, and let dry. jri 1/4" wide rabbet Glue the frame pieces together Frame piece (typ) Assembly Drawing The Best of Creative Woodworks & Crafts 1998 |


