Creative Woodworks & Crafts-059-1998-Fall, страница 50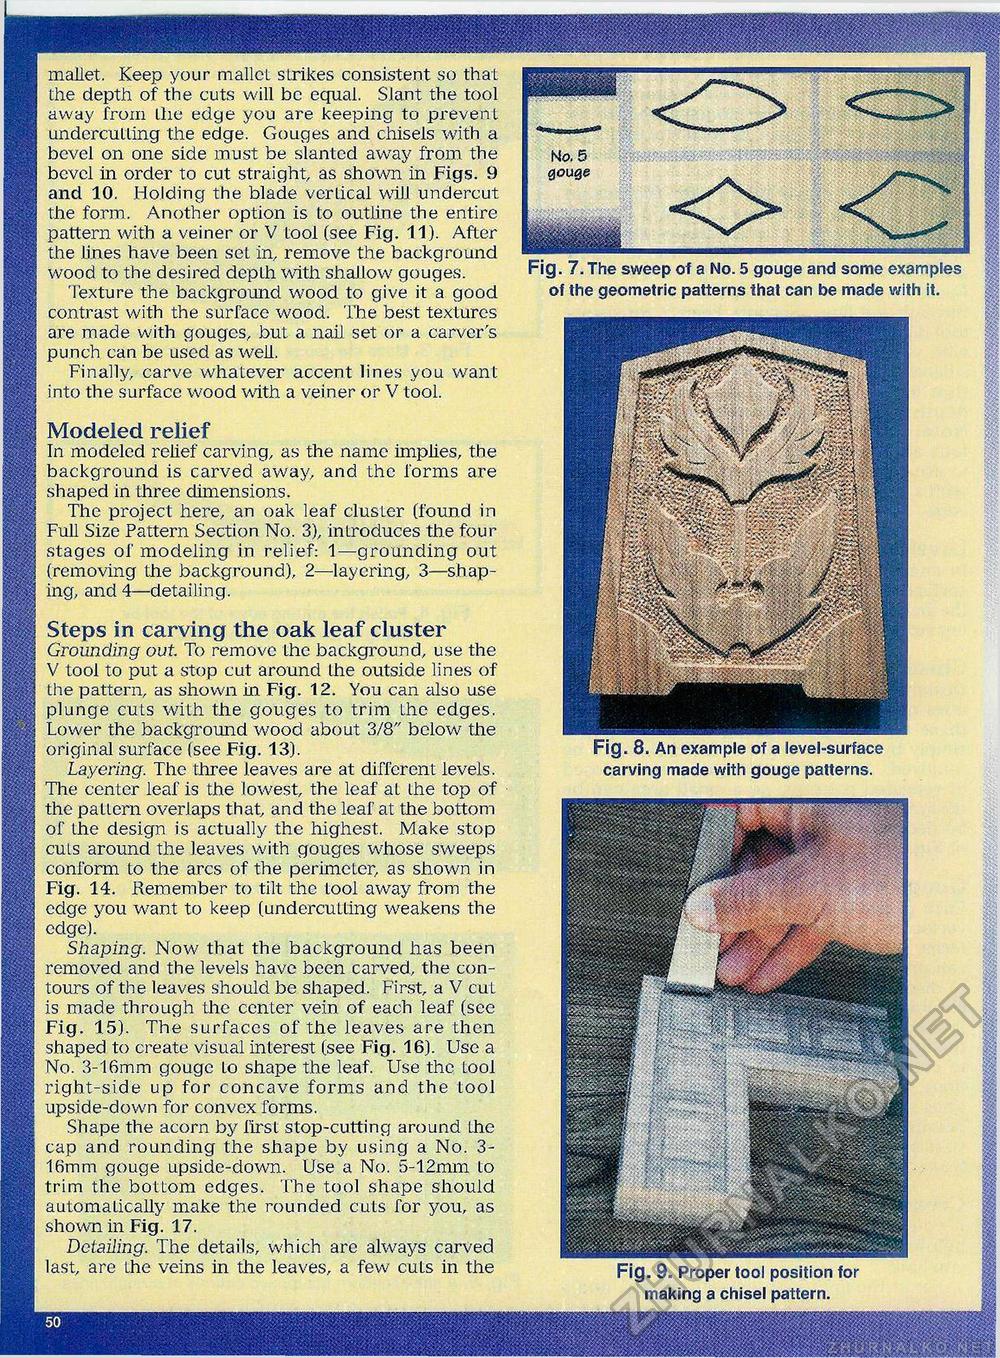
mallet. Keep your mallet slrikes consistent so that the depth of the cuts will be equal. Slant the tool away from Lhe edge you are keeping to prevent undercutting the edge. Gouges and chisels with a bevel on one side must be slanted away from the bevel in order to cut straight, as shown in Figs. 9 and 10. Holding the blade verLical will undercut the form. Another option is to outline the entire pattern with a veiner or V tool (see Fig. 11). After the lines have been set in, remove the background wood to the desired depLh with shallow gouges. Texture the background wood to give it a good contrast with the surface wood. The best textures are made with gouges, but a nail set or a carver's punch can be used as well. Finally, carve whatever accent lines you want into the surface wood with a veiner or V tool. Fig. 7. The sweep of a No. 5 gouge and some examples of the geometric patterns that can be made with it. Modeled relief In modeled relief carving, as the name implies, the background is carved away, and the forms are shaped in three dimensions. The project here, an oak leaf cluster (found in Full Size Pattern Section No. 3), introduces the four stages of modeling in relief: 1—grounding out (removing Lhe background), 2—layering, 3—shaping, and 4—detailing. Steps in carving the oak leaf cluster Grounding out. To remove the background, use the V tool to put a stop cut around Lhe outside lines of the pattern, as shown in Fig. 12. You can also use plunge cuts with the gouges to trim Lhe edges. Lower the background wood about 3/8" below the original surface (see Fig. 13). Layering. The three leaves are at different levels. The center leaf is the lowest, the leaf at the top of the pattern overlaps that, and the leaf at the bottom of Lhe design is actually the highest. Make stop cuLs around the leaves with gouges whose sweeps conform to the arcs of the perimeter, as shown in Fig. 14. Remember to tilt the tool away from the edge you want to keep (undercutting weakens the edge). Shaping. Now that the background has been removed and the levels have been carved, the contours of the leaves should be shaped. First, a V cuL is made through the center vein of each leaf (see Fig. 15). The surfaces of the leaves are then shaped to create visual interest (see Fig. 16). Use a No. 3-16mm gouge Lo shape the leaf. Use the Loot right-side up for concave forms and the tool upside-down for convex forms. Shape the acorn by first stop-cutting around Lhe cap and rounding the shape by using a No. 3-16mm gouge upside-down. Use a No. 5-12mm Lo trim the bottom edges. The tool shape should automatically make the rounded cuts for you, as shown in Fig. 17. Detailing. The details, which are always carved last, are Lhe veins in the leaves, a few cuts in the Fig. 8. An example of a level-surface carving made with gouge patterns. Fig. 9. Proper tool position for making a chisel pattern. |


