Creative Woodworks & crafts-103-2004-Holiday, страница 35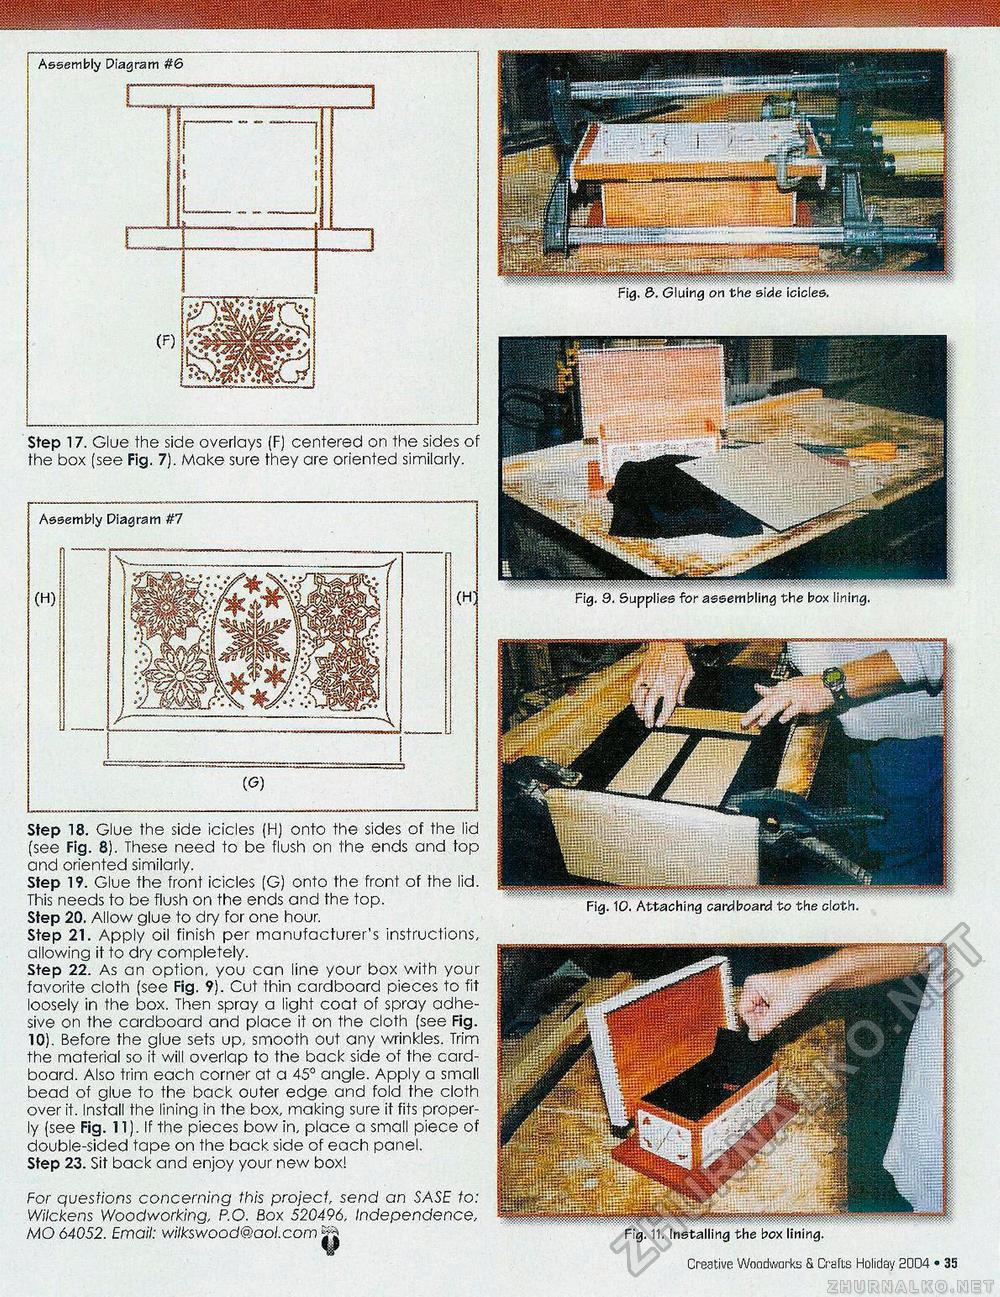
Creative Woodworks & Craft:; Holiday 2004 • 15 Assembly Diagram #6 Step 17. Glue the side overlays (F) centered on the sides of the box (see Fig. 7). Make sure they are oriented similarly. Step 18. Glue the side icicles (H) onto the sides of the lid (see Fig. 8). These need to be flush on the ends and top and oriented similarly. Step 19. Glue the front icicles (G) onto the front of the lid. This needs to be flush on the ends and the top. Step 20. Allow glue to dry for one hour. Step 21. Apply oil finish per manufacturer's instructions, allowing it to dry completely. Step 22. As an option, you can line your box with your favorite cloth (see Fig. 9). Cut thin cardboard pieces to fit loosely in the box. Then spray a light coat of spray adhesive on the cardboard and place it on the cloth (see Fig. 10). Before the glue sets up, smooth out any wrinkles. Trim the material so it will overlap to the back side of the cardboard. Also trim each corner at a 45° angle. Apply a small bead of glue to the back outer edge and fold the cloth over it. Install the lining in the box, making sure it fits properly (see Fig. 11). If the pieces bow in, place a small piece of double-sided tape on the back side of each panel. Step 23. Sit back and enjoy your new box! For questions concerning this project, send an SASE to: Wilckens Woodworking, P.O. Box 520496, Independence, MO 64052. Email: wilkswood@aol.com jjg* Assembly Diagram #7 Fig. 9. Supplies for assembling the box lining. Fig. 10. Attaching cardboard to the cloth. |


