Creative Woodworks & crafts-103-2004-Holiday, страница 63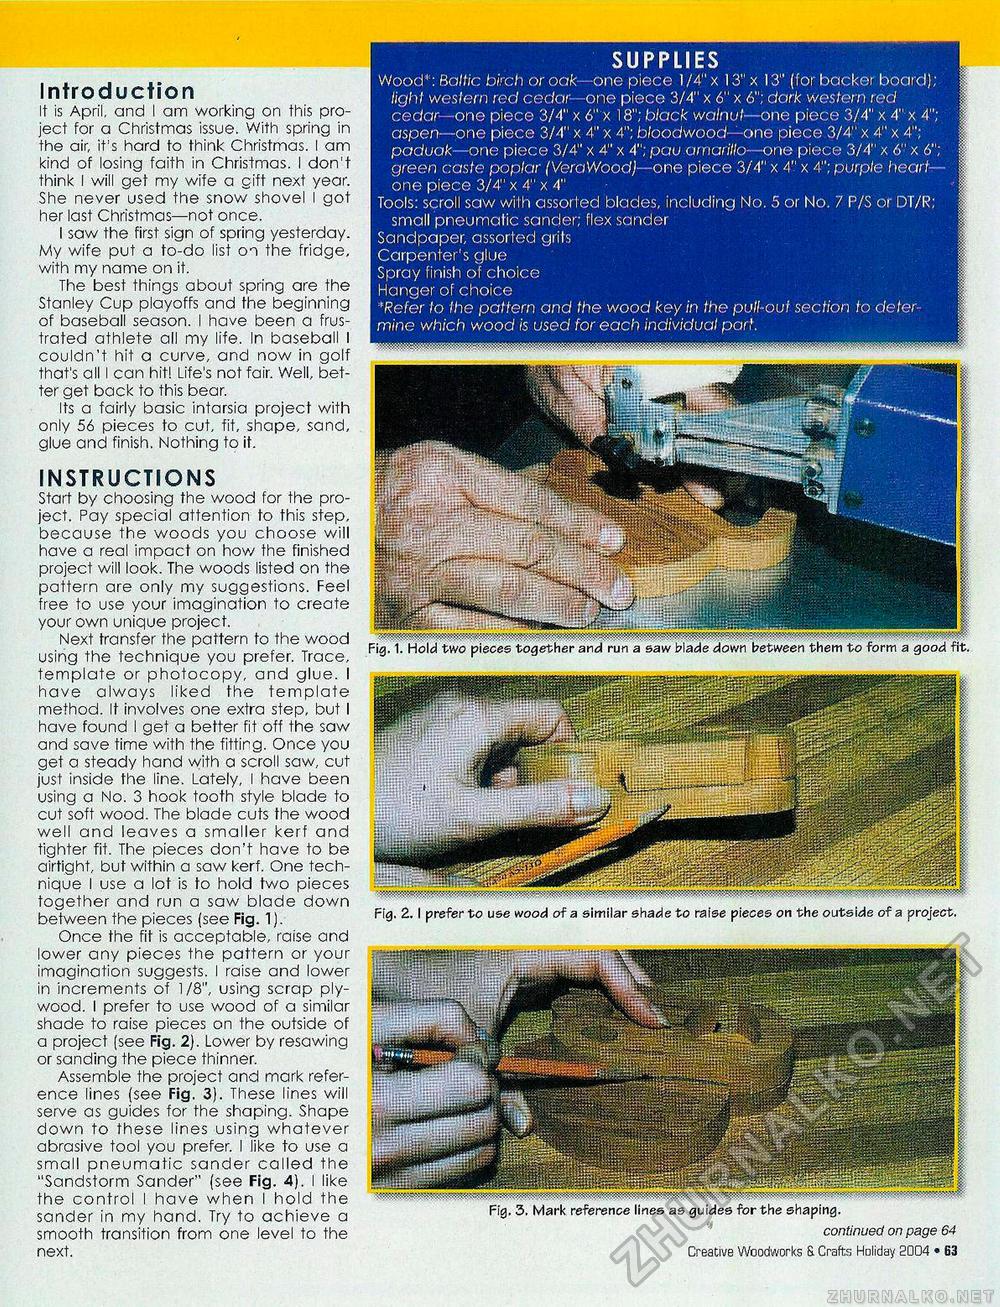
SUPPLIES Wood*: Baltic birch or oak—-one piece 1 /4" x 13" x 13" (for backer board); light western red cedar— one piece 3/4" x 6" x 6"; dork western red cedar- one piece 3/4" x 6" x 18"; black walnut—one piece 3/4" x 4" x 4"; aspen—one piece 3/4" x 4" x 4"; bloodwood—one piece 3/4" x 4" x 4"; paduak—one piece 3/4" x 4" x 4"; pau amarillo- -one piece 3/4" x 6" x 6"; green caste poplar (VeraWood)—one piece 3/4" x 4" x 4"; purple heart-one piece 3/4" x 4" x 4" Tools: scroll saw with assorted blades, including No. 5 or No. 7 P/S or DT/R; small pneumatic sander; flex sander Sandpaper, assorted grits Carpenter's glue Spray finish of choice Hanger of choice *Refer to the pattern and the wood key in the pull-out section to determine which wood is used for each individual part. Introduction It is April, and I am working on this project for a Christmas issue. With spring in the air, it's hard to think Christmas. I am kind of losing faith in Christmas. I don't think I will get my wife a gift next year. She never used the snow shovel l got her last Christmas—not once. I saw the first sign of spring yesterday. My wife put a to-do list on the fridge, with my name on it. The best things about spring are the Stanley Cup playoffs and the beginning of baseball season. I have been a frustrated athlete all my life. In baseball I couldn't hit a curve, and now in golf that's all I can hit! Life's not fair. Well better get back to this bear. Its a fairly basic intarsia project with only 56 pieces to cut, fit, shape, sand, glue and finish. Nothing to it. INSTRUCTIONS Start by choosing the wood for the project. Pay special attention to this step, because the woods you choose will have a real impact on how the finished project will look. The woods listed on the pattern are only my suggestions. Feel free to use your imagination to create your own unique project. Next transfer the pattern to the wood using the technique you prefer. Trace, template or photocopy, and glue. I have always liked the template method. It involves one extra step, but I have found I get a better fit off the saw and save time with the fittirg. Once you get a steady hand with a scroll saw, cut just inside the line. Lately, I have been using a No. 3 hook tooth style blade to cut soft wood. The blade cuts the wood well and leaves a smaller kerf and tighter fit. The pieces don't have to be airtight, but within a saw kerf. One technique I use a lot is to hold two pieces together and run a saw blade down between the pieces (see Fig. 1). Once the fit is acceptable, raise and lower any pieces the pattern or your imagination suggests. I raise and lower in increments of 1/8", using scrap plywood. I prefer to use wood of a similar shade to raise pieces on the outside of a project (see Fig. 2). Lower by resawing or sanding the piece thinner. Assemble the project and mark reference lines (see Fig. 3). These lines will serve as guides for the shaping. Shape down to these lines using whatever abrasive tool you prefer. I like to use a small pneumatic sander called the "Sandstorm Sander" (see Fig. 4). I like the control I have when I hold the sander in my hand. Try to achieve a smooth transition from one level to the next. Fig. 2.1 prefer to use wood of a similar shade to raise pieces on the outside of a project. continued on page 64 Creative Woodworks S. Crafts Holiday 2004 • 63 Fig. 1. Hold two pieces together and run a saw blade down between them to form a good fit. |


