Creative Woodworks & crafts-111-2005-Holiday, страница 40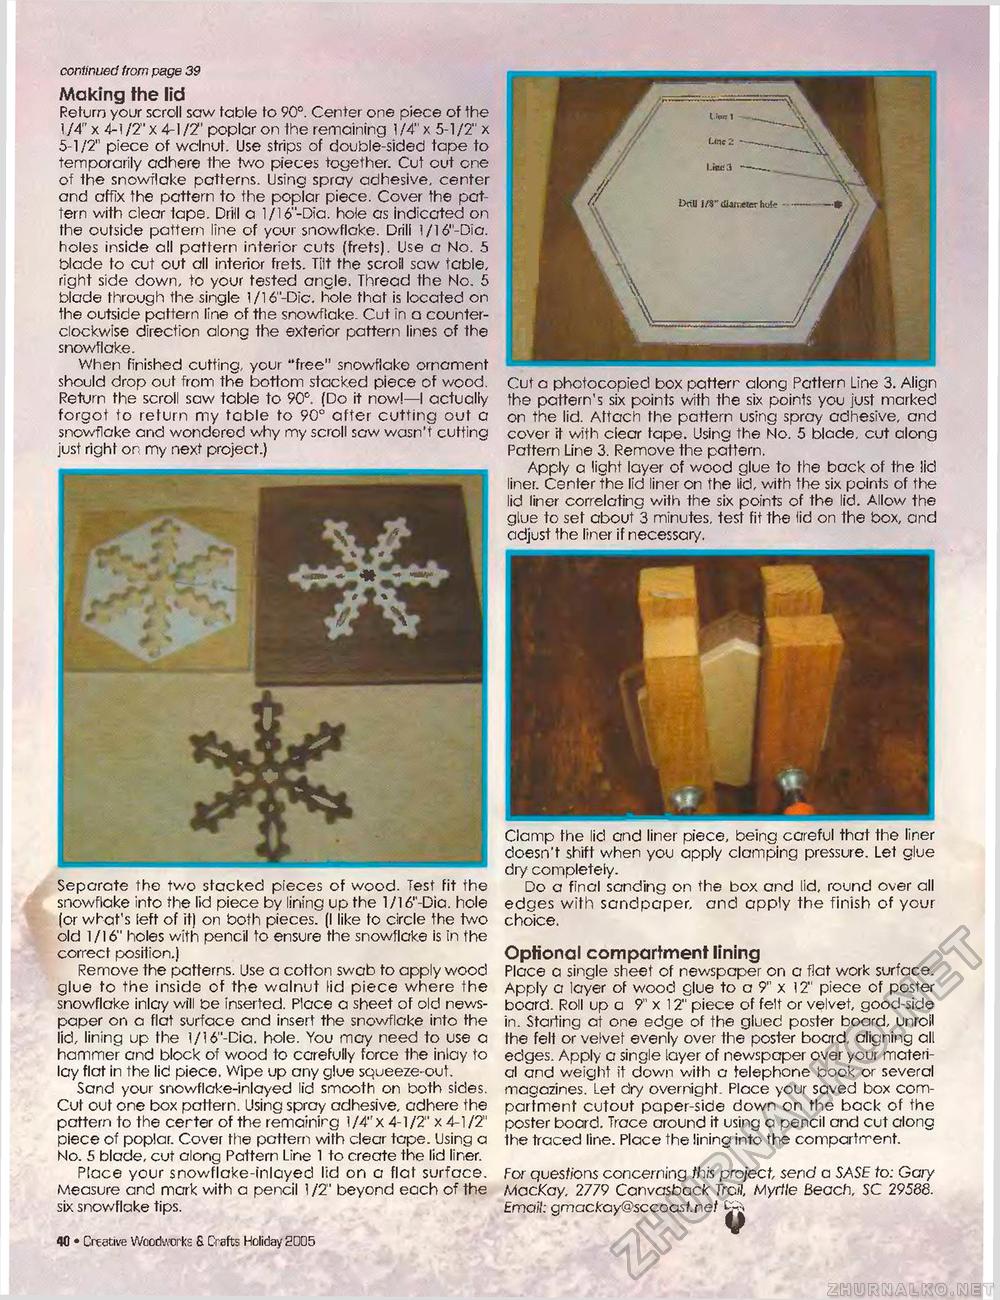
Cut a photocopied box pattern along Pattern Line 3. Align the pattern's six points with the six points you just marked on the lid. Attach the pattern using spray adhesive, and cover it with ciear tape. Using the No. 5 blade, cut along Pattern Line 3. Remove the pattern. Apply a light layer of wood glue to the back of the !id liner. Center the lid liner on the lid, with the six points of the lid liner correlating with the six points of the lid. Allow the glue to set about 3 minutes, test fit the lid on the box, and adjust the liner if necessary. Clamp the lid and liner piece, being careful that the liner doesn't shift when you apply clamping pressure. Let glue dry completely. Do a final sanding on the box and lid, round over all edges with sandpaper, and apply the finish of your choice. Optional compartment lining Place a single sheet of newspaper on a flat work surface. Apply a layer of wood glue to a 9" x 12" piece of poster board. Roll up a 9" x 12" piece of felt or velvet, good-side in. Starting at one edge of the glued poster board, unroll the felt or velvet evenly over the poster board, aligning all edges. Apply a single layer of newspaper over your material and weight it down with a telephone book or several magazines. Let dry overnight. Place your saved box compartment cutout paper-side down on the back of the poster board. Trace around it using a pencil and cut along the traced line. Place the lining into the compartment. For questions concerning this project send a SASE to: Gory MacKay. 27/9 Canvasback Trail, Myrtle Beach, SC 29588. Email: gmackay@scccast net Efc continued from page 39 Making the lid Return your scroll saw table to 90°. Center one piece of the 1/4" x 4-1/2" x 4-1/2" poplar on the remaining 1 /4" x 5-1/2" x 5-1/2" piece of wclnuf. Use strips of double-sided tape to temporarily adhere the two pieces together. Cut out one of the snowflake patterns. Using spray adhesive, center arid affix the pattern to the poplar piece. Cover the pattern with clear tape. Drill a 1/16"-Dia. hole as indicated on the outside pattern line of your snowflake. Drill 1/16"-Dia. holes inside all pattern interior cuts (frets). Use a No. 5 blade to cut out all interior frets. Tilt the scroll saw table, right side down, to your tested angle. Thread the No. 5 blade through the single l/16"-Dic. hole that is located on the outside pattern line of the snowflake. Cut in a counterclockwise direction along the exterior pattern lines of the snowflake. When finished cutting, your "free" snowflake ornament should drop out from the bottom stacked piece of wood. Return the scroll saw table to 90°. (Do it now!—I actually forgot to return my table to 90° after cutting out a snowflake and wondered why my scroll saw wasn't cutting just right on my next project.) Separate the two stacked pieces of wood. Test fit the snowflake into the lid piece by lining up the 1/16"-Dia. hole (or what's left of it) on both pieces. (I like to circle the two old 1/16" holes with pencil to ensure the snowflake is in the correct position.) Remove the patterns. Use a cotton swab to apply wood glue to the inside of the walnut lid piece where the snowflake inlay will be inserted. Place a sheet of old newspaper on a flat surface and insert the snowflake into the lid, lining up the 1/16"-Cio. hole. You may need to use a hammer and block of wood to carefully force the inlay to lay flat in the lid piece. Wipe up any glue squeeze-out. Sand your snowflake-inlayed lid smooth on both sides. Cut out one box pattern. Using spray adhesive, adhere the pattern to the center of the remainirg 1/4" x 4-1/2" x 4-1/2" piece of poplar. Cover the pattern with clear tape. Using a No. 5 blade, cut along Pattern Line 1 to create the lid liner. Place your snowflake-inlayed lid on a flat surface. Measure and mark with a pencil 1 /2" beyond each of the six snowflake tips. i flfl • Creative Woodworks & Crafts Holiday S005 |


