Creative Woodworks & crafts-125-2007-Holiday, страница 68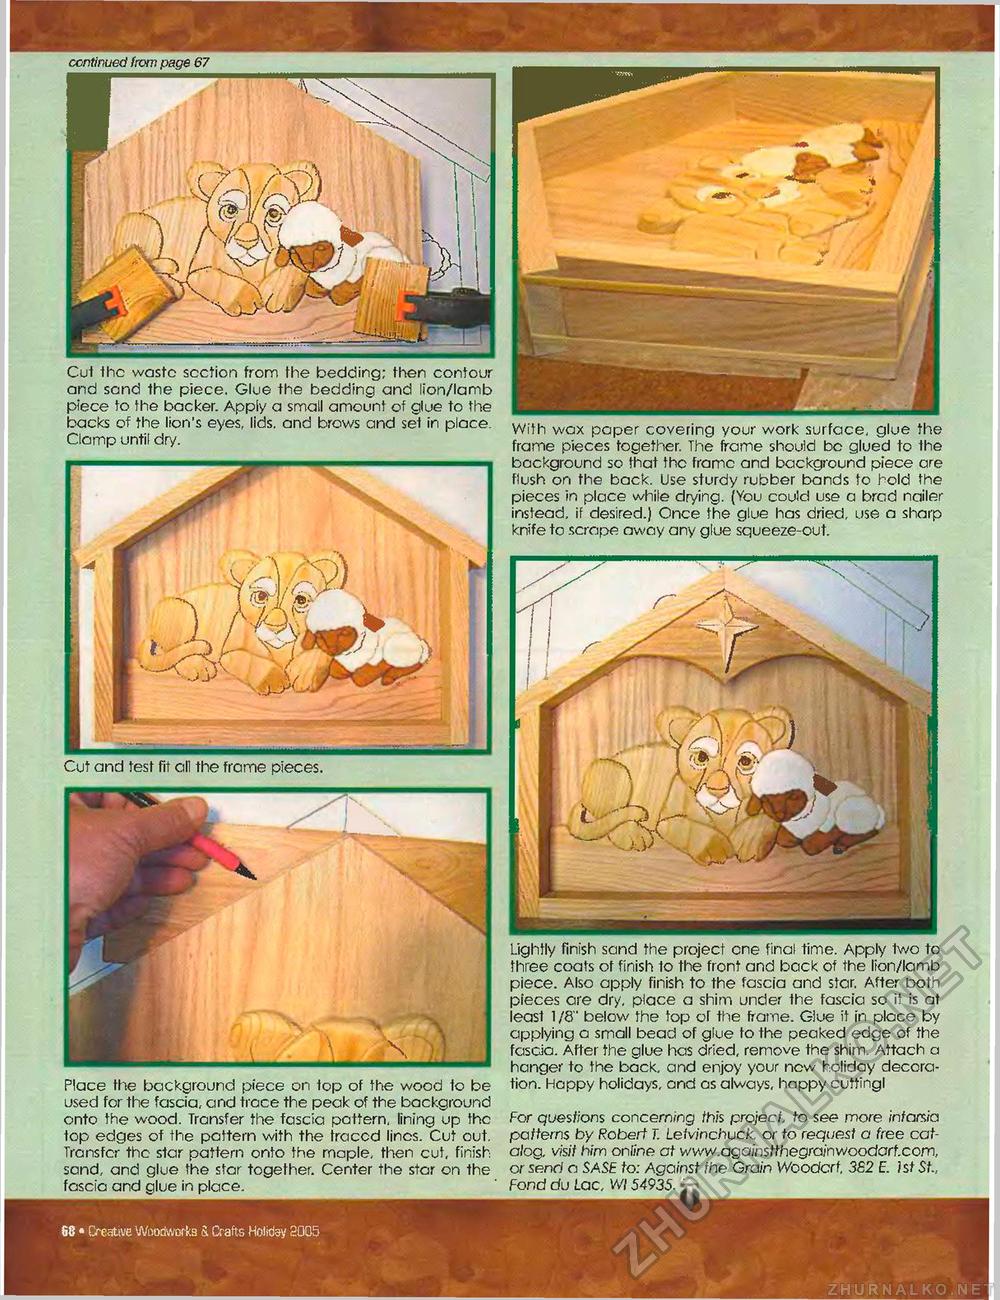
> Cut the waste scction from the bedding; then contour and sond the piece. Glue the bedding and lion/lamb piece to the backer. Apply a small amount of glue to the backs of the lion's eyes, lids, and brows and set in place. Clamp until dry. Cut and test fit all the frame pieces. N. With wax paper covering your work surface, glue the frame pieces together. The frame should be glued to the background so that the frame and background piece are flush on the back. Use sturdy rubber bands to hold the pieces in place while drying. (You could use a brad nailer instead, if desired.) Once the glue has dried, use a sharp knife to scrape away any glue squeeze-out. Place the background piece on 1op of the wood to be used for the fascia, and trace the peak of the background onto the wood. Transfer the fascia pattern, lining up the fop edges of the pattern with the traccd lines. Cut out. Transfer the star pattern onto the maple, then cut, finish sand, and glue the star together. Center the star on the fascia and glue in place. Lightly finish sand the project one final time. Apply two to three coats of finish to the front and back of the lion/lamb piece. Also apply finish to the fascia and star. After Doth pieces are dry, place a shim under the fascia so it is at leasl 1 /8" below the top of the frame. Glue it in place by applying a small bead of glue to the peaked edge of the fascia. After the glue has dried, remove the shim. Attach a hanger to the back, and enjoy your now holiday decoration. Hoppy holidays, and as always, happy cuttingl For questions concerning this project to see more inforeia patterns by Robert T. Letvinchuck, or to request a free catalog, visit him online at www.againstthegrainwoodarf.com, or send a SASE to: Against the Grain Woodcrt. 3S2 E. 1st St., Fond du Lac, Wl 54935. — 68 • Creative Woodworks & Crafts Holiday 3005 continued from page 67 |


