Popular Woodworking 2000-01 № 112, страница 45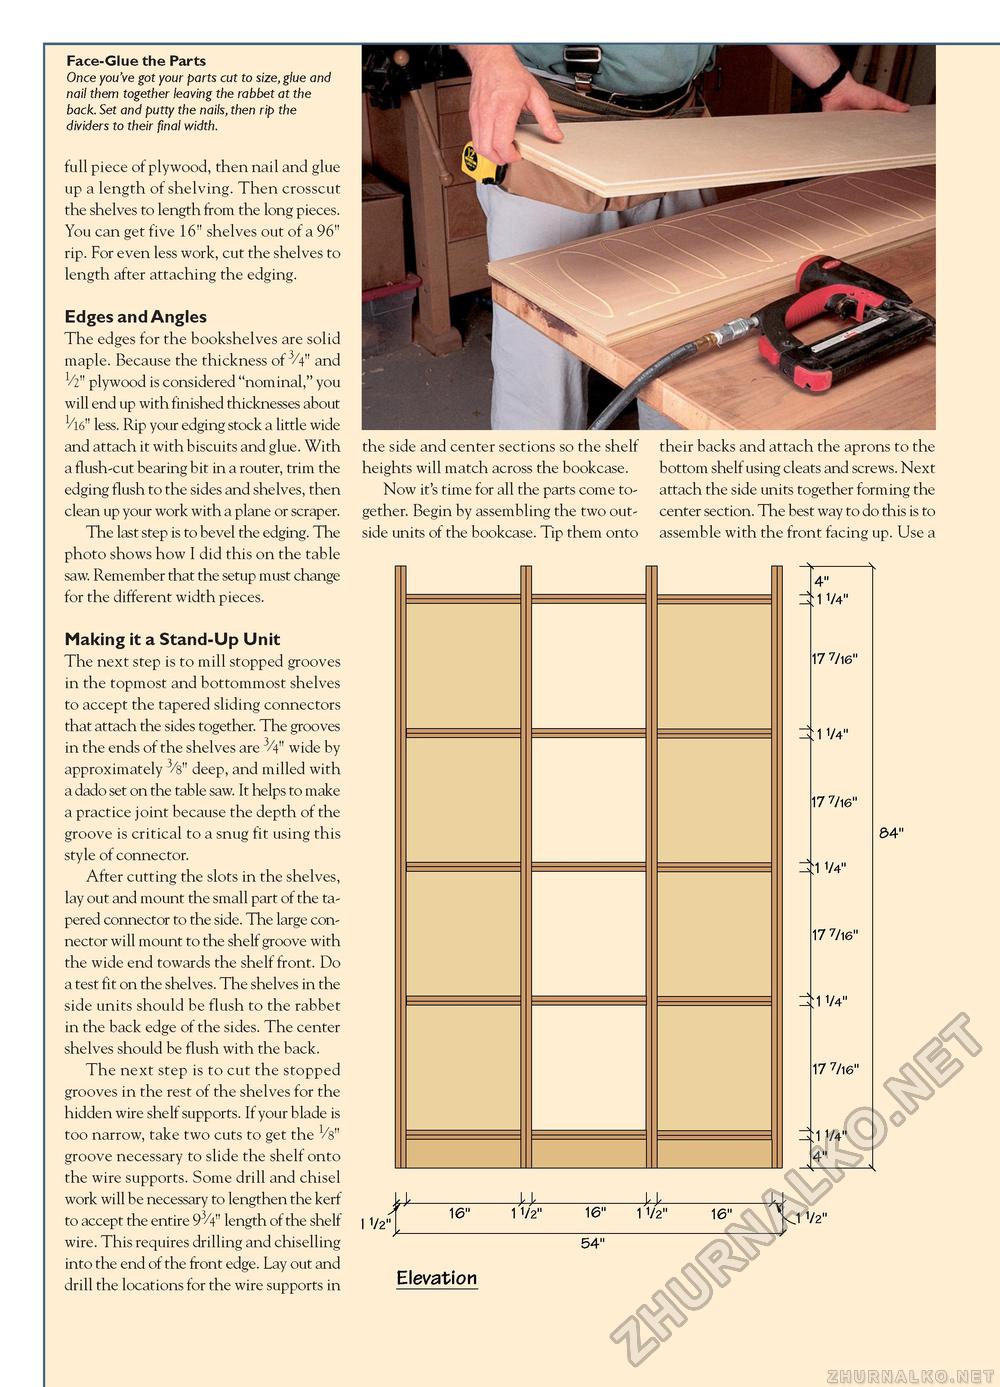
Face-Glue the Parts Once you've got your parts cut to size, glue and nail them together leaving the rabbet at the back. Set and putty the nails, then rip the dividers to their final width. full piece of plywood, then nail and glue up a length of shelving. Then crosscut the shelves to length from the long pieces. You can get five 16" shelves out of a 96" rip. For even less work, cut the shelves to length after attaching the edging. Edges and Angles The edges for the bookshelves are solid maple. Because the thickness of 3/4" and 1/2" plywood is considered "nominal," you will end up with finished thicknesses about 1/16" less. Rip your edging stock a little wide and attach it with biscuits and glue. With a flush-cut bearing bit in a router, trim the edging flush to the sides and shelves, then clean up your work with a plane or scraper. The last step is to bevel the edging. The photo shows how I did this on the table saw. Remember that the setup must change for the different width pieces. Making it a Stand-Up Unit The next step is to mill stopped grooves in the topmost and bottommost shelves to accept the tapered sliding connectors that attach the sides together. The grooves in the ends of the shelves are 3/4" wide by approximately 3/s" deep, and milled with a dado set on the table saw. It helps to make a practice joint because the depth of the groove is critical to a snug fit using this style of connector. After cutting the slots in the shelves, lay out and mount the small part of the tapered connector to the side. The large connector will mount to the shelf groove with the wide end towards the shelf front. Do a test fit on the shelves. The shelves in the side units should be flush to the rabbet in the back edge of the sides. The center shelves should be flush with the back. The next step is to cut the stopped grooves in the rest of the shelves for the hidden wire shelf supports. If your blade is too narrow, take two cuts to get the Vs" groove necessary to slide the shelf onto the wire supports. Some drill and chisel work will be necessary to lengthen the kerf to accept the entire 93/4" length of the shelf wire. This requires drilling and chiselling into the end of the front edge. Lay out and drill the locations for the wire supports in the side and center sections so the shelf heights will match across the bookcase. Now it's time for all the parts come together. Begin by assembling the two outside units of the bookcase. Tip them onto their backs and attach the aprons to the bottom shelf using cleats and screws. Next attach the side units together forming the center section. The best way to do this is to assemble with the front facing up. Use a 4" ■ 1 1/4" 17 7/i6" 1 1/4" 17 7/16" 1 1/4" 84" 17 7/16" •1 1/4" 17 7/16" ;1 1/4" 4"
vj 1/2" vj 1/2" 54" Elevation |


