Popular Woodworking 2000-01 № 112, страница 42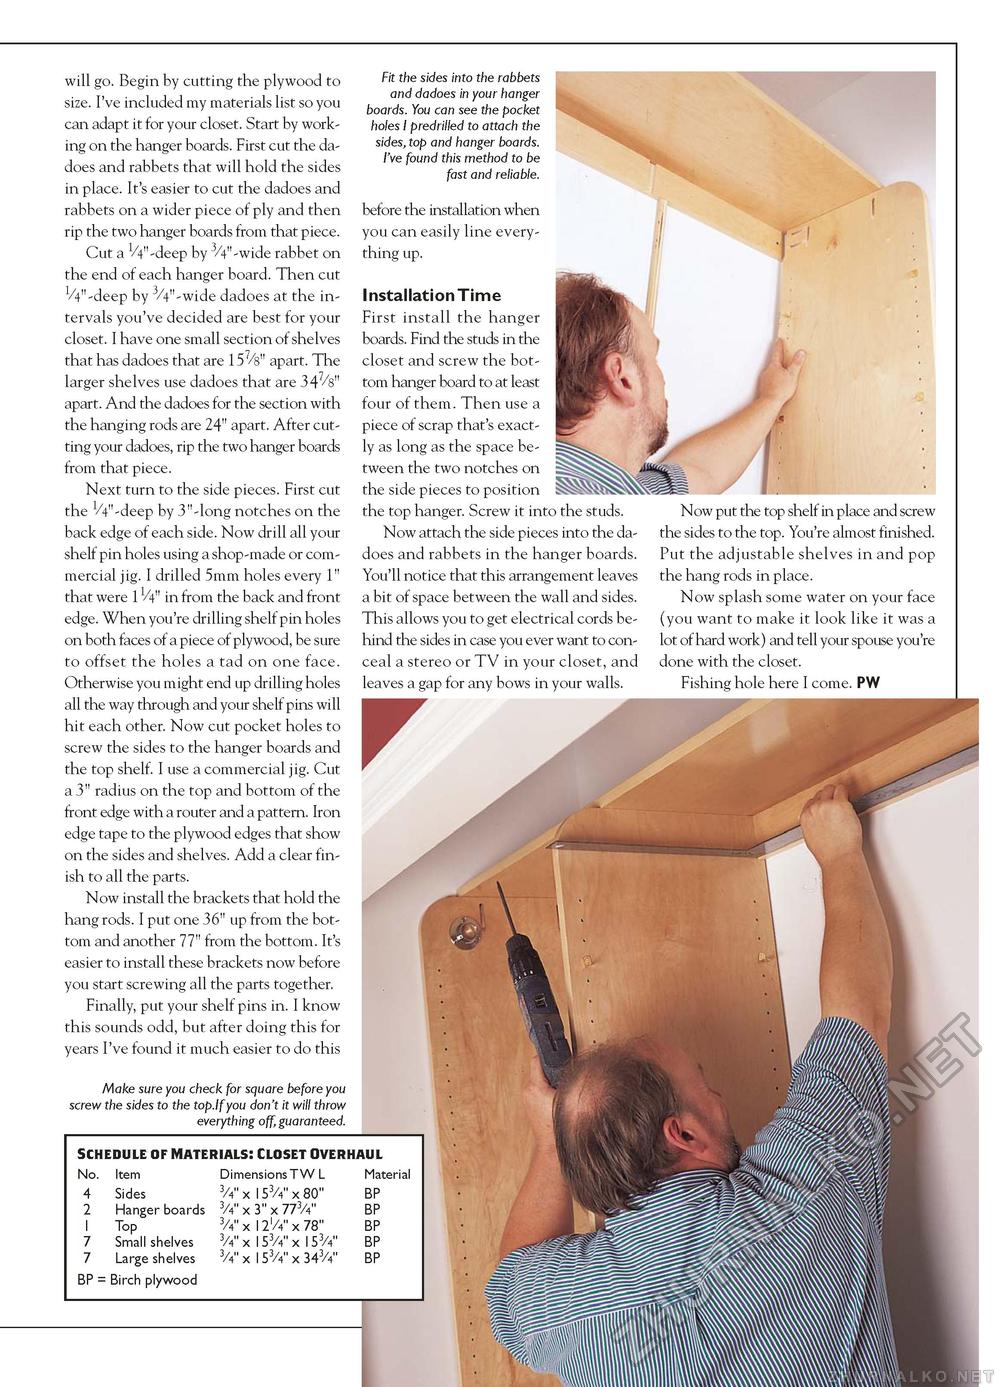
will go. Begin by cutting the plywood to size. I've included my materials list so you can adapt it for your closet. Start by working on the hanger boards. First cut the dadoes and rabbets that will hold the sides in place. It's easier to cut the dadoes and rabbets on a wider piece of ply and then rip the two hanger boards from that piece. Cut a 1/4"-deep by 3/4" -wide rabbet on the end of each hanger board. Then cut V4"-deep by 3/4" -wide dadoes at the intervals you've decided are best for your closet. I have one small section of shelves that has dadoes that are 157/s" apart. The larger shelves use dadoes that are 347/b" apart. And the dadoes for the section with the hanging rods are 24" apart. After cutting your dadoes, rip the two hanger boards from that piece. Next turn to the side pieces. First cut the VV'-deep by 3"-long notches on the back edge of each side. Now drill all your shelf pin holes using a shop-made or commercial jig. I drilled 5mm holes every 1" that were 1V4" in from the back and front edge. When you're drilling shelf pin holes on both faces of a piece of plywood, be sure to offset the holes a tad on one face. Otherwise you might end up drilling holes all the way through and your shelf pins will hit each other. Now cut pocket holes to screw the sides to the hanger boards and the top shelf. I use a commercial jig. Cut a 3" radius on the top and bottom of the front edge with a router and a pattern. Iron edge tape to the plywood edges that show on the sides and shelves. Add a clear finish to all the parts. Now install the brackets that hold the hang rods. I put one 36" up from the bottom and another 77" from the bottom. It's easier to install these brackets now before you start screwing all the parts together. Finally, put your shelf pins in. I know this sounds odd, but after doing this for years I've found it much easier to do this Make sure you check for square before you screw the sides to the top.If you don't it will throw everything off, guaranteed. Fit the sides into the rabbets and dadoes in your hanger boards. You can see the pocket holes I predrilled to attach the sides, top and hanger boards. I've found this method to be fast and reliable. before the installation when you can easily line everything up. Installation Time First install the hanger boards. Find the studs in the closet and screw the bottom hanger board to at least four of them. Then use a piece of scrap that's exactly as long as the space between the two notches on the side pieces to position the top hanger. Screw it into the studs. Now attach the side pieces into the dadoes and rabbets in the hanger boards. You'll notice that this arrangement leaves a bit of space between the wall and sides. This allows you to get electrical cords behind the sides in case you ever want to conceal a stereo or TV in your closet, and leaves a gap for any bows in your walls. Now put the top shelf in place and screw the sides to the top. You're almost finished. Put the adjustable shelves in and pop the hang rods in place. Now splash some water on your face (you want to make it look like it was a lot of hard work) and tell your spouse you're done with the closet. Fishing hole here I come. PW
|
||||||||||||||||||||||||||||||||


