Popular Woodworking 2000-02 № 113, страница 43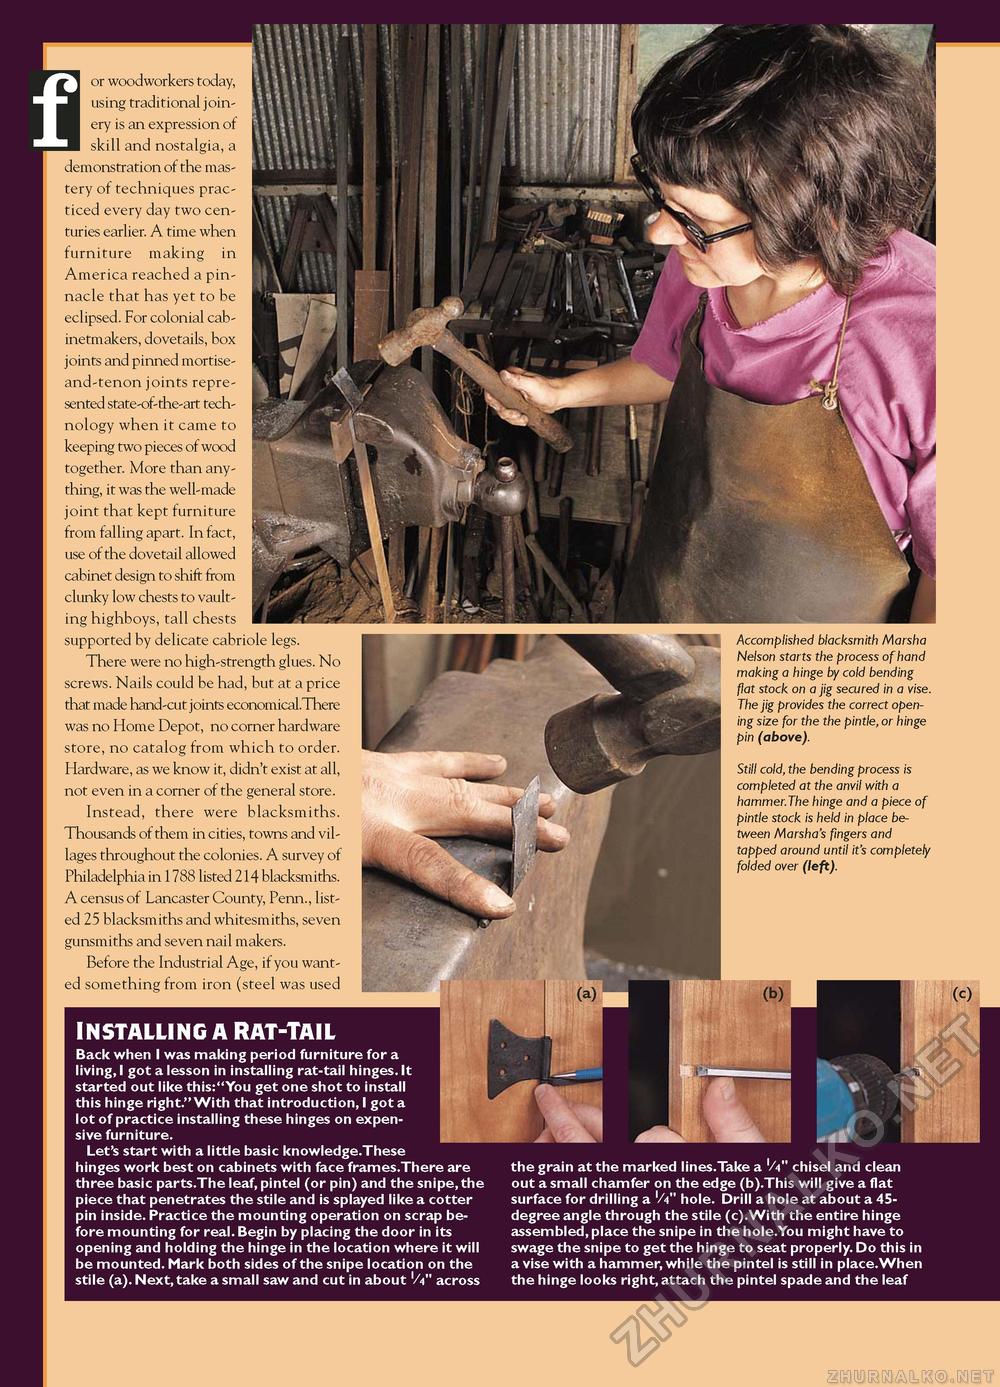
or woodworkers today, using traditional joinery is an expression of skill and nostalgia, a demonstration of the mastery of techniques practiced every day two centuries earlier. A time when furniture making in America reached a pinnacle that has yet to be eclipsed. For colonial cabinetmakers, dovetails, box joints and pinned mortise-and-tenon joints represented state-of-the-art technology when it came to keeping two pieces of wood together. More than anything, it was the well-made joint that kept furniture from falling apart. In fact, use of the dovetail allowed cabinet design to shift from clunky low chests to vaulting highboys, tall chests supported by delicate cabriole legs. There were no high-strength glues. No screws. Nails could be had, but at a price that made hand-cut joints economical.There was no Home Depot, no corner hardware store, no catalog from which to order. Hardware, as we know it, didn't exist at all, not even in a corner of the general store. Instead, there were blacksmiths. Thousands of them in cities, towns and villages throughout the colonies. A survey of Philadelphia in 1788 listed 214 blacksmiths. A census of Lancaster County, Penn., listed 25 blacksmiths and whitesmiths, seven gunsmiths and seven nail makers. Before the Industrial Age, if you wanted something from iron (steel was used installing a rat-tail Back when I was making period furniture for a living, I got a lesson in installing rat-tail hinges. It started out like this:"You get one shot to install this hinge right." With that introduction, I got a lot of practice installing these hinges on expensive furniture. Let's start with a little basic knowledge.These hinges work best on cabinets with face frames.There are three basic parts.The leaf, pintel (or pin) and the snipe, the piece that penetrates the stile and is splayed like a cotter pin inside. Practice the mounting operation on scrap before mounting for real. Begin by placing the door in its opening and holding the hinge in the location where it will be mounted. Mark both sides of the snipe location on the stile (a). Next,take a small saw and cut in about '/4" across Accomplished blacksmith Marsha Nelson starts the process of hand making a hinge by cold bending flat stock on a jig secured in a vise. The jig provides the correct opening size for the the pintle, or hinge pin (above). Still cold, the bending process is completed at the anvil with a hammer.The hinge and a piece of pintle stock is held in place between Marsha's fingers and tapped around until it's completely folded over (left).
the grain at the marked lines.Take a '/4" chisel and clean out a small chamfer on the edge (b).This will give a flat surface for drilling a '/V hole. Drill a hole at about a 45-degree angle through the stile (c).With the entire hinge assembled,place the snipe in the hole.You might have to swage the snipe to get the hinge to seat properly. Do this in a vise with a hammer, while the pintel is still in place.When the hinge looks right, attach the pintel spade and the leaf |
||||||||||||||||||||||||||||||||


