Popular Woodworking 2000-04 № 114, страница 53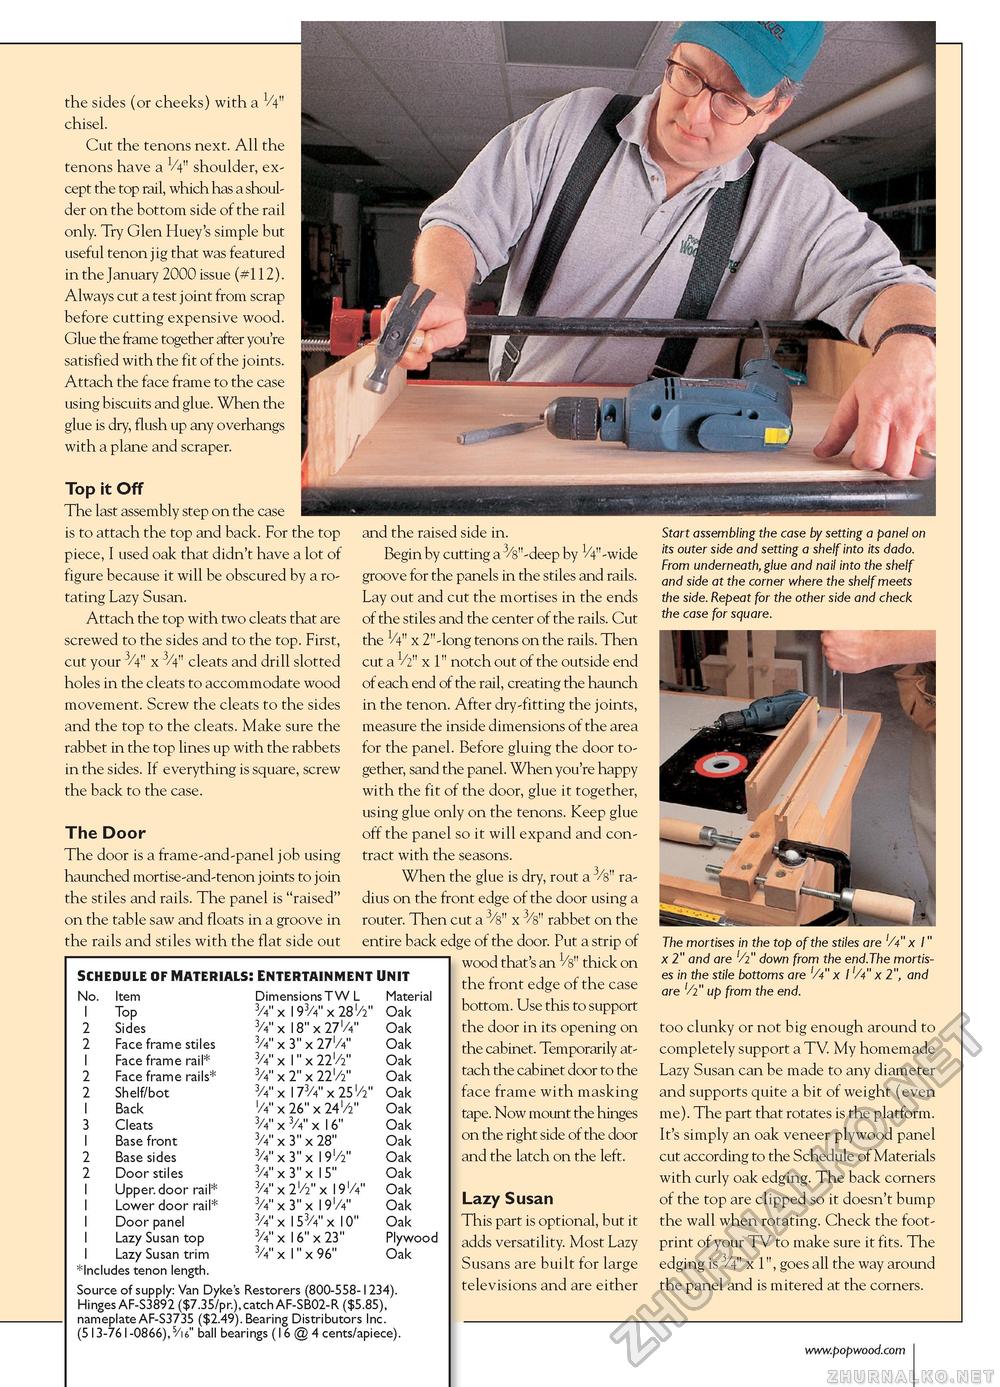
the sides (or cheeks) with a V4" chisel. Cut the tenons next. All the tenons have a V4" shoulder, except the top rail, which has a shoulder on the bottom side of the rail only. Try Glen Huey's simple but useful tenon jig that was featured in the January 2000 issue (#112). Always cut a test joint from scrap before cutting expensive wood. Glue the frame together after you're satisfied with the fit of the joints. Attach the face frame to the case using biscuits and glue. When the glue is dry, flush up any overhangs with a plane and scraper. Top it Off The last assembly step on the case is to attach the top and back. For the top piece, I used oak that didn't have a lot of figure because it will be obscured by a rotating Lazy Susan. Attach the top with two cleats that are screwed to the sides and to the top. First, cut your 3/4" x 3/4" cleats and drill slotted holes in the cleats to accommodate wood movement. Screw the cleats to the sides and the top to the cleats. Make sure the rabbet in the top lines up with the rabbets in the sides. If everything is square, screw the back to the case. The Door The door is a frame-and-panel job using haunched mortise-and-tenon joints to join the stiles and rails. The panel is "raised" on the table saw and floats in a groove in the rails and stiles with the flat side out SCHEDULE OF MATERIALS! ENTERTAINMENT UNIT SCHEDULE OF MATERIALS! ENTERTAINMENT UNIT
*Includes tenon length. Source of supply: Van Dyke's Restorers (800-558-1234). Hinges AF-S3892 ($7.35/pr.), catch AF-SB02-R ($5.85), nameplate AF-S3735 ($2.49). Bearing Distributors Inc. (513-761-0866), 5/i6" ball bearings (16 @ 4 cents/apiece). *Includes tenon length. Source of supply: Van Dyke's Restorers (800-558-1234). Hinges AF-S3892 ($7.35/pr.), catch AF-SB02-R ($5.85), nameplate AF-S3735 ($2.49). Bearing Distributors Inc. (513-761-0866), 5/i6" ball bearings (16 @ 4 cents/apiece). and the raised side in. Begin by cutting a 3/s"-deep by H" -wide groove for the panels in the stiles and rails. Lay out and cut the mortises in the ends of the stiles and the center of the rails. Cut the 1/4" x 2"-long tenons on the rails. Then cut a V2" x 1" notch out of the outside end of each end of the rail, creating the haunch in the tenon. After dry-fitting the joints, measure the inside dimensions of the area for the panel. Before gluing the door together, sand the panel. When you're happy with the fit of the door, glue it together, using glue only on the tenons. Keep glue off the panel so it will expand and contract with the seasons. When the glue is dry, rout a 3/s" radius on the front edge of the door using a router. Then cut a 3/8" x 3/s" rabbet on the entire back edge of the door. Put a strip of wood that's an Vs" thick on the front edge of the case bottom. Use this to support the door in its opening on the cabinet. Temporarily attach the cabinet door to the face frame with masking tape. Now mount the hinges on the right side of the door and the latch on the left. Lazy Susan This part is optional, but it adds versatility. Most Lazy Susans are built for large televisions and are either Start assembling the case by setting a panel on its outer side and setting a shelf into its dado. From underneath, glue and nail into the shelf and side at the corner where the shelf meets the side. Repeat for the other side and check the case for square. The mortises in the top of the stiles are 'A" x 1" x 2" and are 'A" down from the end.The mortises in the stile bottoms are 'A" x 1'A" x 2", and are '/2" up from the end. too clunky or not big enough around to completely support a TV. My homemade Lazy Susan can be made to any diameter and supports quite a bit of weight (even me). The part that rotates is the platform. It's simply an oak veneer plywood panel cut according to the Schedule of Materials with curly oak edging. The back corners of the top are clipped so it doesn't bump the wall when rotating. Check the footprint of your TV to make sure it fits. The edging is 3/4" x 1", goes all the way around the panel and is mitered at the corners. |
|||||||||||||||||||||||||||||||||||||||||||||||||||||||||||||||||||||||||||||||||||||


