Popular Woodworking 2000-12 № 119, страница 30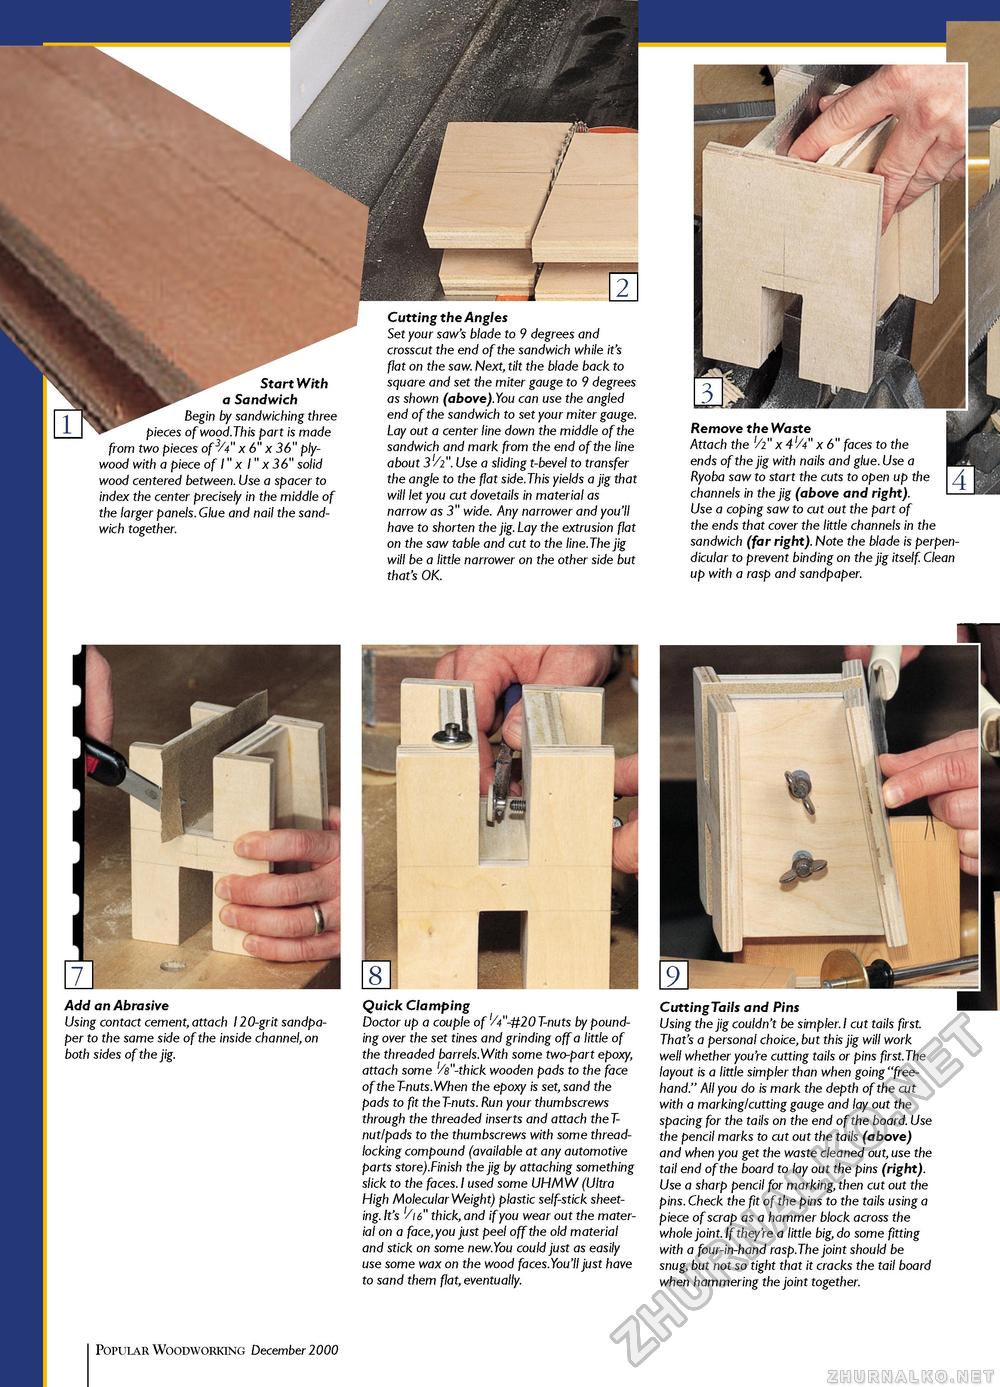
Start With a Sandwich Begin by sandwiching three pieces of wood.This part is made from two pieces of 3A" x 6" x 36" plywood with a piece of 1" x 1" x 36" solid wood centered between. Use a spacer to index the center precisely in the middle of the larger panels. Glue and nail the sandwich together. Cutting the Angles Set your saw's blade to 9 degrees and crosscut the end of the sandwich while it's flat on the saw. Next, tilt the blade back to square and set the miter gauge to 9 degrees as shown (above).You can use the angled end of the sandwich to set your miter gauge. Lay out a center line down the middle of the sandwich and mark from the end of the line about 3'/i". Use a sliding t-bevel to transfer the angle to the flat side.This yields a jig that will let you cut dovetails in material as narrow as 3" wide. Any narrower and you'll have to shorten the jig. Lay the extrusion flat on the saw table and cut to the line.The jig will be a little narrower on the other side but that's OK. Remove the Waste Attach the 'A" x 4'A" x 6" faces to the ends of the jig with nails and glue.Use a Ryoba saw to start the cuts to open up the channels in the jig (above and right). Use a coping saw to cut out the part of the ends that cover the little channels in the sandwich (far right). Note the blade is perpendicular to prevent binding on the jig itself. Clean up with a rasp and sandpaper. Add an Abrasive Using contact cement, attach 120-grit sandpaper to the same side of the inside channel, on both sides of the jig. Quick Clamping Doctor up a couple of'A"-#20 T-nuts by pounding over the set tines and grinding off a little of the threaded barrels.With some two-part epoxy, attach some 'A"-thick wooden pads to the face of the T-nuts.When the epoxy is set, sand the pads to fit the T-nuts. Run your thumbscrews through the threaded inserts and attach the T-nut/pads to the thumbscrews with some thread-locking compound (available at any automotive parts store).Finish the jig by attaching something slick to the faces. I used some UHMW (Ultra High Molecular Weight) plastic self-stick sheeting. It's '/16" thick, and if you wear out the material on a face,you just peel off the old material and stick on some new.You could just as easily use some wax on the wood faces.You'll just have to sand them flat, eventually. Cutting Tails and Pins Using the jig couldn't be simpler. I cut tails first. That's a personal choice, but this jig will work well whether you're cutting tails or pins first.The layout is a little simpler than when going "freehand." All you do is mark the depth of the cut with a marking/cutting gauge and lay out the spacing for the tails on the end of the board. Use the pencil marks to cut out the tails (above) and when you get the waste cleaned out, use the tail end of the board to lay out the pins (right). Use a sharp pencil for marking, then cut out the pins. Check the fit of the pins to the tails using a piece of scrap as a hammer block across the whole joint. If they're a little big, do some fitting with a four-in-hand rasp.The joint should be snug, but not so tight that it cracks the tail board when hammering the joint together. 30 Popular Woodworking December 1000 |


