Popular Woodworking 2001-02 № 120, страница 20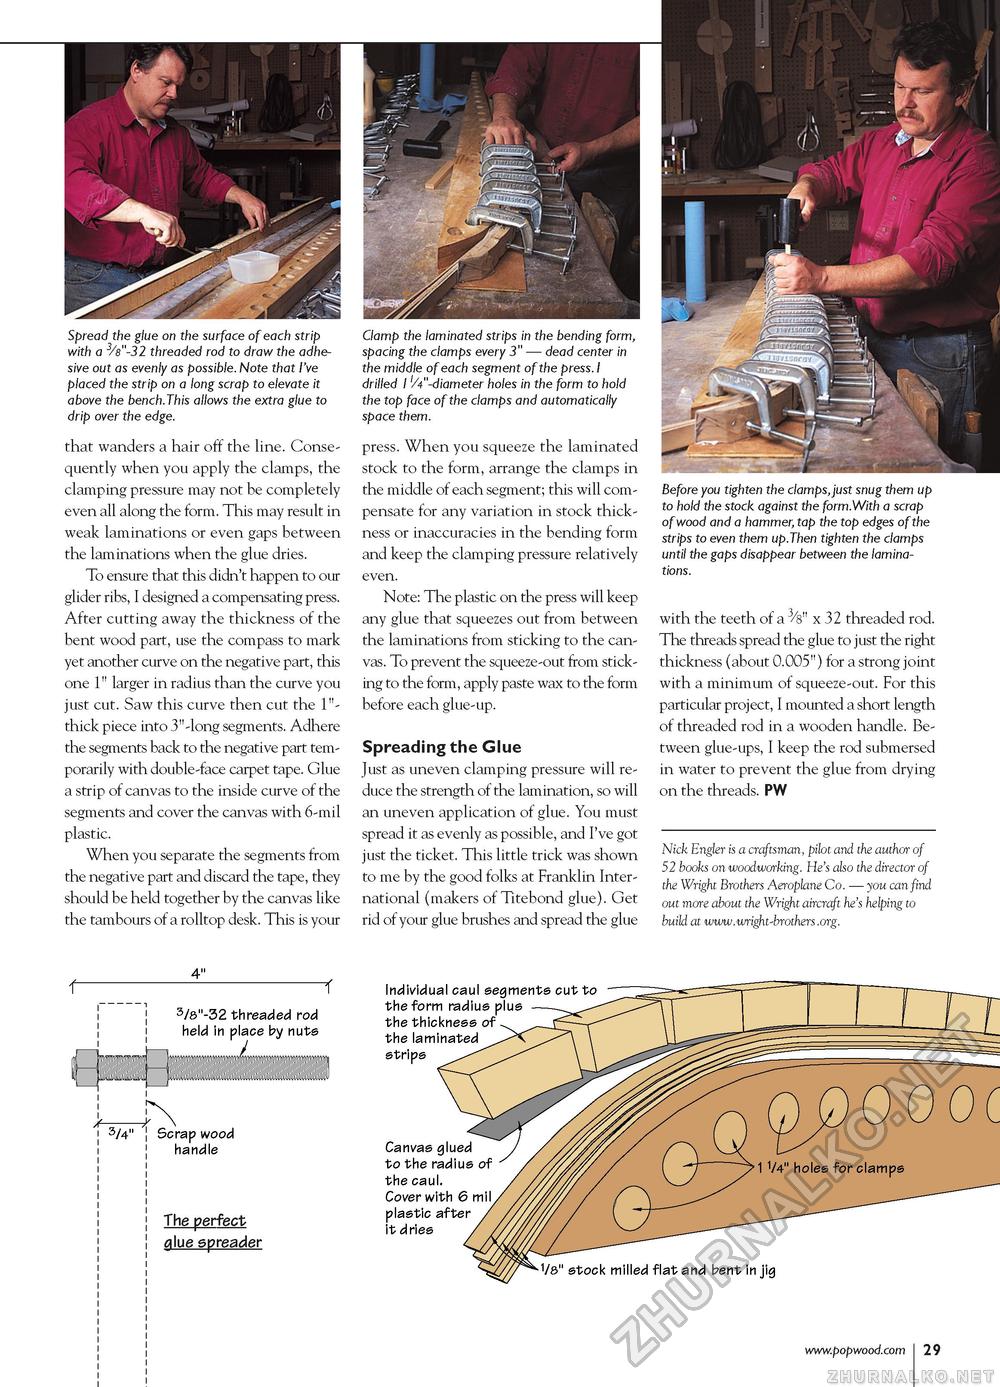
Spread the glue on the surface of each strip with a 3/s"-32 threaded rod to draw the adhesive out as evenly as possible. Note that I've placed the strip on a long scrap to elevate it above the bench.This allows the extra glue to drip over the that wanders a hair off the line. Consequently when you apply the clamps, the clamping pressure may not be completely even all along the form. This may result in weak laminations or even gaps between the laminations when the glue dries. To ensure that this didn't happen to our glider ribs, I designed a compensating press. After cutting away the thickness of the bent wood part, use the compass to mark yet another curve on the negative part, this one 1" larger in radius than the curve you just cut. Saw this curve then cut the 1"-thick piece into 3"-long segments. Adhere the segments back to the negative part temporarily with double-face carpet tape. Glue a strip of canvas to the inside curve of the segments and cover the canvas with 6-mil plastic. When you separate the segments from the negative part and discard the tape, they should be held together by the canvas like the tambours of a rolltop desk. This is your Clamp the laminated strips in the bending form, spacing the clamps every 3" — dead center in the middle of each segment of the press. I drilled 1 'A' -diameter holes in the form to hold the top face of the clamps and automatically space them. press. When you squeeze the laminated stock to the form, arrange the clamps in the middle of each segment; this will compensate for any variation in stock thickness or inaccuracies in the bending form and keep the clamping pressure relatively even. Note: The plastic on the press will keep any glue that squeezes out from between the laminations from sticking to the canvas. To prevent the squeeze-out from sticking to the form, apply paste wax to the form before each glue-up. Spreading the Glue Just as uneven clamping pressure will reduce the strength of the lamination, so will an uneven application of glue. You must spread it as evenly as possible, and I've got just the ticket. This little trick was shown to me by the good folks at Franklin International (makers of Titebond glue). Get rid of your glue brushes and spread the glue Before you tighten the clamps,just snug them up to hold the stock against the form.With a scrap of wood and a hammer, tap the top edges of the strips to even them up.Then tighten the clamps until the gaps disappear between the laminations. with the teeth of a 3/8" x 32 threaded rod. The threads spread the glue to just the right thickness (about 0.005") for a strong joint with a minimum of squeeze-out. For this particular project, I mounted a short length of threaded rod in a wooden handle. Between glue-ups, I keep the rod submersed in water to prevent the glue from drying on the threads. PW Nick Engler is a craftsman, pilot and the author of 52 books on woodworking. He's also the director of the Wright Brothers Aeroplane Co. — you can find out more about the Wright aircraft he's helping to build at www.wright-brothers.org. 4" £ " 3/8"-32 threaded rod held in place by nuts 3/4 Scrap wood handle The perfect glue spreader Individual caul segments cut to the form radius plus the thickness of the laminated strips Canvas glued to the radius of the caul. Cover with 6 mil plastic after it dries "1/8" stock milled flat and bent in jig |


