Popular Woodworking 2001-02 № 120, страница 56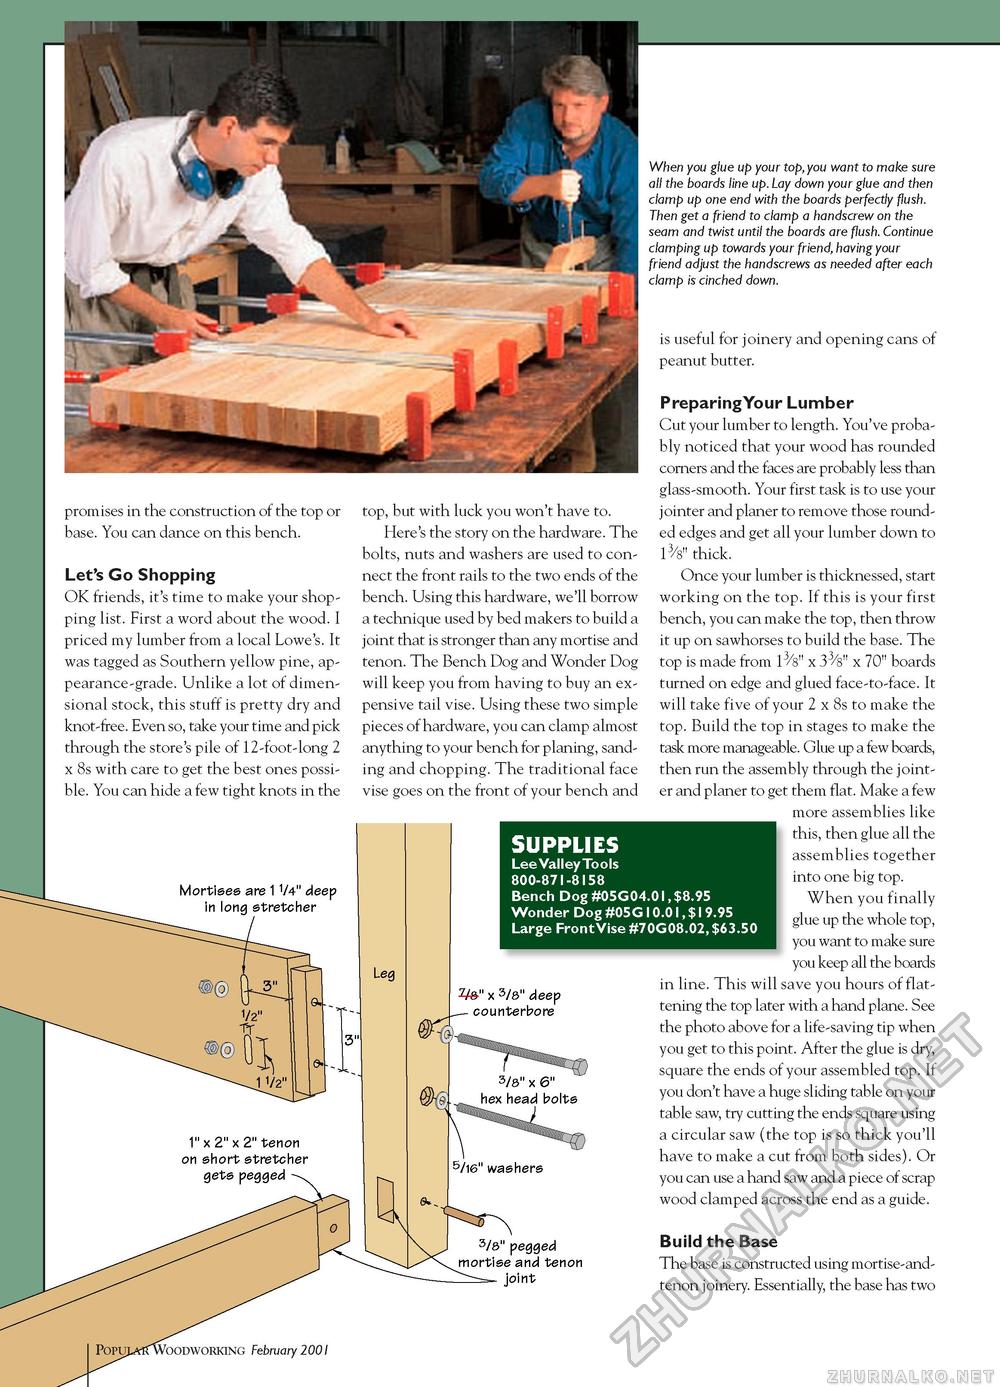
promises in the construction of the top or base. You can dance on this bench. Let's Go Shopping OK friends, it's time to make your shopping list. First a word about the wood. I priced my lumber from a local Lowe's. It was tagged as Southern yellow pine, appearance-grade. Unlike a lot of dimensional stock, this stuff is pretty dry and knot-free. Even so, take your time and pick through the store's pile of 12-foot-long 2 x 8s with care to get the best ones possible. You can hide a few tight knots in the Mortises are 1 1/4" deep in long stretcher top, but with luck you won't have to. Here's the story on the hardware. The bolts, nuts and washers are used to connect the front rails to the two ends of the bench. Using this hardware, we'll borrow a technique used by bed makers to build a joint that is stronger than any mortise and tenon. The Bench Dog and Wonder Dog will keep you from having to buy an expensive tail vise. Using these two simple pieces of hardware, you can clamp almost anything to your bench for planing, sanding and chopping. The traditional face vise goes on the front of your bench and 1" x 2" x 2" tenon on short stretcher gets pegged Leg SUPPLIES Lee Valley Tools 800-871-8158 Bench Dog #05G04.01, $8.95 Wonder Dog #05G10.01,$19.95 Large Front Vise #70G08.02,$63.50 7/8" x 3/8" deep counterbore When you glue up your top, you want to make sure all the boards line up. Lay down your glue and then clamp up one end with the boards perfectly flush. Then get a friend to clamp a handscrew on the seam and twist until the boards are flush. Continue clamping up towards your friend, having your friend adjust the handscrews as needed after each clamp is cinched down. is useful for joinery and opening cans of peanut butter. PreparingYour Lumber Cut your lumber to length. You've probably noticed that your wood has rounded corners and the faces are probably less than glass-smooth. Your first task is to use your jointer and planer to remove those rounded edges and get all your lumber down to 13/8" thick. Once your lumber is thicknessed, start working on the top. If this is your first bench, you can make the top, then throw it up on sawhorses to build the base. The top is made from 13/8" x 33/8" x 70" boards turned on edge and glued face-to-face. It will take five of your 2 x 8s to make the top. Build the top in stages to make the task more manageable. Glue up a few boards, then run the assembly through the jointer and planer to get them flat. Make a few more assemblies like this, then glue all the assemblies together into one big top. When you finally glue up the whole top, you want to make sure you keep all the boards in line. This will save you hours of flattening the top later with a hand plane. See the photo above for a life-saving tip when you get to this point. After the glue is dry, square the ends of your assembled top. If you don't have a huge sliding table on your table saw, try cutting the ends square using a circular saw (the top is so thick you'll have to make a cut from both sides). Or you can use a hand saw and a piece of scrap wood clamped across the end as a guide. 3/8" pegged mortise and tenon joint Build the Base The base is constructed using mortise-and-tenon joinery. Essentially, the base has two Voodworking February 2001 |


