Popular Woodworking 2001-06 № 122, страница 16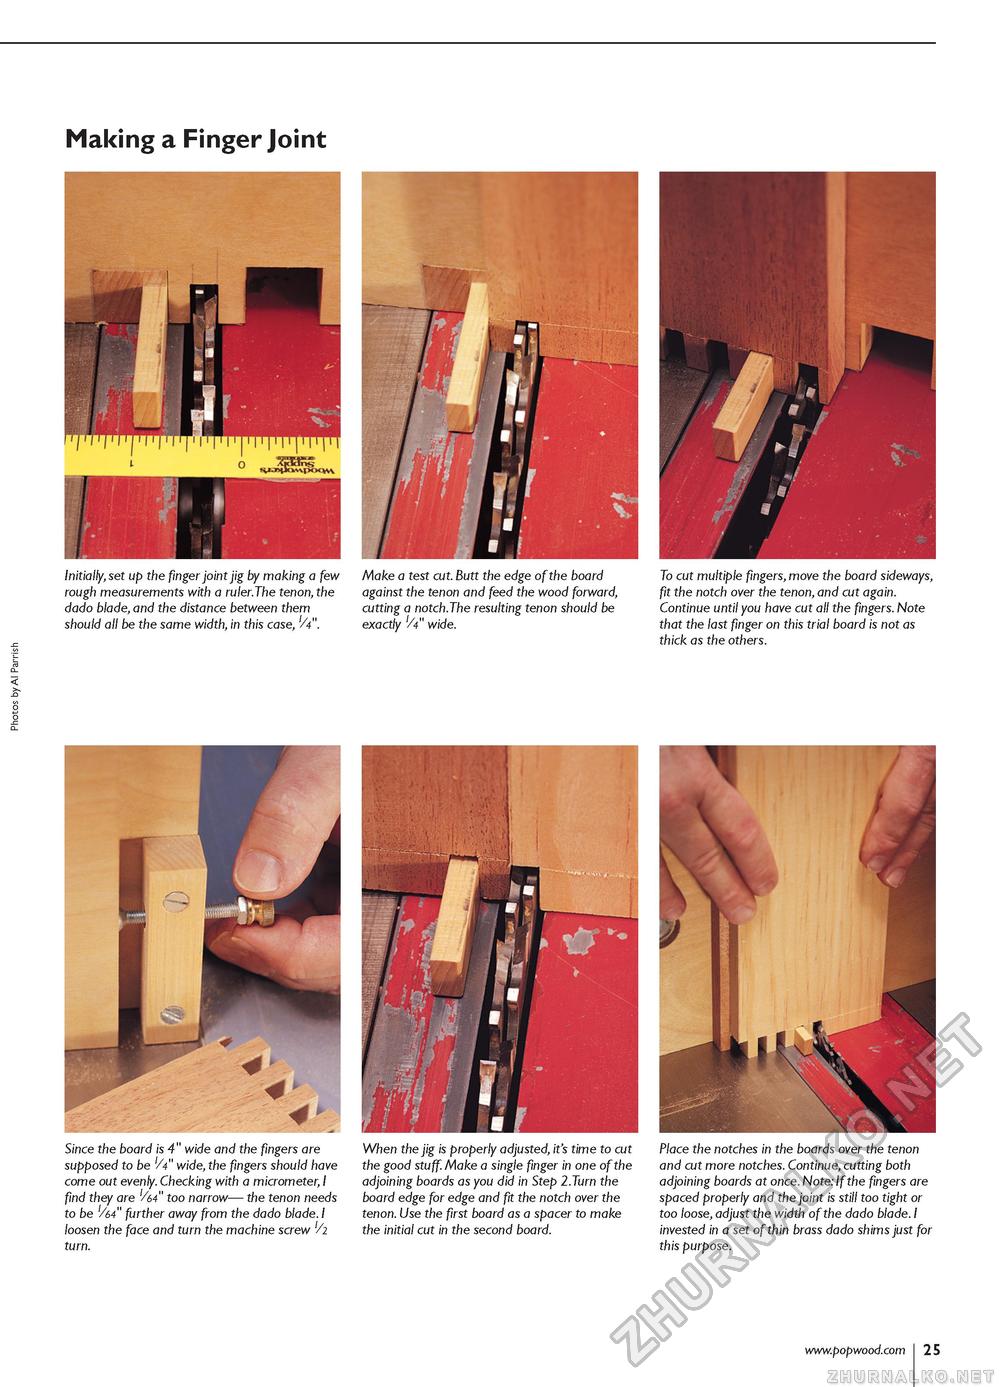
Making a Finger Joint Initially, set up the finger joint jig by making a few Make a test cut. Butt the edge of the board rough measurements with a ruler.The tenon, the against the tenon and feed the wood forward, dado blade, and the distance between them cutting a notch.The resulting tenon should be should all be the same width, in this case, 'A". exactly 'A" wide. Since the board is 4" wide and the fingers are supposed to be 'A" wide, the fingers should have come out evenly. Checking with a micrometer, I find they are too narrow— the tenon needs to be '/64" further away from the dado blade. I loosen the face and turn the machine screw '/l turn. When the jig is properly adjusted, it's time to cut the good stuff. Make a single finger in one of the adjoining boards as you did in Step l.Turn the board edge for edge and fit the notch over the tenon. Use the first board as a spacer to make the initial cut in the second board. To cut multiple fingers, move the board sideways, fit the notch over the tenon, and cut again. Continue until you have cut all the fingers. Note that the last finger on this trial board is not as thick as the others. Place the notches in the boards over the tenon and cut more notches. Continue, cutting both adjoining boards at once. Note: If the fingers are spaced properly and the joint is still too tight or too loose, adjust the width of the dado blade. I invested in a set of thin brass dado shims just for this purpose. |


