Popular Woodworking 2001-08 № 123, страница 20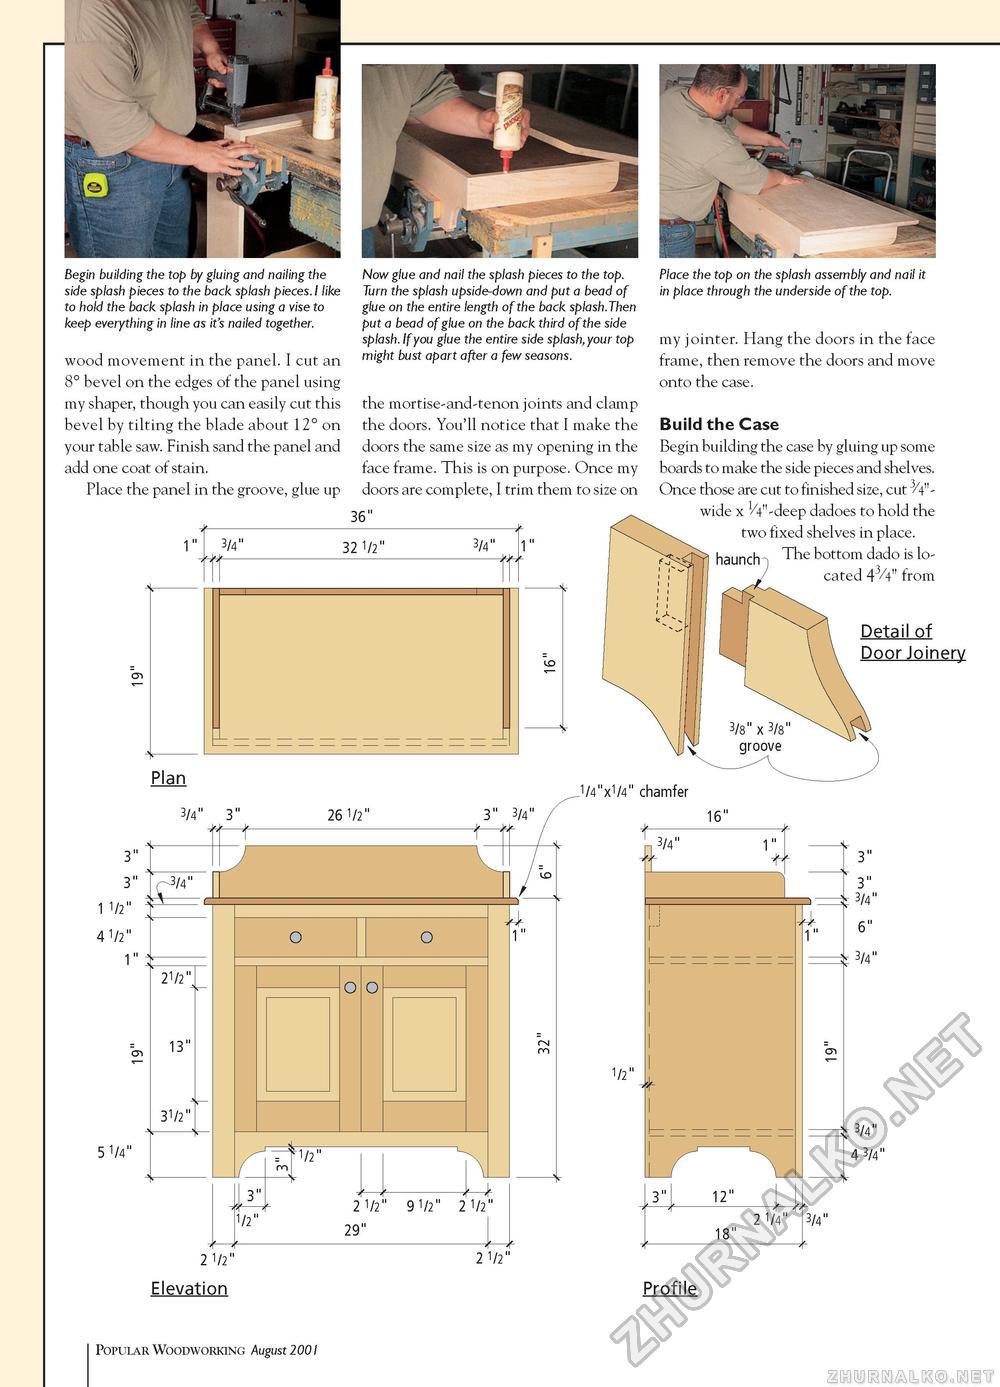
Begin building the top by gluing and nailing the side splash pieces to the back splash pieces. I like to hold the back splash in place using a vise to keep everything in line as it's nailed together. wood movement in the panel. I cut an 8° bevel on the edges of the panel using my shaper, though you can easily cut this bevel by tilting the blade about 12° on your table saw. Finish sand the panel and add one coat of stain. Place the panel in the groove, glue up Now glue and nail the splash pieces to the top. Turn the splash upside-down and put a bead of glue on the entire length of the back splash.Then put a bead of glue on the back third of the side splash. If you glue the entire side splash, your top might bust apart after a few seasons. the mortise-and-tenon joints and clamp the doors. You'll notice that I make the doors the same size as my opening in the face frame. This is on purpose. Once my doors are complete, I trim them to size on 36" Place the top on the splash assembly and nail it in place through the underside of the top. my jointer. Hang the doors in the face frame, then remove the doors and move onto the case. Build the Case Begin building the case by gluing up some boards to make the side pieces and shelves. Once those are cut to finished size, cut 3/4"-wide x 1/4"-deep dadoes to hold the two fixed shelves in place. haunchn The bottom dado is located 43/4" from Detail of Door Joinery 3 3 1 1/2" 4 1/2" 1 5 1/4" 3" — 1/2" 2 1/2 " 9 1/2 " 2 1/2" 29" 18" —/— 2 1/4" 3/4" 2 1/2" Elevation 2 1/2" Profile Popular Woodworking August 2001 |


