Popular Woodworking 2001-08 № 123, страница 58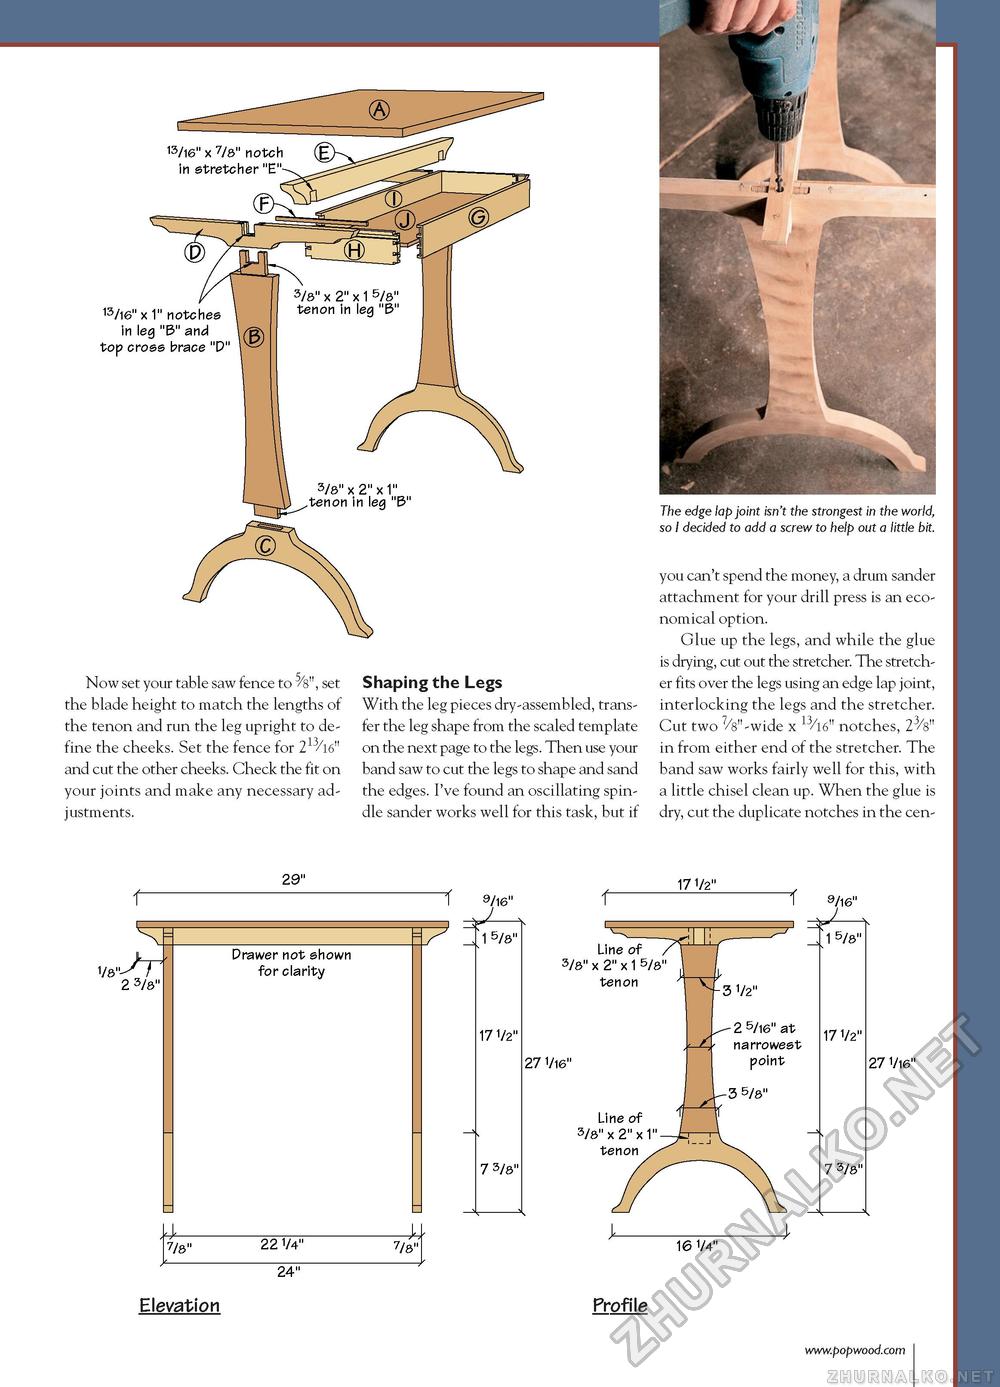
13/16" x 1" notches in leg "B" and top cross brace "D" Now set your table saw fence to set the blade height to match the lengths of the tenon and run the leg upright to define the cheeks. Set the fence for 213/16" and cut the other cheeks. Check the fit on your joints and make any necessary adjustments. Shaping the Legs With the leg pieces dry-assembled, transfer the leg shape from the scaled template on the next page to the legs. Then use your band saw to cut the legs to shape and sand the edges. I've found an oscillating spindle sander works well for this task, but if The edge lap joint isn't the strongest in the world, so I decided to add a screw to help out a little bit. you can't spend the money, a drum sander attachment for your drill press is an economical option. Glue up the legs, and while the glue is drying, cut out the stretcher. The stretcher fits over the legs using an edge lap joint, interlocking the legs and the stretcher. Cut two 7/8"-wide x notches, 23/8" in from either end of the stretcher. The band saw works fairly well for this, with a little chisel clean up. When the glue is dry, cut the duplicate notches in the cen- 1/81 .">r 2 3/8" 29" Drawer not shown for clarity 24"
T 9/16" —I —- 17 1/2" 1 5/8" 7 3/8" 9/16" Line of 3/8" x 2" x 1 5/8" tenon Line of 3/8" x 2" x 1" tenon 3 1/2" 2 5/16" at narrowest point 3 5/8" 16 1/4" 1 5/8" 7 3/8" Elevation Profile |


