Popular Woodworking 2001-12 № 125, страница 35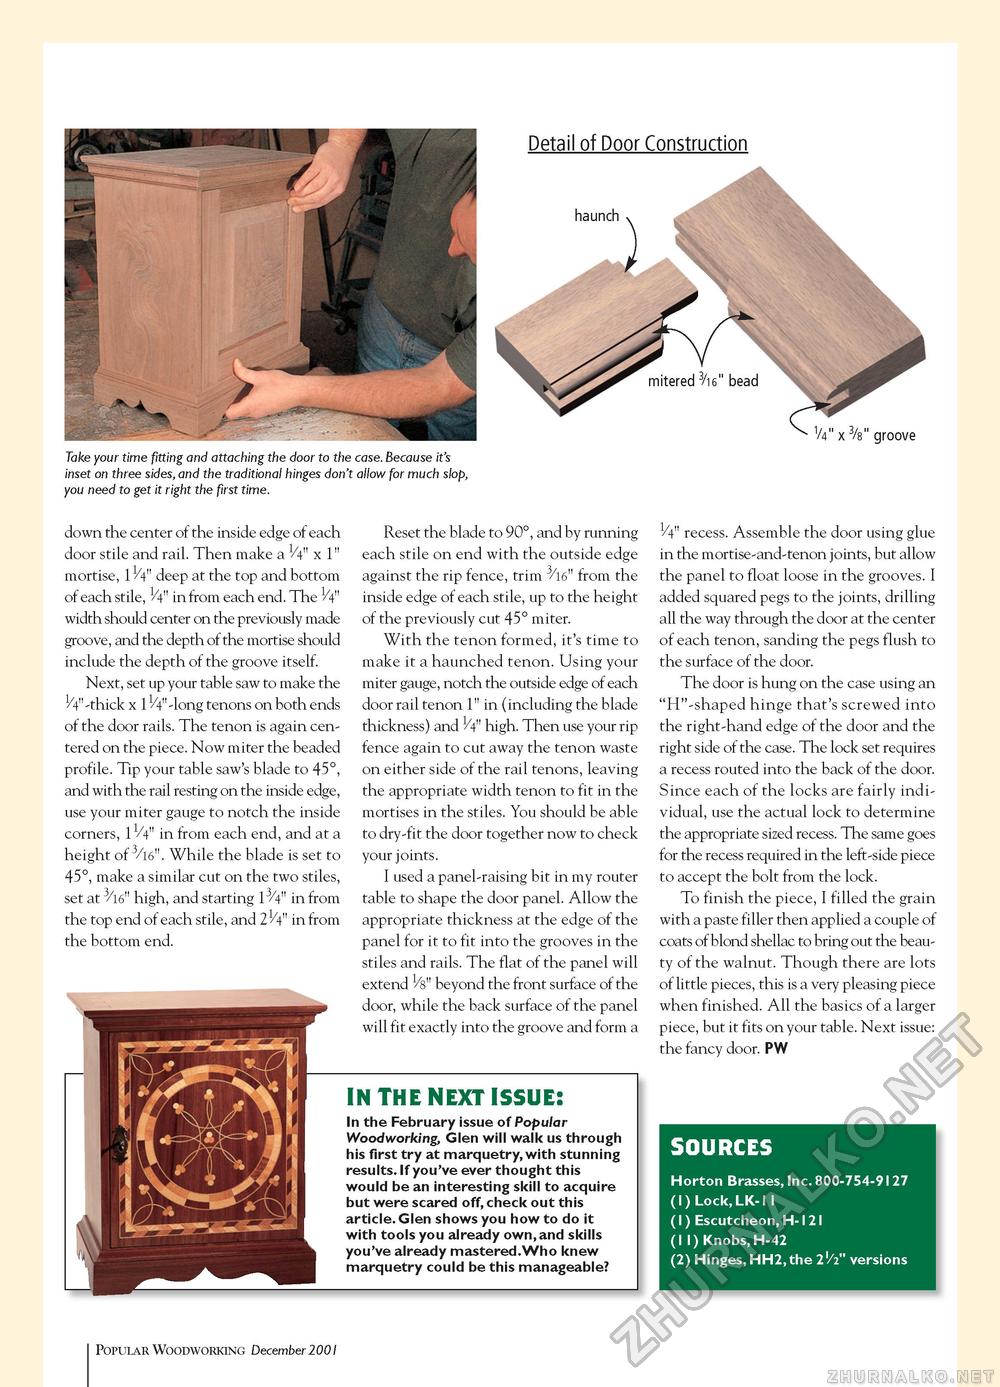
Take your time fitting and attaching the door to the case. Because it's inset on three sides, and the traditional hinges don't allow for much slop, you need to get it right the first time.
down the center of the inside edge of each door stile and rail. Then make a V4" x 1" mortise, 11/4" deep at the top and bottom of each stile, H" in from each end. The 1/4" width should center on the previously made groove, and the depth of the mortise should include the depth of the groove itself. Next, set up your table saw to make the 14"-thick x 11/4"-long tenons on both ends of the door rails. The tenon is again centered on the piece. Now miter the beaded profile. Tip your table saw's blade to 45°, and with the rail resting on the inside edge, use your miter gauge to notch the inside corners, 11/4" in from each end, and at a height of 3/16". While the blade is set to 45°, make a similar cut on the two stiles, set at high, and starting 13/4" in from the top end of each stile, and 21/4" in from the bottom end. Reset the blade to 90°, and by running each stile on end with the outside edge against the rip fence, trim 3/16" from the inside edge of each stile, up to the height of the previously cut 45° miter. With the tenon formed, it's time to make it a haunched tenon. Using your miter gauge, notch the outside edge of each door rail tenon 1" in (including the blade thickness) and 1/4" high. Then use your rip fence again to cut away the tenon waste on either side of the rail tenons, leaving the appropriate width tenon to fit in the mortises in the stiles. You should be able to dry-fit the door together now to check your joints. I used a panel-raising bit in my router table to shape the door panel. Allow the appropriate thickness at the edge of the panel for it to fit into the grooves in the stiles and rails. The flat of the panel will extend Vs" beyond the front surface of the door, while the back surface of the panel will fit exactly into the groove and form a In The Next Issue: In the February issue of Popular Woodworking, Glen will walk us through his first try at marquetry, with stunning results. If you've ever thought this would be an interesting skill to acquire but were scared off, check out this article. Glen shows you how to do it with tools you already own, and skills you've already mastered.Who knew marquetry could be this manageable? 1/4" recess. Assemble the door using glue in the mortise-and-tenon joints, but allow the panel to float loose in the grooves. I added squared pegs to the joints, drilling all the way through the door at the center of each tenon, sanding the pegs flush to the surface of the door. The door is hung on the case using an "H"-shaped hinge that's screwed into the right-hand edge of the door and the right side of the case. The lock set requires a recess routed into the back of the door. Since each of the locks are fairly individual, use the actual lock to determine the appropriate sized recess. The same goes for the recess required in the left-side piece to accept the bolt from the lock. To finish the piece, I filled the grain with a paste filler then applied a couple of coats of blond shellac to bring out the beauty of the walnut. Though there are lots of little pieces, this is a very pleasing piece when finished. All the basics of a larger piece, but it fits on your table. Next issue: the fancy door. PW Sources Horton Brasses, Inc. 800-754-9127 (1) Lock, LK-11 (1) Escutcheon, H-121 (11) Knobs, H-42 (2) Hinges, HH2,the 2'/2" versions 35 Popular Woodworking December 2001 |


