Popular Woodworking 2001-12 № 125, страница 56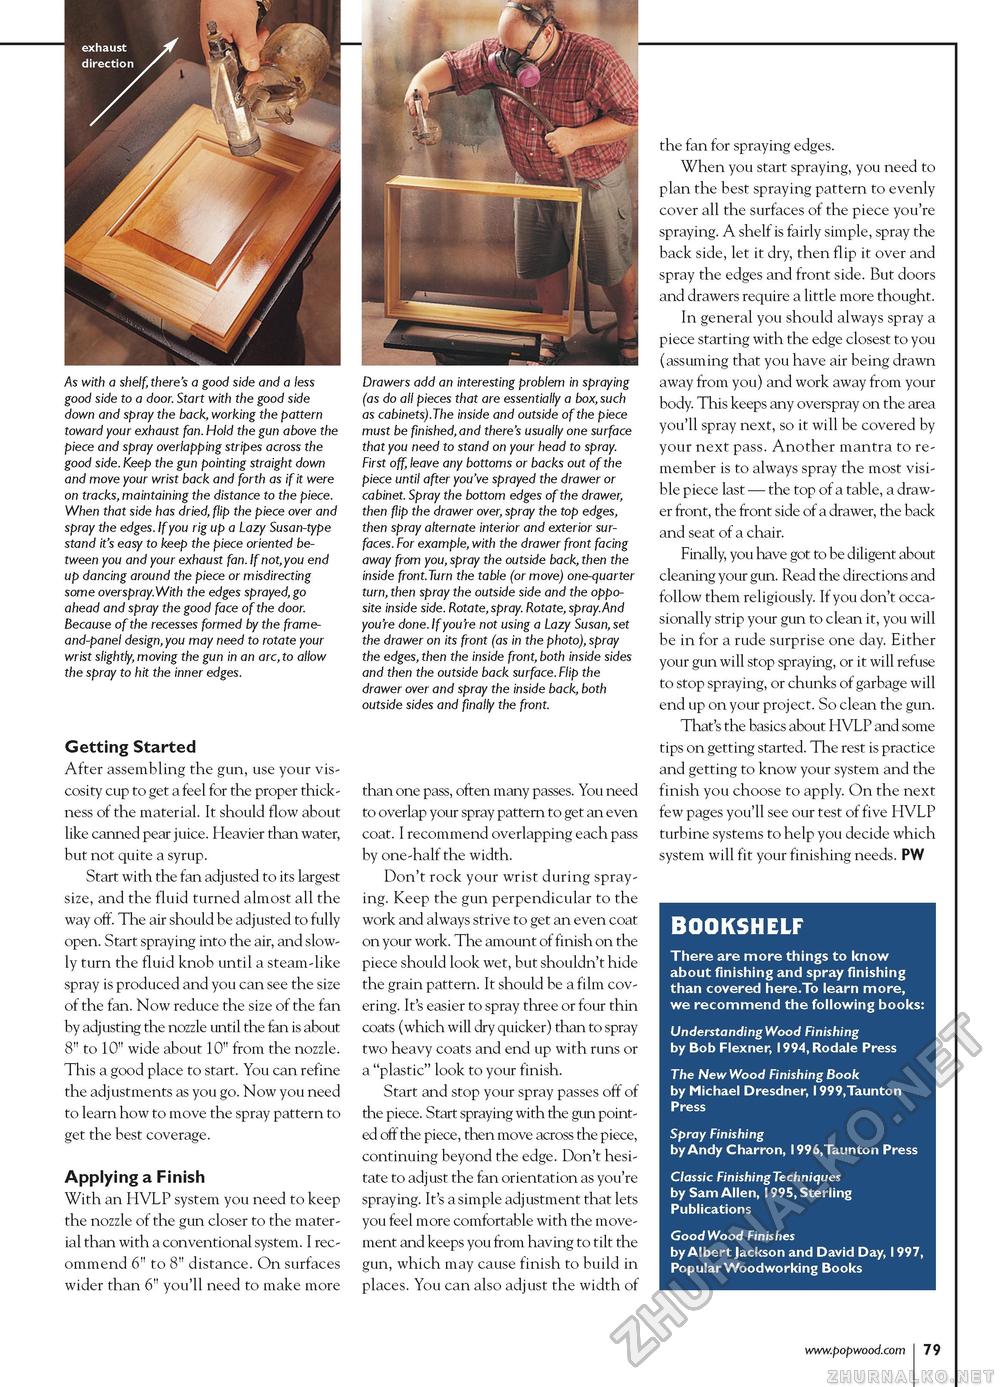
As with a shelf, there's a good side and a less good side to a door. Start with the good side down and spray the back, working the pattern toward your exhaust fan. Hold the gun above the piece and spray overlapping stripes across the good side. Keep the gun pointing straight down and move your wrist back and forth as if it were on tracks, maintaining the distance to the piece. When that side has dried, flip the piece over and spray the edges. If you rig up a Lazy Susan-type stand it's easy to keep the piece oriented between you and your exhaust fan. If not,you end up dancing around the piece or misdirecting some overspray.With the edges sprayed, go ahead and spray the good face of the door. Because of the recesses formed by the frame and-panel design, you may need to rotate your wrist slightly, moving the gun in an arc, to allow the spray to hit the inner edges. Getting Started After assembling the gun, use your viscosity cup to get a feel for the proper thickness of the material. It should flow about like canned pear juice. Heavier than water, but not quite a syrup. Start with the fan adjusted to its largest size, and the fluid turned almost all the way off. The air should be adjusted to fully open. Start spraying into the air, and slowly turn the fluid knob until a steam-like spray is produced and you can see the size of the fan. Now reduce the size of the fan by adjusting the nozzle until the fan is about 8" to 10" wide about 10" from the nozzle. This a good place to start. You can refine the adjustments as you go. Now you need to learn how to move the spray pattern to get the best coverage. Applying a Finish With an HVLP system you need to keep the nozzle of the gun closer to the material than with a conventional system. I recommend 6" to 8" distance. On surfaces wider than 6" you'll need to make more Drawers add an interesting problem in spraying (as do all pieces that are essentially a box,such as cabinets).The inside and outside of the piece must be finished, and there's usually one surface that you need to stand on your head to spray. First off, leave any bottoms or backs out of the piece until after you've sprayed the drawer or cabinet. Spray the bottom edges of the drawer, then flip the drawer over, spray the top edges, then spray alternate interior and exterior surfaces. For example, with the drawer front facing away from you, spray the outside back, then the inside front.Turn the table (or move) one-quarter turn, then spray the outside side and the opposite inside side. Rotate, spray. Rotate, spray.And you're done. If you're not using a Lazy Susan, set the drawer on its front (as in the photo), spray the edges, then the inside front, both inside sides and then the outside back surface. Flip the drawer over and spray the inside back, both outside sides and finally the front. than one pass, often many passes. You need to overlap your spray pattern to get an even coat. I recommend overlapping each pass by one-half the width. Don't rock your wrist during spraying. Keep the gun perpendicular to the work and always strive to get an even coat on your work. The amount of finish on the piece should look wet, but shouldn't hide the grain pattern. It should be a film covering. It's easier to spray three or four thin coats (which will dry quicker) than to spray two heavy coats and end up with runs or a "plastic" look to your finish. Start and stop your spray passes off of the piece. Start spraying with the gun pointed off the piece, then move across the piece, continuing beyond the edge. Don't hesitate to adjust the fan orientation as you're spraying. It's a simple adjustment that lets you feel more comfortable with the movement and keeps you from having to tilt the gun, which may cause finish to build in places. You can also adjust the width of the fan for spraying edges. When you start spraying, you need to plan the best spraying pattern to evenly cover all the surfaces of the piece you're spraying. A shelf is fairly simple, spray the back side, let it dry, then flip it over and spray the edges and front side. But doors and drawers require a little more thought. In general you should always spray a piece starting with the edge closest to you (assuming that you have air being drawn away from you) and work away from your body. This keeps any overspray on the area you'll spray next, so it will be covered by your next pass. Another mantra to remember is to always spray the most visible piece last — the top of a table, a drawer front, the front side of a drawer, the back and seat of a chair. Finally, you have got to be diligent about cleaning your gun. Read the directions and follow them religiously. If you don't occasionally strip your gun to clean it, you will be in for a rude surprise one day. Either your gun will stop spraying, or it will refuse to stop spraying, or chunks of garbage will end up on your project. So clean the gun. That's the basics about HVLP and some tips on getting started. The rest is practice and getting to know your system and the finish you choose to apply. On the next few pages you'll see our test of five HVLP turbine systems to help you decide which system will fit your finishing needs. PW BOOKSHELF There are more things to know about finishing and spray finishing than covered here.To learn more, we recommend the following books: Understanding Wood Finishing by Bob Flexner, 1994, Rodale Press The New Wood Finishing Book by Michael Dresdner, 1999,Taunton Press Spray Finishing by Andy Charron, 1996,Taunton Press Classic FinishingTechniques by Sam Allen, 1995, Sterling Publications Good Wood Finishes by Albert Jackson and David Day, 1997, Popular Woodworking Books |


