Popular Woodworking 2001-12 № 125, страница 61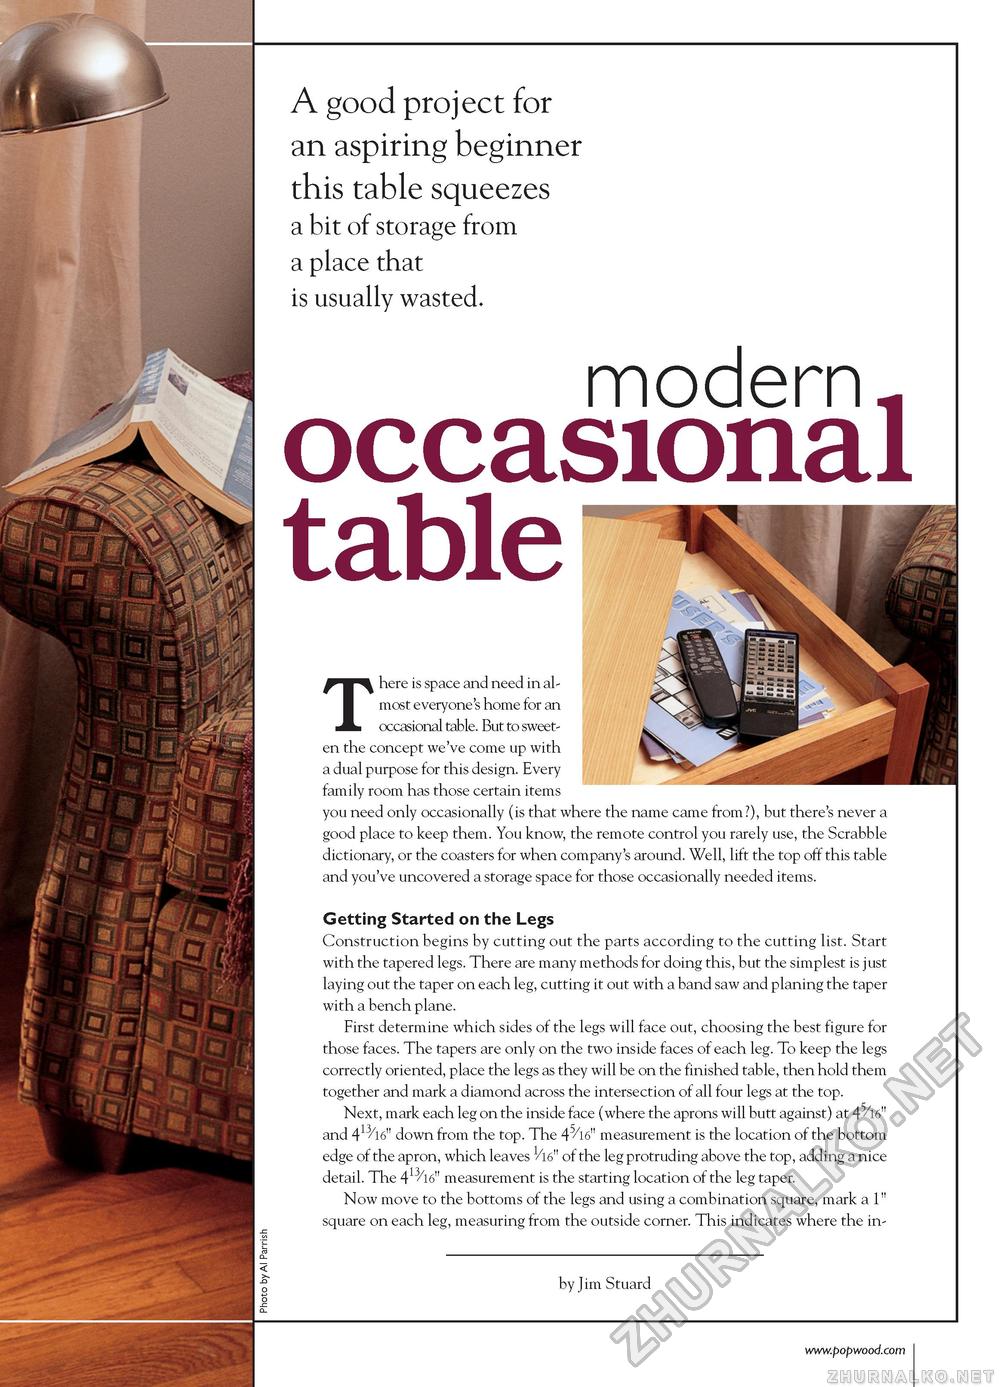
A good project for an aspiring beginner this table squeezes a bit of storage from a place that is usually wasted. modern occasional table There is space and need in almost everyone's home for an occasional table. But to sweeten the concept we've come up with a dual purpose for this design. Every family room has those certain items you need only occasionally (is that where the name came from?), but there's never a good place to keep them. You know, the remote control you rarely use, the Scrabble dictionary, or the coasters for when company's around. Well, lift the top off this table and you've uncovered a storage space for those occasionally needed items. Getting Started on the Legs Construction begins by cutting out the parts according to the cutting list. Start with the tapered legs. There are many methods for doing this, but the simplest is just laying out the taper on each leg, cutting it out with a band saw and planing the taper with a bench plane. First determine which sides of the legs will face out, choosing the best figure for those faces. The tapers are only on the two inside faces of each leg. To keep the legs correctly oriented, place the legs as they will be on the finished table, then hold them together and mark a diamond across the intersection of all four legs at the top. Next, mark each leg on the inside face (where the aprons will butt against) at 45/16" and 413/16" down from the top. The 45/l6" measurement is the location of the bottom edge of the apron, which leaves 1/l6" of the leg protruding above the top, adding a nice detail. The 413316" measurement is the starting location of the leg taper. Now move to the bottoms of the legs and using a combination square, mark a 1" square on each leg, measuring from the outside corner. This indicates where the in- by Jim Stuard |


