Popular Woodworking 2001-12 № 125, страница 63
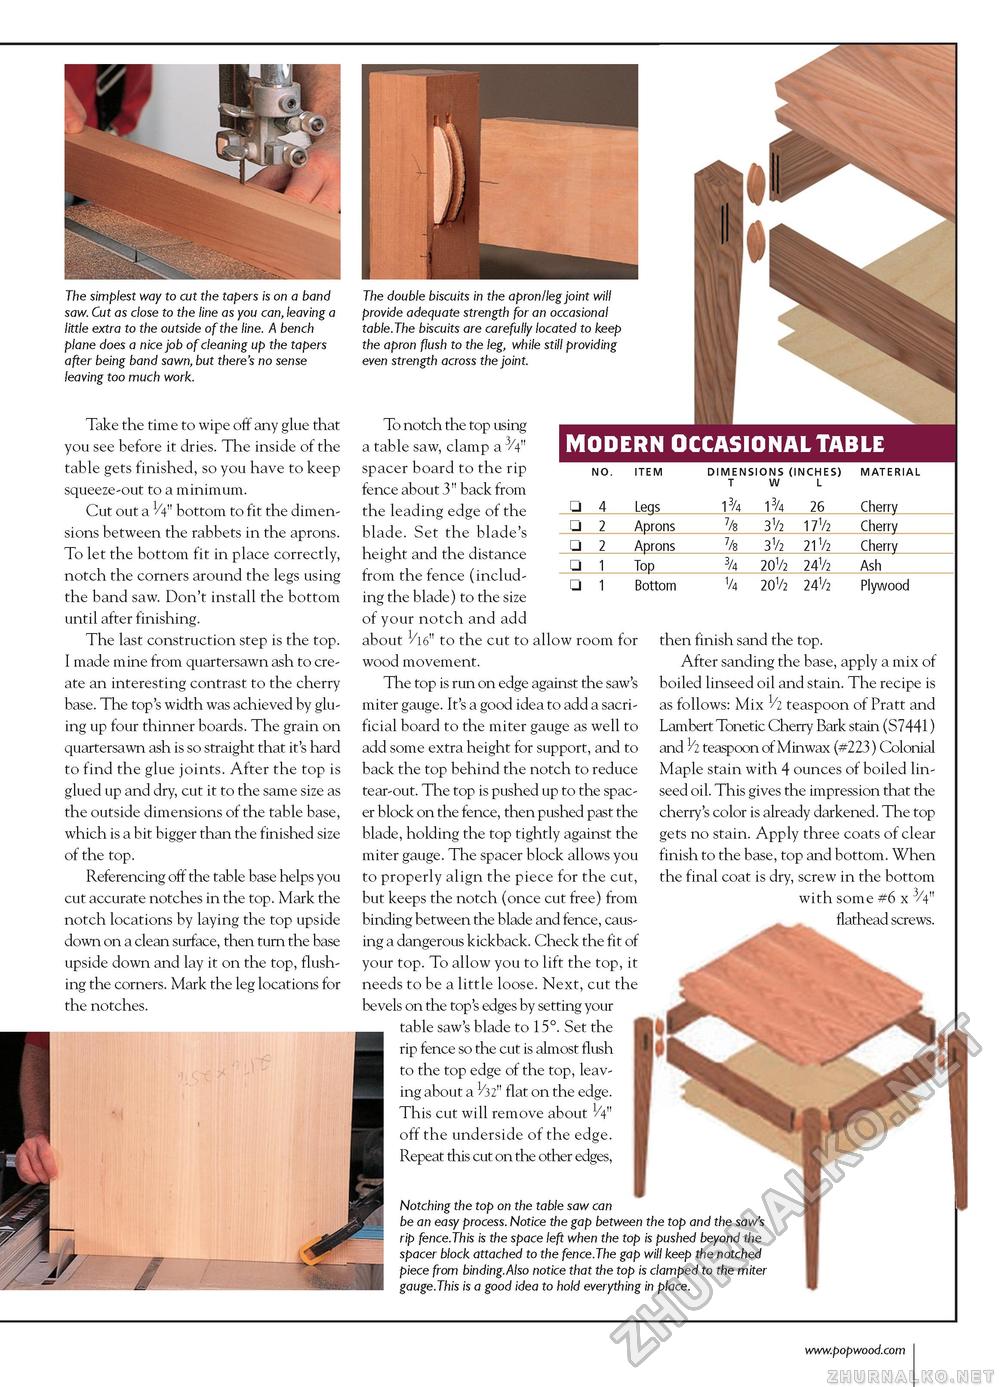
The simplest way to cut the tapers is on a band saw. Cut as close to the line as you can, leaving a little extra to the outside of the line. A bench plane does a nice job of cleaning up the tapers after being band sawn, but there's no sense leaving too much work. Take the time to wipe off any glue that you see before it dries. The inside of the table gets finished, so you have to keep squeeze-out to a minimum. Cut out a V-t" bottom to fit the dimensions between the rabbets in the aprons. To let the bottom fit in place correctly, notch the corners around the legs using the band saw. Don't install the bottom until after finishing. The last construction step is the top. I made mine from quartersawn ash to create an interesting contrast to the cherry base. The top's width was achieved by gluing up four thinner boards. The grain on quartersawn ash is so straight that it's hard to find the glue joints. After the top is glued up and dry, cut it to the same size as the outside dimensions of the table base, which is a bit bigger than the finished size of the top. Referencing off the table base helps you cut accurate notches in the top. Mark the notch locations by laying the top upside down on a clean surface, then turn the base upside down and lay it on the top, flushing the corners. Mark the leg locations for the notches.
To notch the top using a table saw, clamp a 3/4 spacer board to the rip fence about 3" back from the leading edge of the blade. Set the blade's height and the distance from the fence (including the blade) to the size of your notch and add about 1/l6" to the cut to allow room for wood movement. The top is run on edge against the saw's miter gauge. It's a good idea to add a sacrificial board to the miter gauge as well to add some extra height for support, and to back the top behind the notch to reduce tear-out. The top is pushed up to the spacer block on the fence, then pushed past the blade, holding the top tightly against the miter gauge. The spacer block allows you to properly align the piece for the cut, but keeps the notch (once cut free) from binding between the blade and fence, causing a dangerous kickback. Check the fit of your top. To allow you to lift the top, it needs to be a little loose. Next, cut the bevels on the top's edges by setting your table saw's blade to 15°. Set the rip fence so the cut is almost flush to the top edge of the top, leaving about a flat on the edge. This cut will remove about 1/4" off the underside of the edge. Repeat this cut on the other edges, Notching the top on the table saw can be an easy process. Notice the gap between the top and the saw's rip fence.This is the space left when the top is pushed beyond the spacer block attached to the fence.The gap will keep the notched piece from binding.Also notice that the top is clamped to the miter gauge.This is a good idea to hold everything in place. then finish sand the top. After sanding the base, apply a mix of boiled linseed oil and stain. The recipe is as follows: Mix 1/2 teaspoon of Pratt and Lambert Tonetic Cherry Bark stain (S7441) and 1/2 teaspoon of Minwax (#223) Colonial Maple stain with 4 ounces of boiled linseed oil. This gives the impression that the cherry's color is already darkened. The top gets no stain. Apply three coats of clear finish to the base, top and bottom. When the final coat is dry, screw in the bottom with some #6 x 3/4" flathead screws. |
||||||||||||||||||||||||||||


