Popular Woodworking 2002-02 № 126, страница 75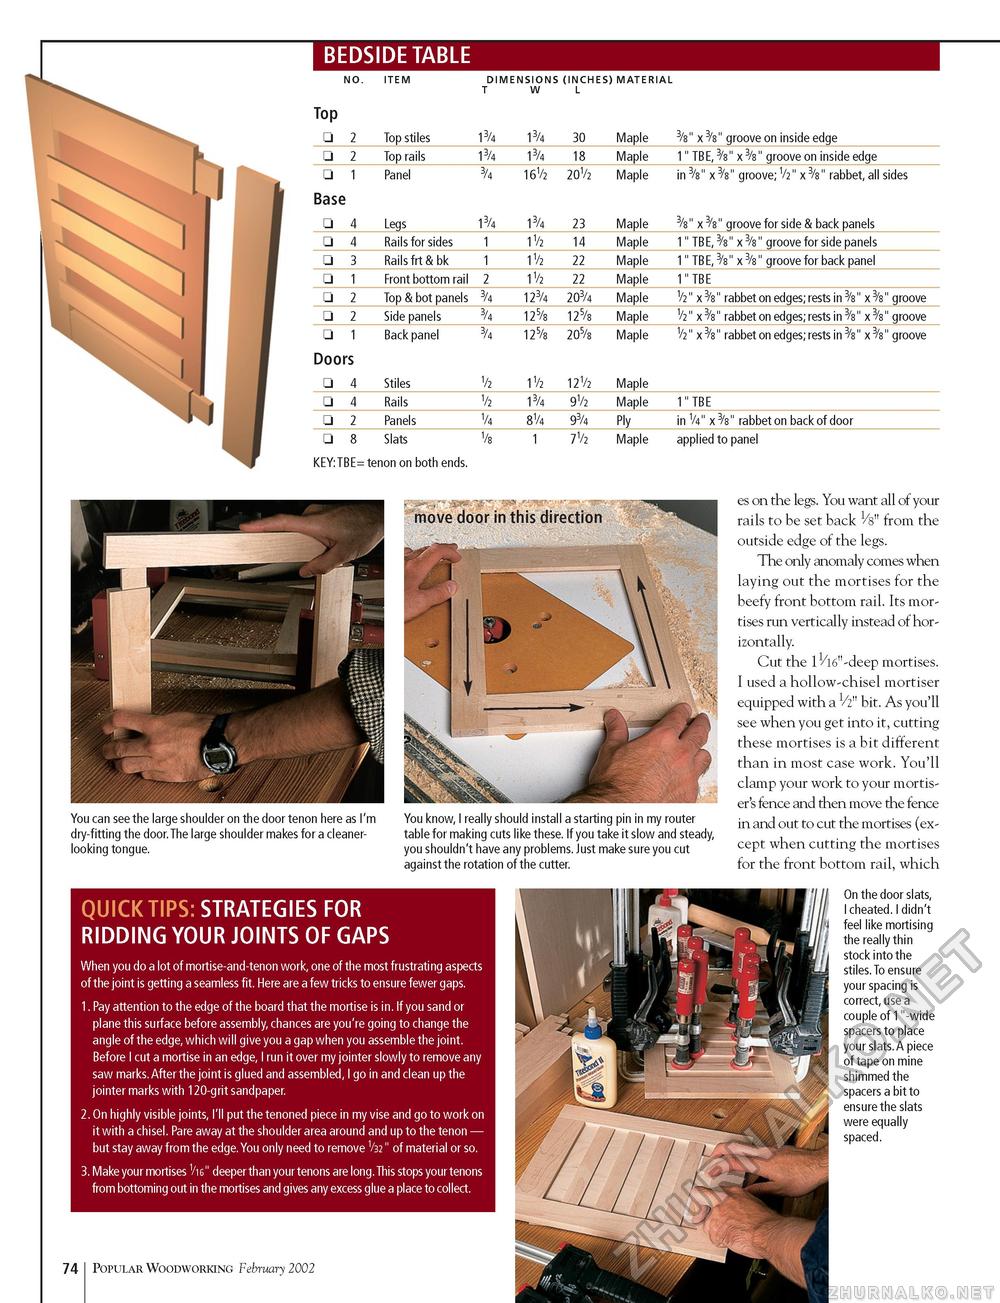
BEDSIDE TABLE
□ 8 Slats 1 7V2 Maple applied to panel □ 8 Slats 1 7V2 Maple applied to panel KEY:TBE= tenon on both ends. You can see the large shoulder on the door tenon here as I'm dry-fitting the door.The large shoulder makes for a cleaner-looking tongue. You know, I really should install a starting pin in my router table for making cuts like these. If you take it slow and steady, you shouldn't have any problems. Just make sure you cut against the rotation of the cutter. QUICK TIPS: STRATEGIES FOR RIDDING YOUR JOINTS OF GAPS When you do a lot of mortise-and-tenon work, one of the most frustrating aspects of the joint is getting a seamless fit. Here are a few tricks to ensure fewer gaps. 1. Pay attention to the edge of the board that the mortise is in. If you sand or plane this surface before assembly, chances are you're going to change the angle of the edge, which will give you a gap when you assemble the joint. Before I cut a mortise in an edge, I run it over my jointer slowly to remove any saw marks.After the joint is glued and assembled, I go in and clean up the jointer marks with 120-grit sandpaper. 2. On highly visible joints, I'll put the tenoned piece in my vise and go to work on it with a chisel. Pare away at the shoulder area around and up to the tenon — but stay away from the edge. You only need to remove V32" of material or so. 3. Make your mortises Vie" deeper than your tenons are long.This stops your tenons from bottoming out in the mortises and gives any excess glue a place to collect. 74 Popular Woodworking February 2002 es on the legs. You want all of your rails to be set back Vs" from the outside edge of the legs. The only anomaly comes when laying out the mortises for the beefy front bottom rail. Its mortises run vertically instead of horizontally. Cut the 11/16" -deep mortises. I used a hollow-chisel mortiser equipped with a V/2" bit. As you'll see when you get into it, cutting these mortises is a bit different than in most case work. You'll clamp your work to your mortis-er's fence and then move the fence in and out to cut the mortises (except when cutting the mortises for the front bottom rail, which On the door slats, I cheated. I didn't feel like mortising the really thin stock into the stiles. To ensure your spacing is correct, use a couple of 1"-wide spacers to place your slats.A piece of tape on mine shimmed the spacers a bit to ensure the slats were equally spaced. |
|||||||||||||||||||||||||||||||||||||||||||||||||||||||||||||||||||||||||||||||||||||||||||||||||||||||||||||||||||||||


