Popular Woodworking 2002-02 № 126, страница 81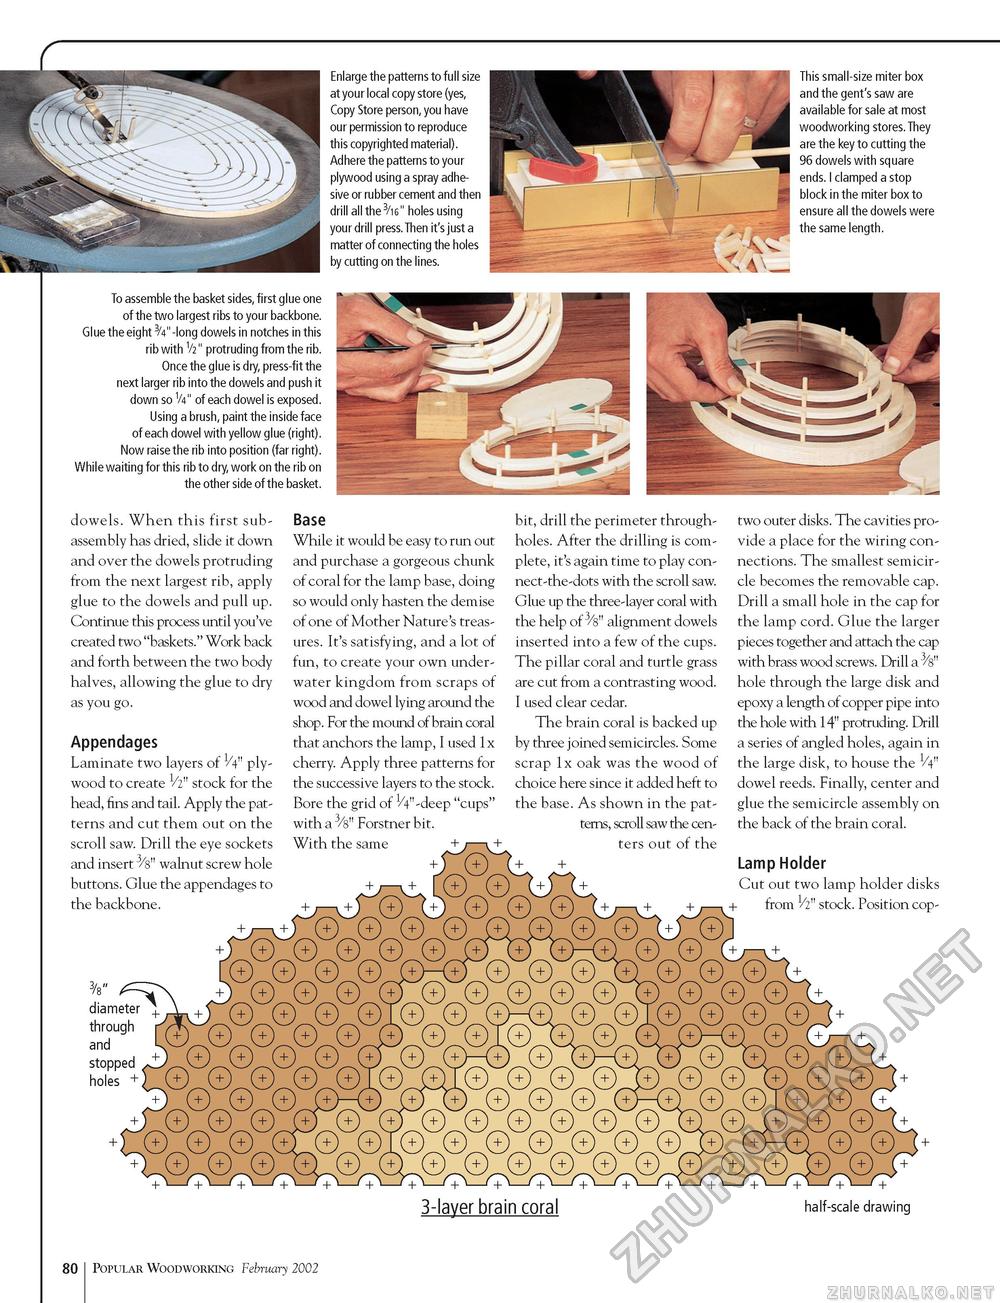
Enlarge the patterns to full size at your local copy store (yes, Copy Store person, you have our permission to reproduce this copyrighted material). Adhere the patterns to your plywood using a spray adhesive or rubber cement and then drill all the 3/ig" holes using your drill press.Then it's just a matter of connecting the holes by cutting on the lines. This small-size miter box and the gent's saw are available for sale at most woodworking stores.They are the key to cutting the 96 dowels with square ends. I clamped a stop block in the miter box to ensure all the dowels were the same length. To assemble the basket sides, first glue one of the two largest ribs to your backbone. Glue the eight 3/4"-long dowels in notches in this rib with V2" protruding from the rib. Once the glue is dry, press-fit the next larger rib into the dowels and push it down so V4" of each dowel is exposed. Using a brush, paint the inside face of each dowel with yellow glue (right). Now raise the rib into position (far right). While waiting for this rib to dry, work on the rib on the other side of the basket. dowels. When this first subassembly has dried, slide it down and over the dowels protruding from the next largest rib, apply glue to the dowels and pull up. Continue this process until you've created two "baskets." Work back and forth between the two body halves, allowing the glue to dry as you go. Appendages Laminate two layers of V4" plywood to create V2" stock for the head, fins and tail. Apply the patterns and cut them out on the scroll saw. Drill the eye sockets and insert 3/s" walnut screw hole buttons. Glue the appendages to the backbone. Base While it would be easy to run out and purchase a gorgeous chunk of coral for the lamp base, doing so would only hasten the demise of one of Mother Nature's treasures. It's satisfying, and a lot of fun, to create your own underwater kingdom from scraps of wood and dowel lying around the shop. For the mound of brain coral that anchors the lamp, I used 1x cherry. Apply three patterns for the successive layers to the stock. Bore the grid of 1/4"-deep "cups" with a 3/8" Forstner bit. With the same + bit, drill the perimeter through-holes. After the drilling is complete, it's again time to play con-nect-the-dots with the scroll saw. Glue up the three-layer coral with the help of 3/8" alignment dowels inserted into a few of the cups. The pillar coral and turtle grass are cut from a contrasting wood. I used clear cedar. The brain coral is backed up by three joined semicircles. Some scrap 1x oak was the wood of choice here since it added heft to the base. As shown in the patterns, scroll saw the centers out of the two outer disks. The cavities provide a place for the wiring connections. The smallest semicircle becomes the removable cap. Drill a small hole in the cap for the lamp cord. Glue the larger pieces together and attach the cap with brass wood screws. Drill a 3/8" hole through the large disk and epoxy a length of copper pipe into the hole with 14" protruding. Drill a series of angled holes, again in the large disk, to house the V4" dowel reeds. Finally, center and glue the semicircle assembly on the back of the brain coral. Lamp Holder Cut out two lamp holder disks from 1/2" stock. Position cop- diameter through and stopped + holes + + 1—1 + 3-layer brain coral half-scale drawing 80 Popular Woodworking February 2002 |


