Popular Woodworking 2002-02 № 126, страница 83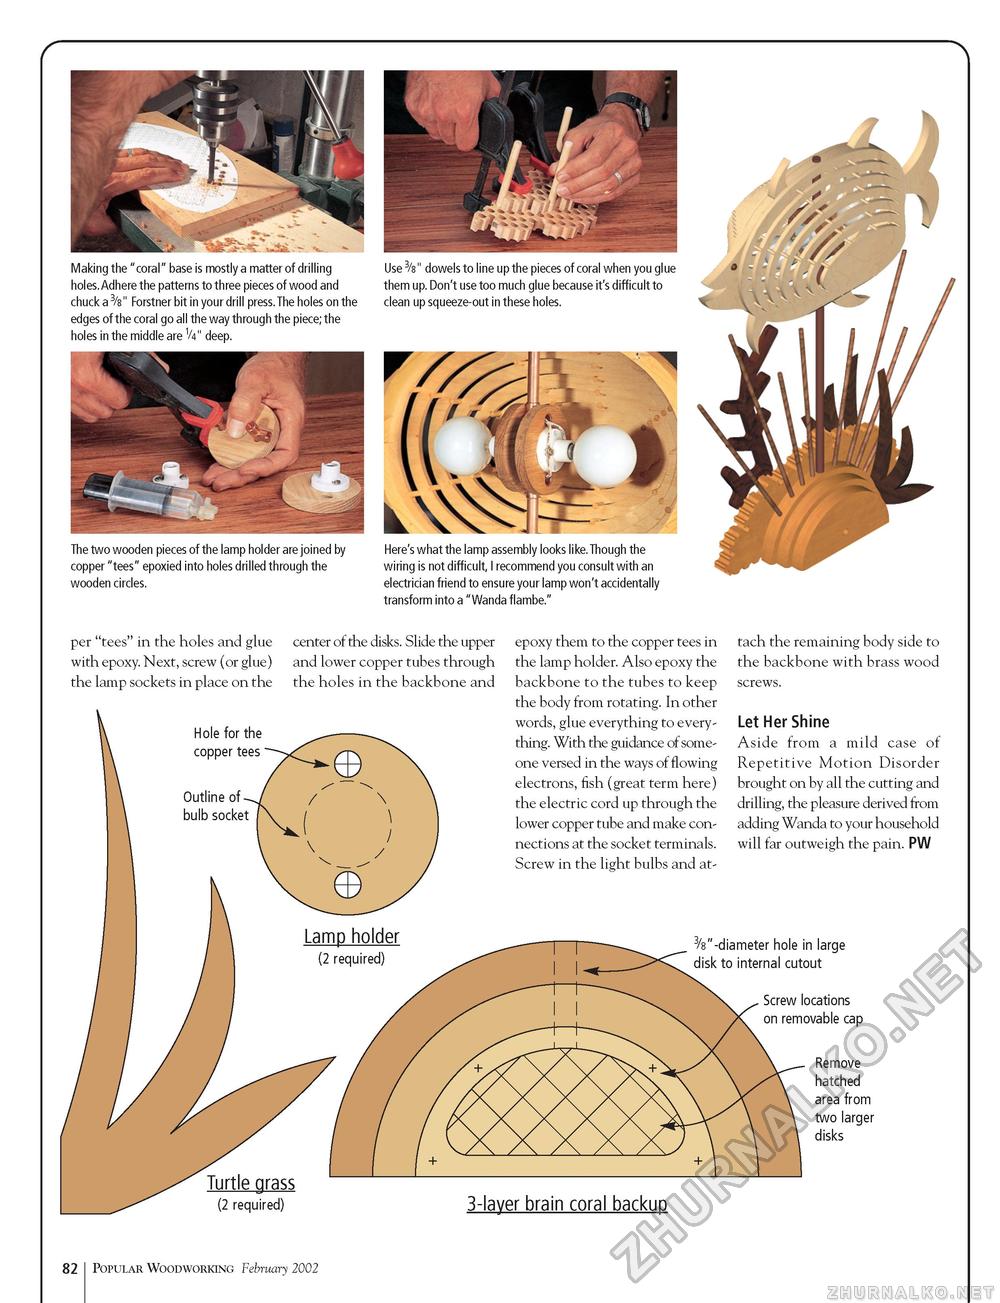
Making the "coral" base is mostly a matter of drilling holes.Adhere the patterns to three pieces of wood and chuck a 3/8" Forstner bit in your drill press.The holes on the edges of the coral go all the way through the piece; the holes in the middle are V4" deep. Use 3/8" dowels to line up the pieces of coral when you glue them up. Don't use too much glue because it's difficult to clean up squeeze-out in these holes. The two wooden pieces of the lamp holder are joined by copper "tees" epoxied into holes drilled through the wooden circles. Here's what the lamp assembly looks like.Though the wiring is not difficult, I recommend you consult with an electrician friend to ensure your lamp won't accidentally transform into a "Wanda flambe." per "tees" in the holes and glue with epoxy. Next, screw (or glue) the lamp sockets in place on the center of the disks. Slide the upper and lower copper tubes through the holes in the backbone and epoxy them to the copper tees in the lamp holder. Also epoxy the backbone to the tubes to keep the body from rotating. In other words, glue everything to everything. With the guidance of someone versed in the ways of flowing electrons, fish (great term here) the electric cord up through the lower copper tube and make connections at the socket terminals. Screw in the light bulbs and at tach the remaining body side to the backbone with brass wood Let Her Shine Aside from a mild case of Repetitive Motion Disorder brought on by all the cutting and drilling, the pleasure derived from adding Wanda to your household will far outweigh the pain. PW "-diameter hole in large disk to internal cutout Screw locations on removable cap Remove hatched area from two larger disks 3-layer brain coral backup 82 Popular Woodworking February 2002 |


